There is something undeniably nostalgic about a perfectly decorated sugar cookie. Whether it’s a snowflake for the holidays or a heart for Valentine’s Day, the combination of a buttery, soft base and a crisp, sweet icing is a culinary masterpiece. However, many home bakers struggle with cookies that spread into amorphous blobs or icing that never quite sets.
This recipe is designed to eliminate those frustrations. By focusing on temperature control and specific mixing techniques, you will produce cookies that hold their sharp edges while maintaining a tender crumb. Paired with a professional-grade royal icing made from meringue powder, your decorations will look like they came straight from a high-end bakery. Get ready to master the art of the sugar cookie and become the star of your next cookie swap.
Why You’ll Love This Recipe
You will fall in love with this recipe because it strikes the perfect balance between flavor and functionality. Unlike many “no-spread” recipes that result in dry, floury biscuits, these cookies remain incredibly soft and buttery. The dough is easy to handle, and the chilling process ensures that your intricate cookie cutter shapes remain distinct after baking. Furthermore, the royal icing is exceptionally versatile. It can be adjusted to different consistencies for detailed piping or smooth flooding, and it dries to a beautiful, hard matte finish that makes the cookies stackable and gift-ready. It is the only sugar cookie recipe you will ever need.
What Is a Decorated Sugar Cookie?
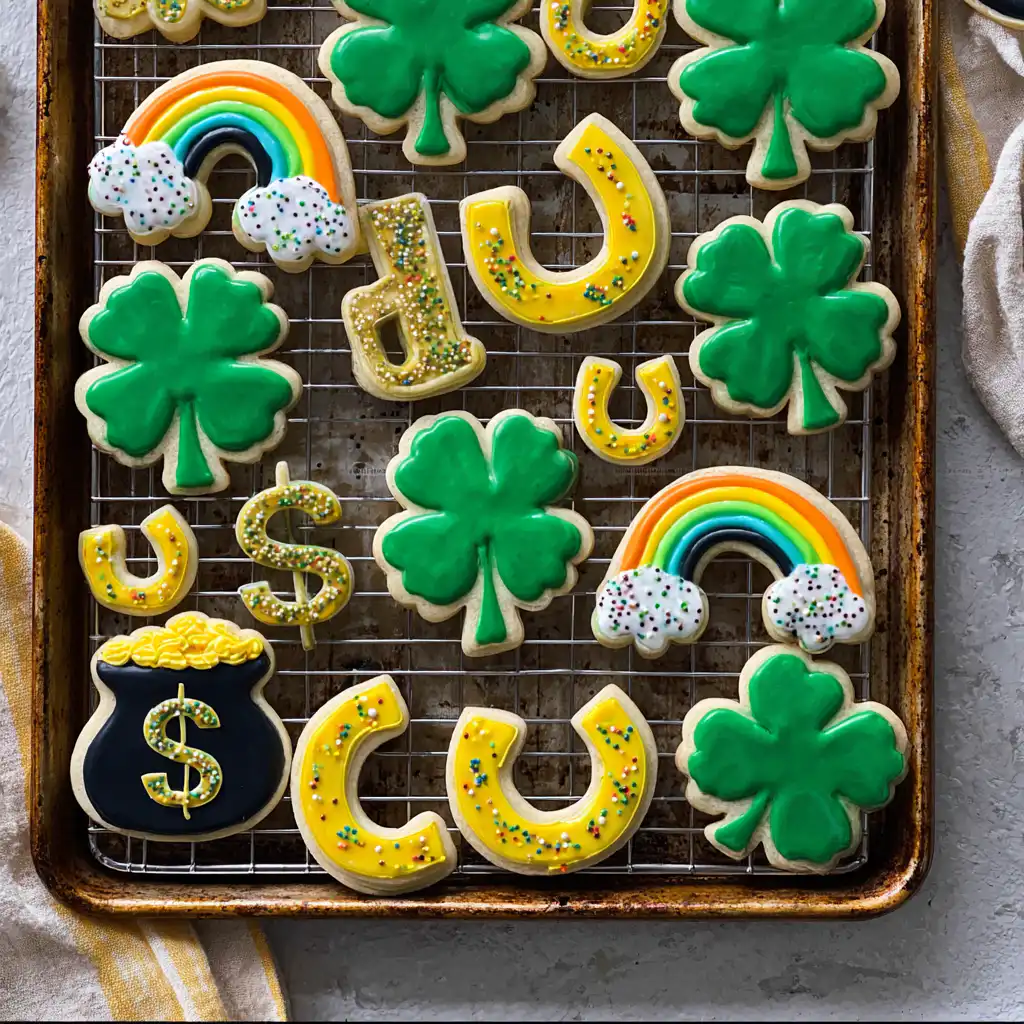
A decorated sugar cookie is a classic sugar cookie—traditionally made with butter, sugar, flour, and eggs—that has been cut into specific shapes and topped with royal icing. Unlike buttercream frosting, which remains soft and smudgeable, royal icing is a specialized icing that hardens as it dries. This is achieved through the use of egg whites or meringue powder. This “hard-set” quality allows for detailed artistry, including “flooding” (filling in large areas) and “piping” (drawing fine lines). Historically, these cookies are the centerpiece of celebrations, serving as both a delicious treat and a form of edible art.
Ingredients
To achieve professional results, the quality and temperature of your ingredients are paramount.
- Unsalted Butter: Use high-quality butter and ensure it is between 65 to 67ºF (18 to 19ºC). This specific temperature allows the butter to cream perfectly with the sugar without becoming too greasy, which prevents spreading.
- Granulated Sugar: Provides sweetness and structure. Mixing it with the butter creates tiny air pockets that give the cookie its lift.
- All-Purpose Flour: This provides the backbone of the cookie. We recommend a protein content around 10-11% for the best texture.
- Meringue Powder: This is the “secret” to safe, easy royal icing. It replaces raw egg whites, providing stability and allowing the icing to dry to a firm, crisp finish.
- Warm Water: For the icing, water temperature (100-110°F) helps dissolve the meringue powder and sugar more efficiently, resulting in a smoother shine.
- Vanilla Extract: Always use pure vanilla extract for the most sophisticated flavor profile.
Ingredient Substitutions & Tips
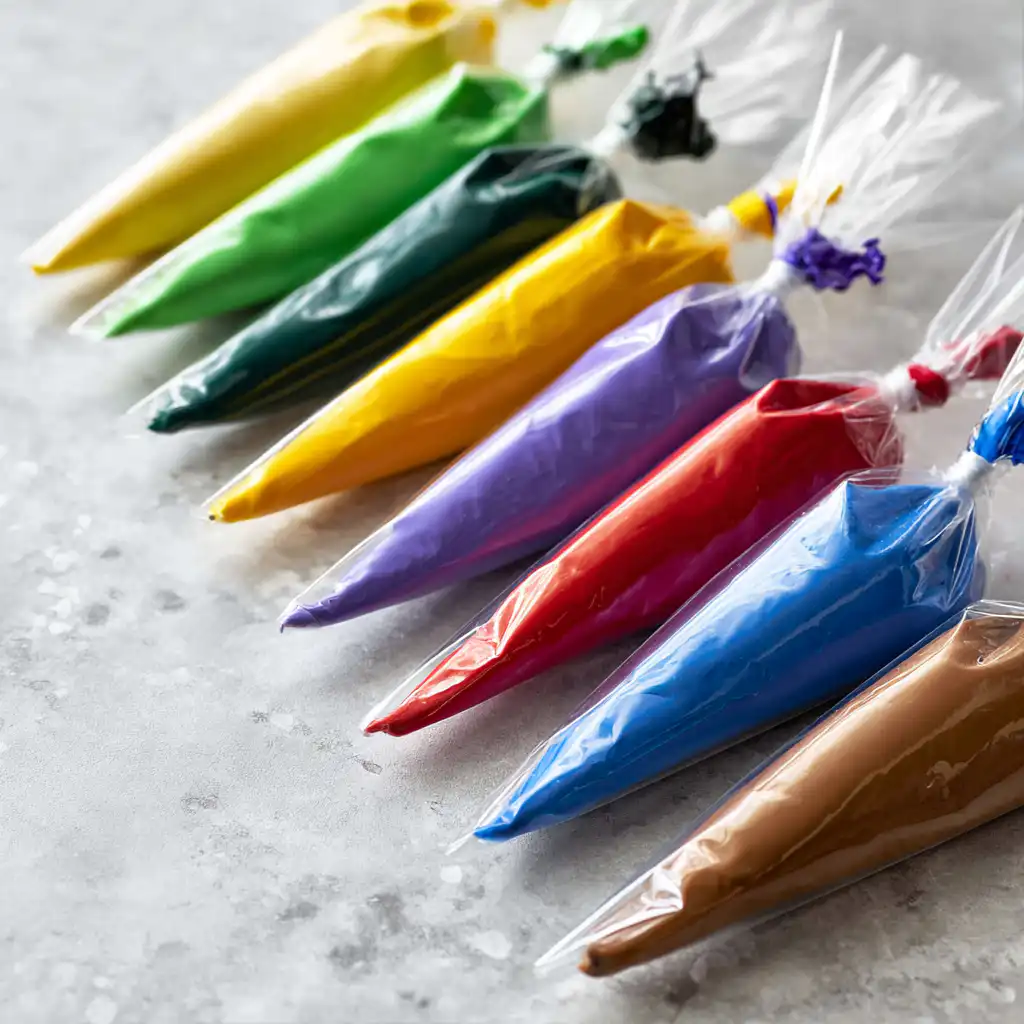
While this recipe is optimized for the ingredients listed, you can make minor adjustments. For a different flavor profile, swap half of the vanilla extract for almond extract or lemon emulsion. If you don’t have kosher salt, use half the amount of table salt. If you must use salted butter, omit the additional salt in the recipe. For the icing, if meringue powder is unavailable, you can use pasteurized liquid egg whites, though the water ratios will need to be adjusted significantly. We strongly recommend using gel food coloring rather than liquid drops, as liquid can thin out the icing consistency and ruin your piping.
Step-by-Step Instructions
1. Creaming and Mixing
Begin by placing your softened butter and granulated sugar in a stand mixer. Using the paddle attachment, cream them on medium-low speed for exactly 2 minutes. You are looking for a light, fluffy texture. Add your room-temperature egg and vanilla, then mix on medium-high for 20 to 30 seconds. In a separate bowl, sift your flour and baking powder, then whisk in the salt. Add the dry mixture to the mixer and pulse 8 times to prevent flour from flying everywhere. Finish on low speed for 10 to 15 seconds until just combined.

2. Chilling and Rolling
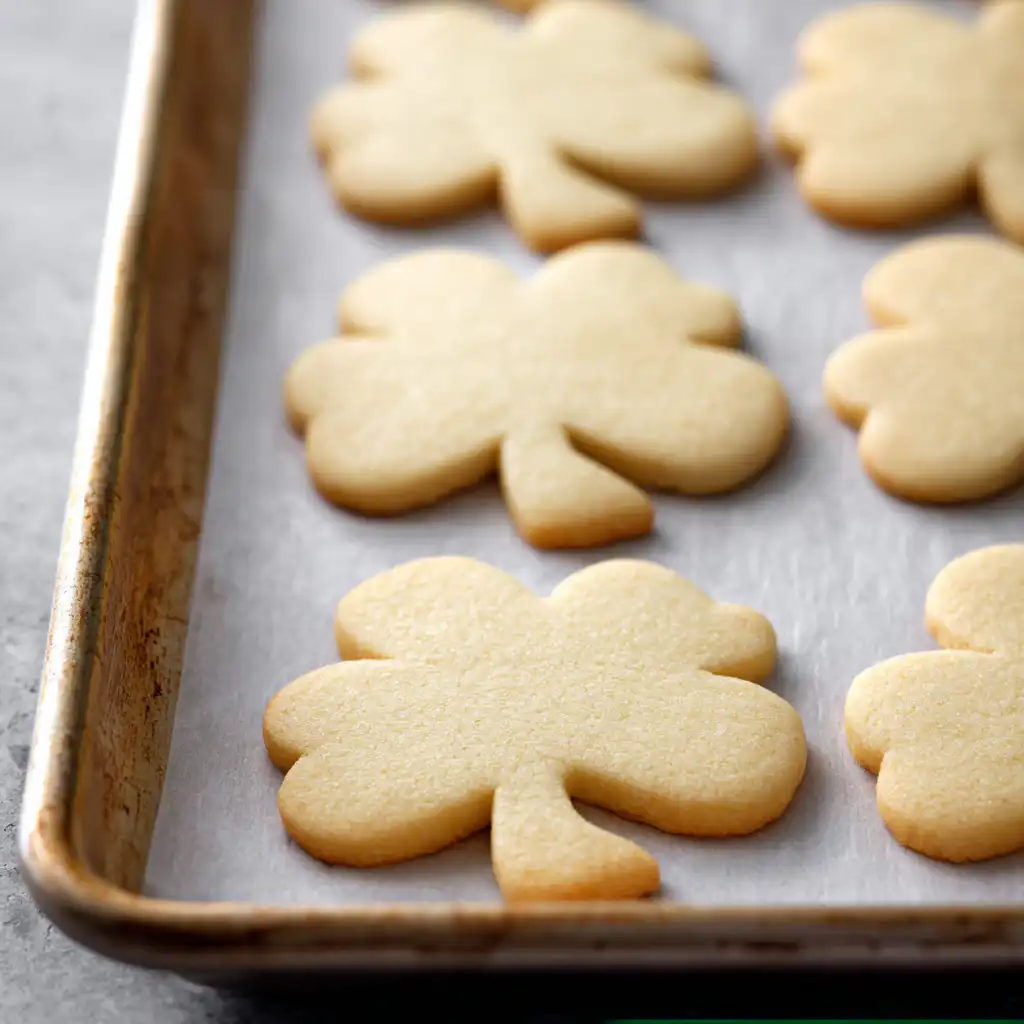
Divide the dough into two discs, wrap in plastic, and refrigerate for 1 to 3 hours. This is non-negotiable! Chilling solidifies the fats, ensuring the cookies don’t spread. When ready, preheat your oven to 350ºF. Roll the dough on a floured surface to exactly 1/4″ thickness. Using an adjustable rolling pin is highly recommended for uniform baking.
3. Cutting and Baking
Cut your shapes as close together as possible to minimize scraps. Transfer to parchment-lined sheets. Bake for 10-12 minutes depending on cookie size. The cookies are done when the surface looks dry and the bottoms are barely golden. Let them cool completely on a wire rack before you even think about icing them.
4. Mastering the Royal Icing
Mix the powdered sugar, meringue powder, warm water, and vanilla on low speed for 7 minutes. Then, increase to medium-low until the icing looks like thick glue. This is your “stiff peak” base. Divide this into bowls to color and thin down with water for your border and flood consistencies.
Expert Baking Tips
- The Scale is King: For the most accurate results, weigh your flour in grams (approximately 280g for this recipe). A cup can vary by up to 20% depending on how you pack it.
- The Rotation Rule: Always rotate your baking sheets halfway through the bake time. Most ovens have “hot spots,” and rotating ensures every cookie is baked evenly.
- Scrap Management: You can reroll dough scraps once. Any more than that, and the cookies will become tough due to developed gluten and excess flour.
- Cool Pans: Never place raw dough on a warm baking sheet. It will start melting the butter before it even hits the oven, causing immediate spreading.
How to Achieve the Perfect Icing Consistency
Consistency is the most difficult part of cookie decorating. To master the “Ribbon Test,” lift a spoonful of icing and let it drizzle back into the bowl.
- Border Icing: Should take about 15-20 seconds for the trail to disappear. It should hold its shape enough to act as a dam.
- Flood Icing: Should take 5-8 seconds to disappear. It should be fluid enough to level itself out into a glass-like surface.
If your icing is too thin, add more sifted powdered sugar. If it is too thick, add water one drop at a time.
Serving Suggestions
These cookies are best served at room temperature once the icing has fully set. They make a stunning addition to any dessert table or “charcuterie-style” dessert board filled with berries and chocolates. For a sophisticated touch, serve them alongside a hot Earl Grey tea or a glass of cold milk. If you are gifting them, wrap individual cookies in cellophane bags tied with a silk ribbon to show off your hard work while keeping them fresh.
Storage & Make-Ahead Tips
Dough: You can make the dough up to 5 days in advance if kept in the refrigerator, or 1 month if frozen.
Baked Cookies: Un-iced cookies store beautifully in an airtight container for up to a week.
Icing: Leftover icing can be refrigerated for 3 days; just be sure to re-whip it by hand to restore the texture.
Finished Cookies: Once the royal icing is completely dry (6-8 hours), store the cookies in a single layer or separated by parchment paper in an airtight container for up to 7 days.
FAQs
Q: Why did my cookies spread during baking?
A: This usually happens if the butter was too warm or if the dough wasn’t chilled long enough. Ensure your butter is 65-67ºF and the dough is cold to the touch when it enters the oven.
Q: Can I use liquid food coloring for the icing?
A: It is not recommended. Liquid coloring adds too much moisture and can make the icing “bleed” or become too runny. Gel or paste colors are much more concentrated and stable.
Q: How long does it take for royal icing to dry?
A: Depending on humidity, it takes 6 to 8 hours for the icing to be hard enough to stack. For the best results, let them dry overnight.
Q: My icing has air bubbles. How do I fix this?
A: After mixing your icing, let the bowl sit on the counter for 15 minutes covered with a damp cloth. The bubbles will rise to the top. You can also pop them with a toothpick once piped onto the cookie.
Q: Can I freeze decorated cookies?
A: Yes! Once the icing is fully dry, layer them with parchment in a freezer-safe container. Thaw them inside the container at room temperature to prevent condensation from ruining the icing.
Soft Sugar Cookies with Professional Royal Icing

These soft sugar cookies are the gold standard for bakers. They feature a buttery, melt-in-your-mouth texture that holds intricate shapes without spreading. Paired with a smooth, high-shine royal icing, they are perfect for holidays, birthdays, and celebrations.
- Prep Time: 90 minutes
- Cook Time: 10 minutes
- Total Time: 100 minutes
- Yield: 24 cookies
- Cuisine: American
Ingredients
Unsalted butter, softened (65-67ºF) – 3/4 cup
Granulated sugar – 1 cup
Large egg, room temperature – 1
Vanilla extract – 1/2 teaspoon
All-purpose flour – 2 1/3 cups
Baking powder – 1 teaspoon
Kosher salt – 1/2 teaspoon
Powdered sugar (icing) – 4 cups
Meringue powder (icing) – 3 tablespoons
Warm water (100-110°F) – 9 tablespoons
Vanilla extract (icing) – 1/2 teaspoon
Instructions
Cream softened butter and sugar on medium-low for 2 minutes.
Add egg and vanilla; mix on medium-high for 20-30 seconds.
Sift dry ingredients and add to mixer; pulse until dough just comes together.
Divide dough, wrap in plastic, and refrigerate for 1-3 hours.
Preheat oven to 350ºF and line sheets with parchment.
Roll dough to 1/4″ thickness on a lightly floured surface.
Cut shapes and place 1″ apart on baking sheets.
Bake for 10-11 minutes (for 3″ cookies) until surface is dry.
Cool on sheet for 5 minutes, then move to wire rack.
Whisk icing ingredients on low for 7 minutes, then medium-low for 2-3 minutes.
Adjust consistency for border and flood icing with water.
Decorate cookies and let dry for 6-8 hours.
Notes
• Weigh your flour for the most consistent results.
• Ensure butter is exactly 65-67ºF to prevent spreading.
• Let iced cookies dry completely before stacking to avoid smudging.
• Dough can be frozen for up to one month.