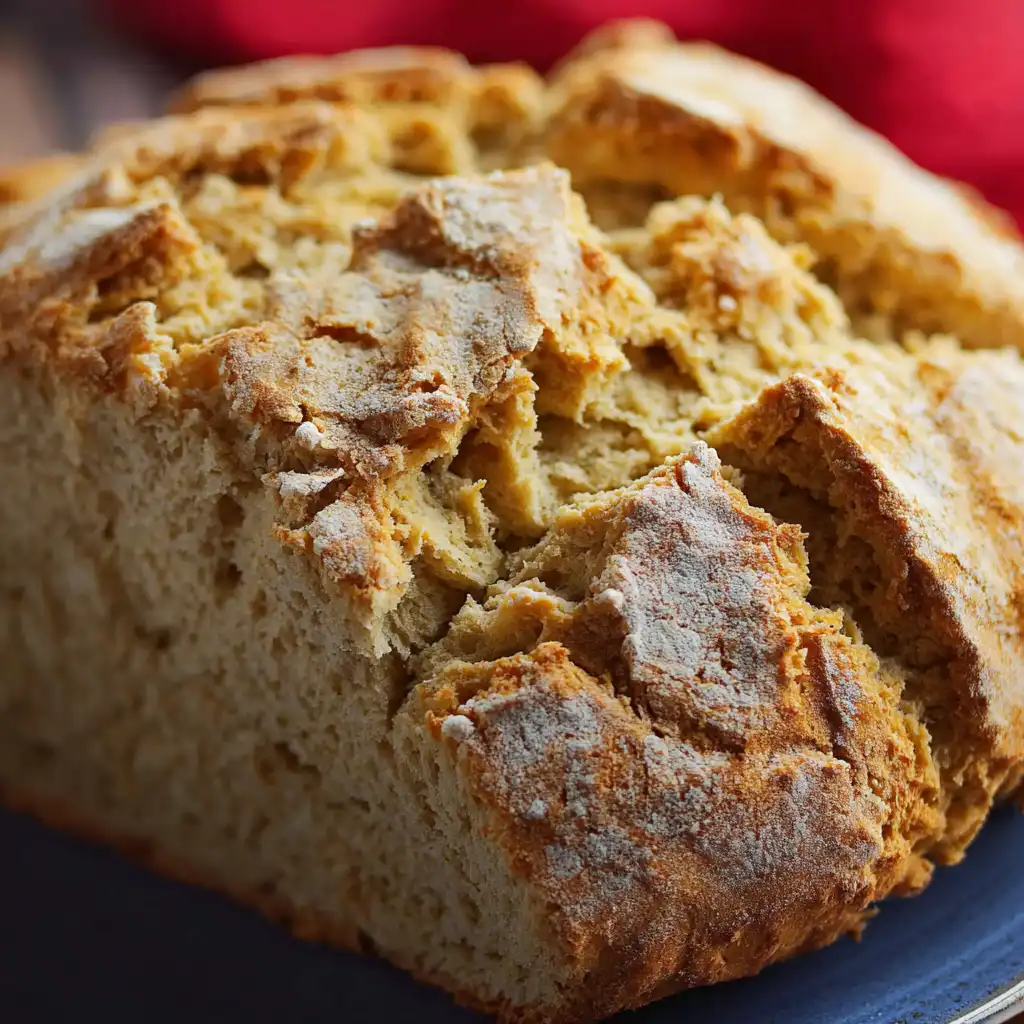
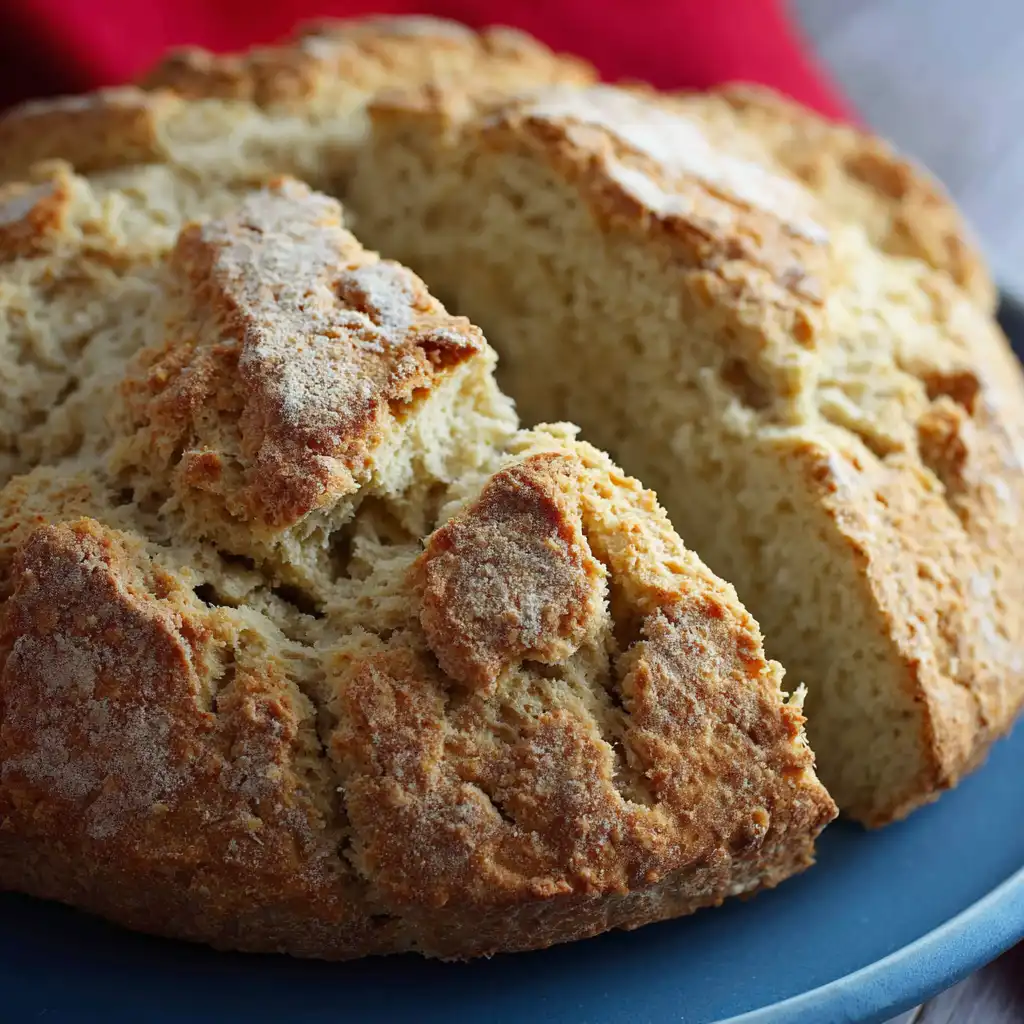
There is something profoundly comforting about the aroma of fresh bread wafting through the house, especially when that bread requires absolutely no yeast and zero rising time. Irish Soda Bread is a rustic, hearty staple that has graced kitchen tables for generations. Whether you are celebrating St. Patrick’s Day or simply looking for the perfect vessel for a thick smear of salted butter, this authentic recipe delivers every time. With its signature “X” on top and a tender, buttermilk-infused crumb, this loaf captures the essence of traditional Irish hearth cooking. In this guide, I will show you how to master this quick bread, ensuring a perfectly golden crust and a soft, flavorful interior that will have your family asking for seconds before the first loaf is even cooled.
Why You’ll Love This Recipe
You will fall in love with this Irish Soda Bread because it is the ultimate “emergency” bread—it goes from pantry to oven in just 15 minutes. Unlike sourdough or standard white loaves, there is no kneading for hours or waiting for dough to double in size. The combination of buttermilk and baking soda creates an instant chemical reaction that provides a beautiful lift and a unique, tangy flavor profile. Furthermore, the addition of a little extra butter and a touch of sugar makes this version slightly richer than the ultra-austere historical versions, making it accessible and delicious for modern palates while maintaining its traditional soul.
What Is Irish Soda Bread?
Irish Soda Bread is a variety of quick bread in which baking soda (sodium bicarbonate) is used as the leavening agent instead of the traditional yeast. The history of this bread is rooted in necessity; in the mid-19th century, Ireland faced significant economic hardship, and many households didn’t have access to expensive ovens or high-quality yeast. They used “soft” wheat flour, which doesn’t work well with yeast but is perfect for soda bread. The iconic “X” cut into the top wasn’t just decorative; it allowed the thickest part of the bread to cook through and, according to folklore, “let the devils out” to protect the household.
Ingredients Overview
To create the perfect loaf, you need to understand how these simple ingredients interact:
- All-Purpose Flour (4 cups): This provides the structure. While some use cake flour for a finer crumb, all-purpose gives that classic rustic chew.
- Granulated Sugar (4 tbsp): A slight sweetness balances the tang of the buttermilk. It also helps the crust caramelize to a beautiful golden brown.
- Baking Soda (1 tsp) & Baking Powder (1 tbsp): The soda reacts with the buttermilk’s acid for the primary rise, while the powder provides extra insurance for a light, airy texture.
- Butter (1/2 cup softened + 1/4 cup melted): Softened butter is cut into the dough for richness, while the melted portion is used for the frequent basting that creates the legendary crust.
- Buttermilk (1 1/4 cups): The most critical ingredient. Its acidity activates the leavening agents and tenderizes the gluten in the flour.
- Egg (1 large): The egg acts as a binder and adds a touch of richness and color to the crumb.
Ingredient Substitutions & Tips
If you find your pantry lacking, don’t worry. The most common hurdle is buttermilk. If you don’t have it, you can make a “DIY” version by adding 1 tablespoon of lemon juice or white vinegar to a measuring cup and filling the rest with whole milk; let it sit for 5 minutes before using. For a dairy-free version, use a vegan butter substitute and soy milk mixed with apple cider vinegar. If you want a more savory loaf, reduce the sugar to 1 tablespoon and add 1/2 cup of sharp cheddar cheese or a tablespoon of fresh rosemary to the dry mix.
Step-by-Step Instructions
- Preparation: Start by preheating your oven to 375°F (190°C). This high temperature is vital for creating that initial “oven spring.” Lightly grease a baking sheet or line it with parchment paper to prevent sticking.
- Mix Dry Ingredients: In a large bowl, whisk together your flour, sugar, baking soda, baking powder, and salt. Ensure there are no lumps of soda, as they can leave a bitter taste.
- Combine: Add the 1/2 cup of softened butter, 1 cup of the buttermilk, and the egg. Use a wooden spoon to stir until the flour is mostly moistened. The dough will look shaggy and slightly sticky—this is exactly what you want.
- Knead and Shape: Turn the dough onto a floured surface. Knead it very gently, only 8 to 10 times. The goal is just to help it hold a round shape. If you over-knead, the bread will become tough and brick-like.
- The Basting Secret: Place your round loaf on the baking sheet. Whisk the melted butter and the remaining 1/4 cup of buttermilk together. Brush this mixture generously over the top and sides of the loaf.
- The Signature Mark: Take a sharp knife and score a deep “X” across the top, about an inch deep.
- Bake: Slide it into the oven for 45 minutes. For a professional finish, pull the loaf out every 15 minutes to brush it again with that buttermilk-butter mixture. This builds layers of flavor and a stunning crust.
- Test for Doneness: The loaf is done when it is deep golden brown and a toothpick comes out clean.
Expert Baking Tips
The biggest mistake people make with Irish Soda Bread is over-handling the dough. Unlike yeast bread, which loves the development of gluten through kneading, soda bread thrives on a “light touch.” Think of it more like a giant biscuit. Another pro tip: ensure your baking soda is fresh. If it’s been sitting in your cupboard for over six months, your bread may fail to rise. Finally, don’t be afraid to get your hands dirty! Mixing by hand allows you to feel the hydration of the dough better than a stand mixer, preventing you from adding too much extra flour.
The Science of the Rise: Why No Yeast?
You might wonder how a loaf this size can rise without yeast. The magic lies in a simple acid-base reaction. Baking soda is a base. When it meets the lactic acid in buttermilk, it immediately begins producing carbon dioxide bubbles. Because this reaction happens the moment the ingredients touch, you must get the loaf into the oven quickly before the “fizz” dies out. This is also why we use a “hot” oven at 375°F; the heat sets the structure of the dough while the bubbles are at their peak, trapping the air inside to create that beautiful, porous crumb.
Serving Suggestions
Authentic Irish Soda Bread is best served warm, just a few minutes after it comes out of the oven. Slice it into thick wedges and serve with a generous amount of high-quality salted Irish butter. It is the traditional accompaniment to Irish Lamb Stew or a hearty Potato Leek soup. For a breakfast treat, try it toasted with a bit of orange marmalade or blackberry jam alongside a strong cup of Irish breakfast tea.
Storage & Make-Ahead Tips
Soda bread is famous for being best on the day it’s baked. However, you can wrap leftovers tightly in plastic wrap or foil and keep them at room temperature for up to 2 days. To refresh the loaf, simply pop a slice in the toaster. If you want to make it ahead, you can freeze the fully baked and cooled loaf for up to 3 months. Just thaw at room temperature and warm in a 350°F oven for 10 minutes.
FAQs
Can I add raisins or caraway seeds to this recipe?
Absolutely! While purists might argue, many “American-Irish” versions include a cup of raisins and a tablespoon of caraway seeds. This creates “Spotted Dog” bread, which is a delicious, sweeter variation.
Why is my soda bread so dense?
Density usually comes from two things: too much flour or too much kneading. Make sure to level off your flour measuring cups with a knife rather than packing the flour down, and stop kneading as soon as the dough is shaped.
Can I bake this in a Dutch oven?
Yes! A Dutch oven is fantastic for soda bread. It traps the steam and creates an even crispier crust. Bake with the lid on for the first 30 minutes, then remove the lid for the final 15 minutes to brown.
What if I don’t have a baking sheet?
You can use a well-seasoned cast-iron skillet. This provides excellent heat distribution and gives the bottom of the bread a wonderful, fried-bread texture.
Making authentic Irish Soda Bread is a rewarding experience that connects you to a long lineage of home bakers. It’s a testament to the fact that you don’t need fancy ingredients or complex techniques to create something truly soul-warming. By following these steps and embracing the “low-effort, high-reward” nature of this recipe, you’ll have a centerpiece loaf that looks like it came straight from a Dublin bakery. Happy baking!
PrintIrish Soda Bread Recipe
This is the best authentic Irish recipe for traditional soda bread. It features a dense yet tender crumb and a signature golden crust, achieved by frequent basting with a buttermilk-butter mixture. Perfect for St. Patrick’s Day or a cozy Sunday dinner.
- Prep Time: 15 minutes
- Cook Time: 45 minutes
- Total Time: 60 minutes
- Yield: 1 loaf (10-12 slices)
- Cuisine: Irish
Ingredients
All-purpose flour – 4 cups
Granulated sugar – 4 tbsp
Baking soda – 1 tsp
Baking powder – 1 tbsp
Salt – 1/2 tsp
Softened butter – 1/2 cup
Melted butter – 1/4 cup (for basting)
Buttermilk – 1 1/4 cups (divided)
Large egg – 1
Instructions
Preheat your oven to 375°F (190°C) and lightly grease a large baking sheet.
In a large mixing bowl, whisk together the flour, sugar, baking soda, baking powder, and salt until well combined.
Add the 1/2 cup of softened butter, 1 cup of the buttermilk, and the egg to the dry ingredients. Mix with a wooden spoon or your hands until a shaggy dough forms.
Turn the dough out onto a lightly floured work surface. Knead briefly (about 8-10 times) just until the dough is smooth. Do not overwork.
Shape the dough into a tight round loaf and place it onto the prepared baking sheet.
In a small bowl, whisk together the 1/4 cup melted butter and the remaining 1/4 cup buttermilk.
Generously brush the entire loaf with the buttermilk mixture.
Using a sharp knife, cut a deep ‘X’ into the top of the loaf (about 1 inch deep).
Bake for 45 minutes. Every 15 minutes, remove the loaf briefly to brush more of the buttermilk mixture over the top.
The bread is done when a toothpick inserted into the center comes out clean and the loaf sounds hollow when tapped on the bottom.
Notes
• Use cold buttermilk for the best rise.
• Don’t skip the ‘X’ on top; it allows heat to penetrate the center of the dense loaf.
• If the crust browns too quickly, tent it loosely with aluminum foil for the last 15 minutes.
• Let the bread cool for at least 30 minutes before slicing to prevent it from becoming gummy.