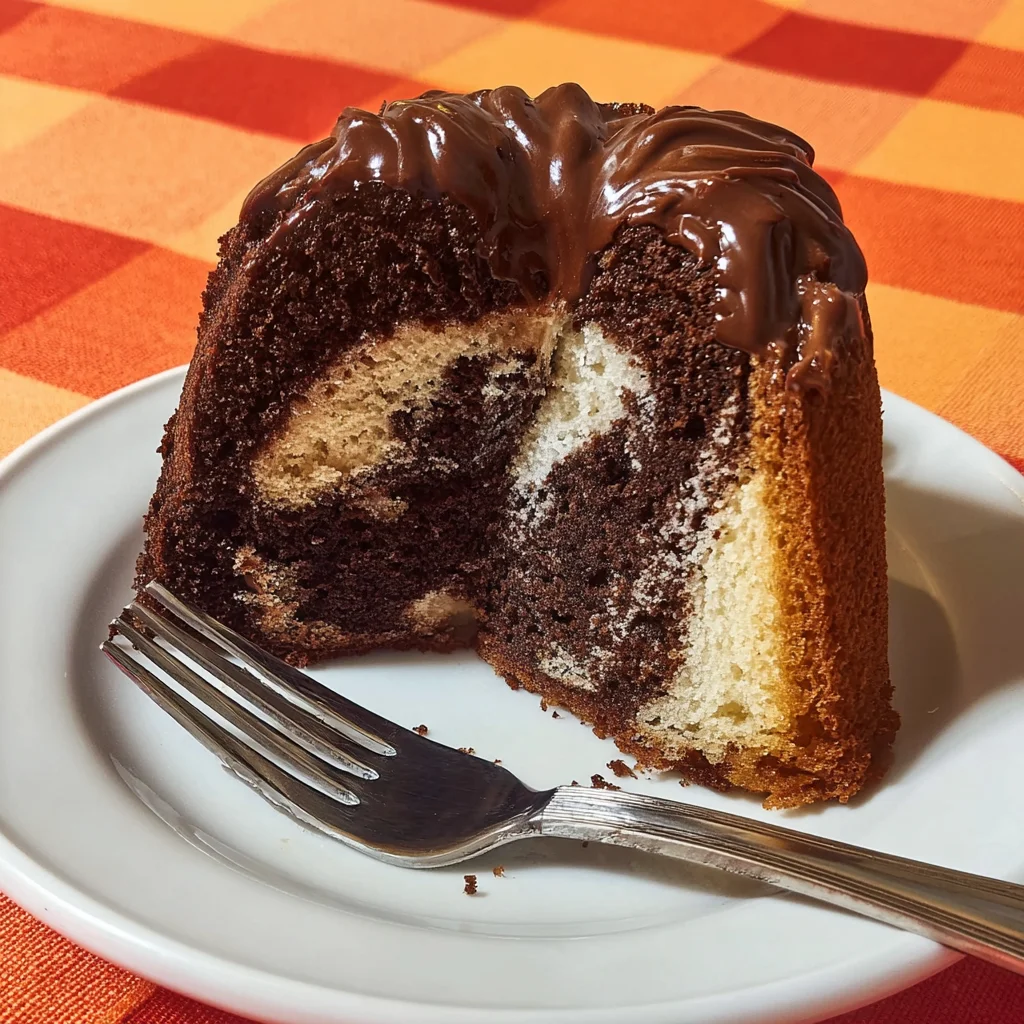
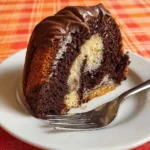
There is something undeniably nostalgic and comforting about a Classic Marble Bundt Cake. It is the architectural beauty of the baking world—a striking visual of dark cocoa and golden vanilla ribbons dancing together inside a sculpted ring. Whether you are hosting a festive brunch or simply looking for a reliable afternoon treat to accompany your coffee, this recipe delivers a sophisticated balance of flavors. The dense yet moist crumb is achieved through a precise method of creaming and alternating ingredients, ensuring every bite is a perfect harmony. In this guide, we will walk you through the nuances of achieving that elusive, high-definition swirl while maintaining a texture that stays fresh for days. Prepare to elevate your baking game with a timeless centerpiece that tastes even better than it looks.
Why You’ll Love This Recipe
You will fall in love with this Marble Bundt Cake because it offers the best of both worlds without compromise. Unlike many recipes that use cocoa powder, we utilize real melted bittersweet chocolate to provide a deep, fudgy intensity to the dark batter. The use of extra-large eggs and a full cup of butter creates a rich, velvet-like mouthfeel that mimics high-end bakery results. Furthermore, the marbling technique is surprisingly forgiving, making it an excellent project for beginners who want a high-impact visual. It is a sturdy cake that travels well, making it the ultimate choice for potlucks or gifting, and it strikes the perfect sweetness balance that appeals to both children and adults.
What Is Marble Cake?
At its core, a marble cake is a cake with a streaked or mottled appearance achieved by very lightly blending light and dark batter. Historically originating in Germany in the 19th century (known as Marmorkuchen), the original versions often used spices or molasses to create the darker contrast. As chocolate became more accessible, the vanilla-and-chocolate duo became the gold standard. The “marble” effect isn’t just for show; it allows for two distinct flavor profiles to exist in a single slice. The vanilla batter remains light and aromatic, while the chocolate section is slightly denser and more decadent, providing a multi-sensory experience in every mouthful.
Ingredients you will need
The success of this Bundt cake lies in the quality and temperature of your ingredients.
- All-Purpose Flour (2-3/4 cups): This provides the necessary structure. Using all-purpose ensures the cake is sturdy enough to hold the Bundt shape without being as tough as bread.
- Unsalted Butter (1 cup): It must be at room temperature. This is critical for the creaming process, which traps air and provides the cake’s lift.
- Extra-Large Eggs (4): These provide richness and act as the primary emulsifier. Ensure they are at room temperature to prevent the batter from curdling.
- Bittersweet Chocolate (4 ounces): We recommend a 60% to 70% cacao content. Melting real chocolate rather than just using cocoa powder adds moisture and a much more sophisticated “real” chocolate flavor.
- Baking Powder & Baking Soda: We use baking powder for the main lift and a touch of baking soda specifically in the chocolate batter to react with the acidity of the chocolate, ensuring both batters rise evenly.
- Milk (3/4 cup): Whole milk is preferred for the highest fat content and most tender crumb.
Ingredient Substitutions & Tips
If you find yourself missing an item, there are several ways to pivot without sacrificing quality. For the chocolate, if bittersweet is unavailable, you can use semi-sweet, though the cake will be slightly sweeter. If you don’t have extra-large eggs, use 5 large eggs instead. To make this dairy-free, a high-quality vegan butter stick and almond milk can be substituted, though the crumb may be slightly less rich. For a deeper flavor, try substituting the vanilla extract with vanilla bean paste. Lastly, if you are out of milk, plain yogurt or sour cream thinned with a splash of water works beautifully to add a slight tang.
Step-by-Step Instructions
- Preparation: Start by preheating your oven to 350°F (175°C). The Bundt pan must be meticulously greased; use a pastry brush to get into every crevice with softened butter, then dust with flour or use a baking spray that contains flour.
- Dry Ingredients: Whisk the flour, baking powder, and salt. This aeration ensures no clumps of leavening agents remain.
- The Creaming Method: In your stand mixer, beat the room-temperature butter and granulated sugar for a full 3 to 4 minutes. The mixture should turn pale yellow and look fluffy. This is where your texture is born!
- Emulsifying: Add vanilla, then the eggs one at a time. Mixing well after each egg ensures the fat and water in the batter stay bound together.
- Alternating Additions: Add one-third of your flour mixture, then half the milk. Repeat, ending with the flour. This technique prevents the gluten from over-developing and ensures a smooth, uniform batter.
- The Chocolate Split: Remove half of the batter to a separate bowl. Stir in your melted (and slightly cooled) bittersweet chocolate and the extra 1/4 teaspoon of baking soda.
- Marbling: Drop heaping tablespoons of vanilla batter into the pan, followed by chocolate. Continue alternating until all batter is used. Bang the pan on the counter to remove air pockets.
- The Swirl: Insert a thin knife or skewer and make a “figure-eight” motion through the batter. Do not overdo it, or the colors will muddy into a single shade of light brown.
- Baking: Bake for 60 to 75 minutes. A tester should come out clean. Let it cool in the pan for exactly 10 minutes before inverting onto a wire rack.
Expert Baking Tips
To achieve the best results, always measure your flour using the “spoon and level” method rather than scooping directly from the bag, which packs the flour and leads to a dry cake. Temperature is your best friend: if your kitchen is cold, your butter won’t cream properly. You can quickly warm eggs by placing them in a bowl of warm water for 5 minutes. Additionally, never skip the “bang” on the counter before baking; Bundt pans are notorious for trapping air bubbles in the decorative ridges, which can ruin the exterior finish of your cake. Finally, ensure your melted chocolate is not hot when added to the batter, or it may cook the eggs.
The Science of the Swirl
Why do we add baking soda only to the chocolate portion? Chocolate is naturally acidic. When we add the melted chocolate to the batter, it shifts the pH balance. The addition of baking soda (a base) neutralizes that acid, which creates a small amount of carbon dioxide. This ensures that the chocolate batter, which is naturally heavier and denser than the vanilla batter, rises at the same rate. Without this tiny adjustment, the chocolate swirls would be much denser and might sink to the bottom of the pan, leading to an uneven bake and a less aesthetically pleasing interior.
Serving Suggestions
This Marble Bundt Cake is beautiful enough to stand alone with just a light dusting of powdered sugar. However, for a more decadent presentation, consider a simple chocolate ganache poured over the top, allowing it to drip down the ridges. It also pairs exceptionally well with a side of lightly sweetened whipped cream and fresh raspberries, which provide a tart contrast to the rich chocolate. For a morning treat, serve it slightly warm with a thick smear of salted butter.
Storage & Make-Ahead Tips
This cake actually tastes better on day two as the moisture redistributes. Store it under a cake dome or wrapped tightly in plastic wrap at room temperature for up to 3 days. If you need to store it longer, it keeps well in the refrigerator for a week, though it should be brought to room temperature before serving to soften the butter content. You can also freeze individual slices wrapped in foil and placed in a freezer bag for up to 3 months.
FAQs
Q: Why did my cake stick to the Bundt pan?
A: This usually happens if the pan wasn’t greased thoroughly or if the cake cooled too long in the pan. Ten minutes is the “sweet spot” for unmolding.
Q: Can I use cocoa powder instead of melted chocolate?
A: You can, but the texture will be drier. If using cocoa, mix 1/4 cup of cocoa powder with 2 tablespoons of boiling water to create a paste before adding it to the batter.
Q: My cake is dry. What happened?
A: Over-baking is the most common culprit. Start checking your cake at the 60-minute mark. Also, ensure you aren’t using too much flour by weighing your ingredients if possible.
Q: Can I use a different size pan?
A: This recipe is optimized for a 10-inch (10-12 cup) pan. If using a smaller pan, you will have excess batter; do not overfill the pan more than 3/4 full.
Mastering the Classic Marble Bundt Cake is a rite of passage for any home baker. It combines technical skills like proper creaming and emulsification with the artistic flair of marbling. The result is a dessert that is as reliable as it is stunning. By following these steps and paying attention to ingredient temperatures, you will produce a cake with a professional crumb and a flavor profile that rivals any boutique bakery. Happy baking!
PrintMarble Bundt Cake
A timeless Classic Marble Bundt Cake that combines the best of both worlds: buttery vanilla and rich, melted bittersweet chocolate. This recipe yields a moist, dense crumb that is perfect for morning coffee or an elegant dinner dessert.
Ingredients
2–3/4 cups all-purpose flour
2–1/4 teaspoons baking powder
1 teaspoon table salt
1 cup (2 sticks) unsalted butter, at room temperature
1–3/4 cups granulated sugar
1 teaspoon vanilla extract
4 extra-large eggs
3/4 cup milk
4 ounces bittersweet chocolate, melted
1/4 teaspoon baking soda
Instructions
1. Preheat oven to 350°. Grease a 10-inch Bundt or tube pan. Whisk together the flour, baking powder, and salt. Set aside.
2. In the bowl of a standing mixer, cream the butter and sugar until light and fluffy, 3 to 4 minutes.
3. Add vanilla and mix, then add eggs one at a time, mixing well after each.
4. Add one-third of the dry ingredients, then add half the milk. Repeat, scraping down bowl periodically. Add remaining third of the dry ingredients and mix until combined.
5. Divide the batter into two bowls. Add the melted chocolate and baking soda to one of the bowls and stir until evenly combined.
6. To make the marble effect, drop the batters into the prepared pan by the heaping tablespoon, alternating between chocolate and vanilla batches.
7. Once all the batters are in the pan, bang it several times on the counter to level it. Use a thin knife to swirl through the mixture several times.
8. Bake until a cake tester comes out clean, 60 to 75 minutes. Unmold onto a wire rack and let cool completely.
Notes
Ensure all cold ingredients are at room temperature for the best emulsion.
Do not over-swirl the batter or you will lose the distinct marble pattern.
Use high-quality bittersweet chocolate for the best flavor profile.