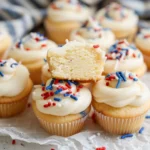
Is there anything more nostalgic than the flavor of birthday cake? Whether it’s the colorful sprinkles, the hit of sweet vanilla, or that unmistakable “cake batter” essence, it just feels like a celebration. These Cake Batter Sprinkle Cookies are the ultimate treat for when you want that festive flavor in a soft, buttery cookie format.
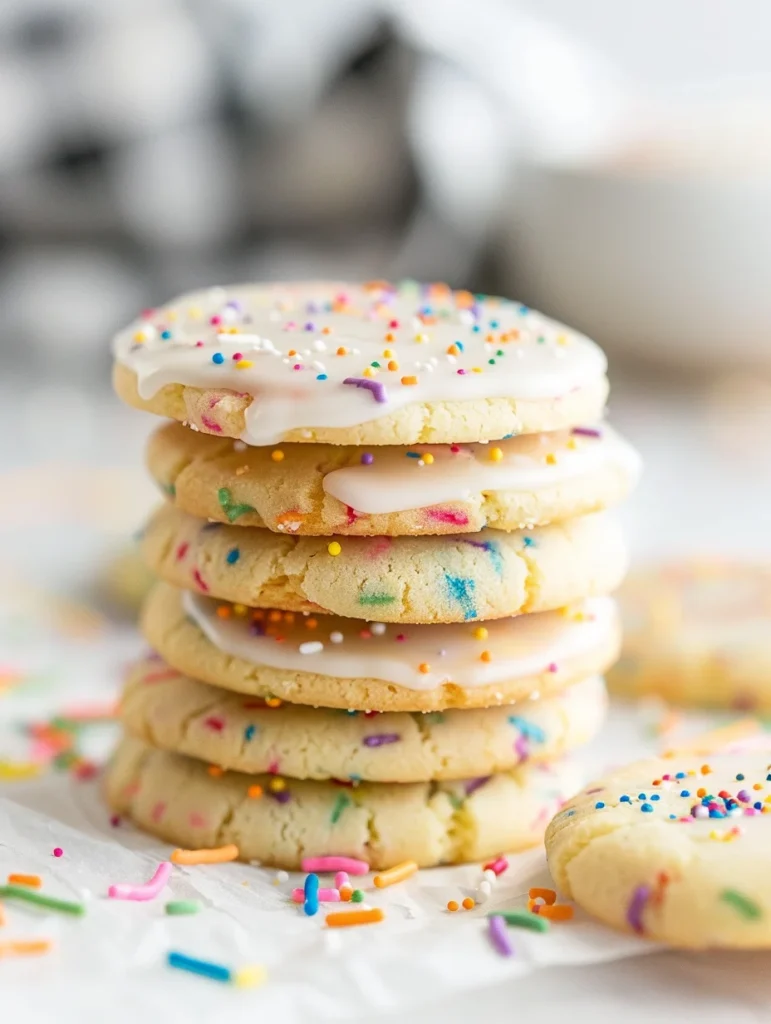
Unlike traditional sugar cookies that can sometimes be dry or bland, these are incredibly tender thanks to a secret ingredient in the dough: powdered sugar. Topped with a thin, window-pane glaze that allows the rainbow sprinkles to peek through, they are as beautiful as they are delicious. Best of all? No chilling required!
Why You’ll Love This Recipe
- No Chill Time: You can go from craving to eating in less than 30 minutes.
- Unique Texture: The use of powdered sugar instead of granulated sugar in the dough creates a “melt-in-your-mouth” shortbread-adjacent texture that is totally addicting.
- That Signature Flavor: We use cake batter flavor to get that authentic box-mix taste without actually using a mix.
- Perfect for Any Occasion: Swap the rainbow sprinkles for red and green at Christmas, or pink and red for Valentine’s Day.
- The Glaze: By glazing the cookies while they are hot, the icing sets into a beautiful, thin, professional-looking shell.
Ingredient Notes
To get the best results, quality matters. Here is what you’ll need to make these sprinkle cookies a success:
- Salted Butter: I prefer salted butter for this recipe to balance the sweetness of the powdered sugar. Make sure it is softened to room temperature but not melty.
- Powdered Sugar: Using this in the dough (and the glaze) is the secret to the soft, fine crumb.
- Cake Batter Flavor: This is usually found in the baking aisle near the vanilla. It gives the cookies that “funfetti” soul.
- All-Purpose Flour: Be sure to measure using the “spoon and level” method to avoid dry, crumbly cookies.
- Sprinkles: Use “jimmies” (the long ones) for the best results inside the dough, as they don’t bleed color as much as nonpareils (the tiny balls).
- Clear Vanilla Extract: For the glaze, clear vanilla keeps the icing a bright, snowy white. Regular vanilla will turn it a slightly off-white tan.
Step-by-Step Instructions
1. Prep the Oven and Pan
Preheat your oven to 350°F (175°C). Line a large cookie sheet with parchment paper. This ensures the cookies don’t stick and helps them bake evenly without browning the bottoms too much.
2. Cream the Base
In your stand mixer (or using a hand mixer), beat the softened butter and powdered sugar together. You want it to be smooth and creamy, which usually takes about 2 minutes.
3. Add Wet Ingredients
Scrape down the sides of the bowl. Add the egg and the cake batter flavor. Mix until combined. Don’t worry if it looks slightly curdled at first; it will come together once the flour is added.
4. Incorporate Dry Ingredients
Add your flour, baking powder, and salt. Start your mixer on low so you don’t get a flour cloud! If the dough seems too crumbly, add 1 teaspoon of water at a time until a soft, workable dough forms.
5. The Sprinkles
Gently fold in your rainbow sprinkles. Be careful not to over-mix, or the colors might start to streak into the dough.
6. Roll and Cut
On a lightly floured surface, roll the dough out to 1/4 inch thickness. These cookies do not spread much, so the thickness you roll is the thickness they will be when finished! Use a 2 1/2 inch circle cutter and place them on the baking sheet.
7. Bake
Bake for 7-9 minutes. You are looking for a matte finish on top and a slight puff. You do not want these to brown. If they turn golden, they will lose that soft texture.
8. The “Magic” Glaze
While they bake, whisk your glaze ingredients. As soon as those cookies come out of the oven, use a pastry brush or spoon to spread a thin layer of glaze over the top. The heat of the cookie will thin the glaze out further, making it translucent and shiny.
Expert Tips for Best Results
- Don’t Overbake: This is the golden rule! If the edges look brown, they’ve been in too long. They will firm up as they cool on the pan.
- The Glaze Secret: Adding a tiny bit of vegetable shortening to the glaze is optional, but it helps the icing “crust.” This makes them much easier to stack once they are fully set.
- Room Temp Ingredients: Ensure your egg and butter are at room temperature. This creates an emulsion that results in a much smoother dough.
- Water is Variable: Depending on your humidity and how you measure flour, you might need 1 tsp of water or 3. Add it slowly!
Variations and Substitutions
- Chocolate Version: Replace 1/4 cup of the flour with high-quality cocoa powder for a “chocolate cake batter” vibe.
- Holiday Themes: Use holiday-specific sprinkle mixes to make these work for any time of year.
- Almond Touch: If you don’t have cake batter flavor, you can use a mix of vanilla extract and a tiny drop of almond extract to mimic that wedding cake flavor.
- Dairy-Free: You can use a high-quality vegan butter stick and almond milk for the glaze.
Storage and Freezing
To Store: Keep these cookies in an airtight container at room temperature. They stay soft for up to 5 days.
To Freeze: These cookies freeze beautifully! I recommend freezing them in a single layer on a sheet pan first, then transferring them to a freezer-safe bag with parchment paper between layers. They will stay fresh for up to 3 months. Thaw at room temperature before serving.
FAQ
Q: Why do my cookies look matte and not shiny?
A: These cookies are designed to be soft and “short,” meaning they won’t have the shiny, crackly top of a traditional sugar cookie. The shine comes from the vanilla glaze applied after baking!
Q: Can I use a different shape cutter?
A: Absolutely! Hearts, stars, or even seasonal shapes work great. Just keep the size around 2.5 inches so the bake time remains consistent.
Q: My glaze is too thick. What should I do?
A: Add milk literally one drop at a time. A little goes a very long way! You want it to be thin enough to spread but thick enough to stay on the cookie.
Happy Baking!
These Cake Batter Sprinkle Cookies are guaranteed to bring a smile to anyone’s face. They are the perfect blend of easy, fast, and impressive. Whether you’re making them for a birthday party, a bake sale, or just a Tuesday afternoon treat, they are sure to become a new family favorite.
Don’t forget to snap a photo and tag me if you make them—I love seeing your beautiful bakes!
PrintSoft Cake Batter Sprinkle Cookies with Vanilla Glaze

Soft, buttery, and bursting with birthday cake flavor, these Cake Batter Sprinkle Cookies are a celebration in every bite. Finished with a thin vanilla glaze that lets the sprinkles shine through!
Ingredients
1/2 cup (111g) salted butter, softened
2/3 cup (71g) powdered sugar
1 egg
1/2 Tbsp cake batter flavor
2 cups (304g) all-purpose flour
1 tsp baking powder
1/4 tsp salt
1–3 tsp water
1/2 cup sprinkles
2 Tbsp butter, softened (for glaze)
1/2 Tbsp vegetable shortening (optional)
3/4 cup (80g) powdered sugar (for glaze)
2 Tbsp milk, plus more as needed
3/4 tsp clear vanilla extract
Instructions
1. Preheat the oven to 350°F. Line a cookie sheet with parchment paper or a silicone baking mat.
2. In a large bowl, cream together the softened butter and powdered sugar until smooth.
3. Scrape down the sides and mix in the egg and cake batter flavor.
4. Add the flour, baking powder, and salt. Mix until the dough begins to form, adding 1-3 tsp of water as needed until the dough is soft and pliable.
5. Fold in the sprinkles until just combined.
6. On a floured surface, roll the dough to 1/4 inch thickness. Use a 2 1/2 inch circle cutter to cut the dough.
7. Arrange on the prepared cookie sheet and bake for 7-9 minutes until the tops look matte and puffed.
8. While baking, whisk together the glaze ingredients (butter, shortening, sugar, milk, and vanilla) until smooth.
9. Immediately after removing cookies from the oven, spread a thin layer of icing over each cookie while they are still hot.
Notes
Use clear vanilla extract in the glaze to keep it a bright, clean white.
Don’t overbake! These cookies should be soft, not browned.
Store in an airtight container for up to 5 days.