There is something undeniably nostalgic about a platter of Classic Lemon Bars. For me, the scent of fresh citrus zest and the buttery aroma of a shortbread crust baking in the oven instantly transports me to Sunday brunches and sunny afternoon tea parties.
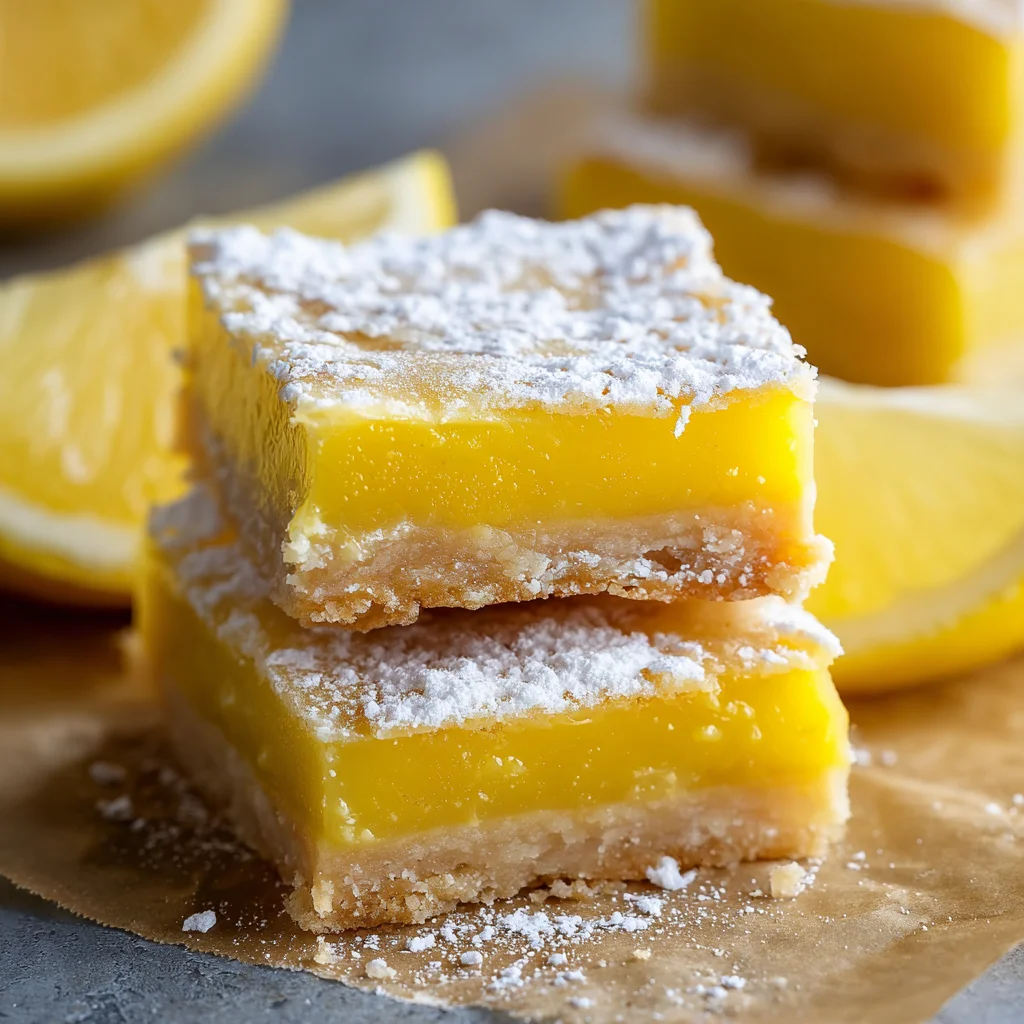
If you have been searching for the perfect lemon square—one that isn’t too runny, isn’t too sweet, and has a crust that actually holds its shape—you’ve arrived. This recipe is the gold standard. It’s tart, it’s vibrant, and it uses just seven simple pantry staples.
Whether you’re looking for a refreshing spring dessert or a bright pick-me-up during the winter months, these lemon bars are a guaranteed crowd-pleaser. Let’s dive into why this specific recipe works so well and how you can achieve that professional bakery finish at home.
Why You’ll Love This Recipe
- Perfect Texture Balance: A thick, sturdy shortbread base supports a silky-smooth, creamy lemon curd top.
- Simple Pantry Ingredients: No fancy stabilizers or cornstarch needed—just butter, flour, sugar, eggs, and lemons.
- Ideal Sweet-to-Tart Ratio: We use a generous amount of fresh lemon juice to ensure the citrus flavor truly shines through the sugar.
- Prep-Ahead Friendly: These actually taste better after a few hours in the fridge, making them the ultimate stress-free dessert for entertaining.
- Beginner Friendly: Whether you use a food processor or your hands, the crust is incredibly forgiving.
Ingredient Notes
To get the best results, quality matters. Since there are so few ingredients, each one plays a starring role.
- Unsalted Butter: Make sure your butter is softened to room temperature so it incorporates easily into the flour. If you only have salted butter, omit the extra 1/4 tsp of salt.
- Freshly Squeezed Lemon Juice: This is non-negotiable! Bottled lemon juice often has a metallic aftertaste and lacks the bright acidity of fresh fruit. You’ll need about 3–4 large lemons to get 2/3 cup of juice.
- Granulated Sugar: Used in both the crust and the filling to balance the acidity and create that signature “crackly” top.
- All-Purpose Flour: This acts as the binder for both the shortbread and the lemon curd.
- Large Eggs: Use room-temperature eggs for the smoothest filling possible.
Step-by-Step Instructions
1. Prepare the Shortbread Crust
Preheat your oven to 350°F (175°C). Lining your 9×9 inch pan with parchment paper is a must—make sure there is a little overhang on the sides so you can lift the bars out easily later.
In a food processor, pulse the butter, 1/2 cup sugar, 2 cups flour, and salt. You’re looking for a “sandy” texture that clumps together when pressed. Press this mixture firmly into the bottom of your prepared pan. Bake for 15–18 minutes until the edges are just barely turning a light golden brown.
2. Mix the Zesty Filling
While the crust takes its first trip to the oven, whisk your eggs and 1 1/2 cups of sugar together in a medium bowl. Sift in the 1/4 cup of flour and whisk until no white lumps remain. Finally, stir in that liquid gold—the fresh lemon juice.
3. The Final Bake
Pour the filling directly over the warm crust. Return the pan to the oven and bake for approximately 30 minutes. You’ll know it’s done when the center is set and doesn’t wiggle when you gently shake the pan.
4. The Big Chill
Patience is the hardest part of this recipe! Let the bars cool at room temperature for an hour, then move them to the fridge for at least 2 hours. This ensures the curd sets completely for those perfect, sharp squares.
Expert Tips for Best Results
- The Sift is Secret: To avoid tiny white “flour pockets” in your lemon layer, sift your flour into the egg and sugar mixture rather than dumping it in.
- Avoid Overbaking: If the top starts to brown deeply, take them out! You want a pale, bright yellow finish.
- Clean Slices: For those Pinterest-perfect squares, use a sharp chef’s knife. Wipe the blade with a warm, damp cloth between every single cut. This prevents the sticky lemon filling from dragging across the crust.
- Fresh Zest: For an extra punch of flavor, zest one of your lemons into the filling mixture before baking.
Variations and Substitutions
- Meyer Lemon Bars: For a sweeter, more floral flavor, swap regular lemons for Meyer lemons. You may want to reduce the sugar in the filling by 2 tablespoons.
- Gluten-Free Option: You can substitute the all-purpose flour with a high-quality 1:1 gluten-free baking flour blend.
- Lime or Citrus Medley: Follow the same ratios but use lime juice or a mix of grapefruit and lemon for a fun twist.
- Add a Crust Kick: Add 1/2 teaspoon of vanilla extract or a pinch of cardamom to the shortbread dough for a gourmet touch.
Storage and Freezing
To Store: Keep your lemon bars in an airtight container in the refrigerator for up to 4 days. I recommend waiting to dust them with powdered sugar until just before serving, as the sugar will eventually dissolve into the moist lemon layer.
To Freeze: These freeze beautifully! Wrap individual squares in plastic wrap and place them in a freezer-safe bag. They will stay fresh for up to 3 months. Thaw in the refrigerator for a few hours before eating.
FAQ
Why are my lemon bars runny?
This usually happens if they haven’t chilled long enough or if the filling wasn’t baked until fully set. Ensure the center doesn’t jiggle before removing from the oven, and always give them at least 2 hours in the fridge.
Do I have to use a food processor for the crust?
Not at all! You can use a pastry cutter or even two forks to work the butter into the flour. It takes a bit more elbow grease, but the results are just as delicious.
Why is there a thin white layer on top of my bars?
This is totally normal! It’s a thin layer of air bubbles and sugar that rises to the top during baking. A generous dusting of powdered sugar hides it perfectly.
Enjoy Your Homemade Citrus Treat!
There you have it—the only lemon bar recipe you’ll ever need. These bars are the perfect way to bring a little sunshine into your kitchen. They are bright, buttery, and incredibly satisfying.
If you make these, don’t forget to leave a comment below and let me know how they turned out! Happy baking!
PrintClassic Lemon Bars

These Classic Lemon Bars are the perfect balance of tart and sweet. Featuring a thick, melt-in-your-mouth shortbread crust and a bright, citrusy lemon curd filling, they are a perennial favorite for spring parties, potlucks, or a cozy weekend treat.
- Prep Time: 15
- Cook Time: 45
- Total Time: 180
- Yield: 16
- Category: Dessert
- Method: Baking
- Cuisine: American
Ingredients
FOR THE CRUST:
1 cup (224g) butter, softened
1/2 cup granulated sugar
2 cups all-purpose flour
1/4 tsp salt
FOR THE FILLING:
4 large eggs
1 1/2 cups granulated sugar
1/4 cup all-purpose flour
2/3 cups fresh lemon juice
Instructions
1. Preheat oven to 350F. Line a 9×9 baking dish with parchment paper.
2. In a food processor, process butter, sugar, flour and salt until crumbs are formed. (Or mix by hand until a crumbly dough forms).
3. Spread dough onto the baking dish in an even layer and press down firmly.
4. Bake crust for 15-18 minutes, until the edges are golden. Let it cool for 15 minutes.
5. While the crust is baking, prepare the filling. In a bowl, whisk eggs and sugar.
6. Add flour, whisk again, make sure there are no lumps. Add lemon juice and whisk to incorporate.
7. Pour mixture over the par-baked crust.
8. Bake for 30 minutes, until the top is set and no longer jiggles.
9. Let it cool in the pan for 1 hour, then cover with foil and refrigerate for at least 2 hours.
10. Remove from pan using the parchment paper overhang. Slice into squares.
11. Dust with powdered sugar and serve.
Notes
Use fresh lemons for the best flavor; bottled juice can be overly metallic.
For clean cuts, wipe your knife with a warm, damp cloth between every slice.
If you want a thicker filling, you can increase the lemon juice to 3/4 cup and add 1 extra tablespoon of flour.