Is there anything more nostalgic than the smell of brownies wafting through the house? For most of us, that smell usually comes from a blue or red cardboard box. We’ve been told for years that “box mix brownies” are the gold standard for texture. But what if I told you that you could achieve that same fudgy, chewy consistency—complete with the iconic crackly top—using nothing but simple pantry staples?
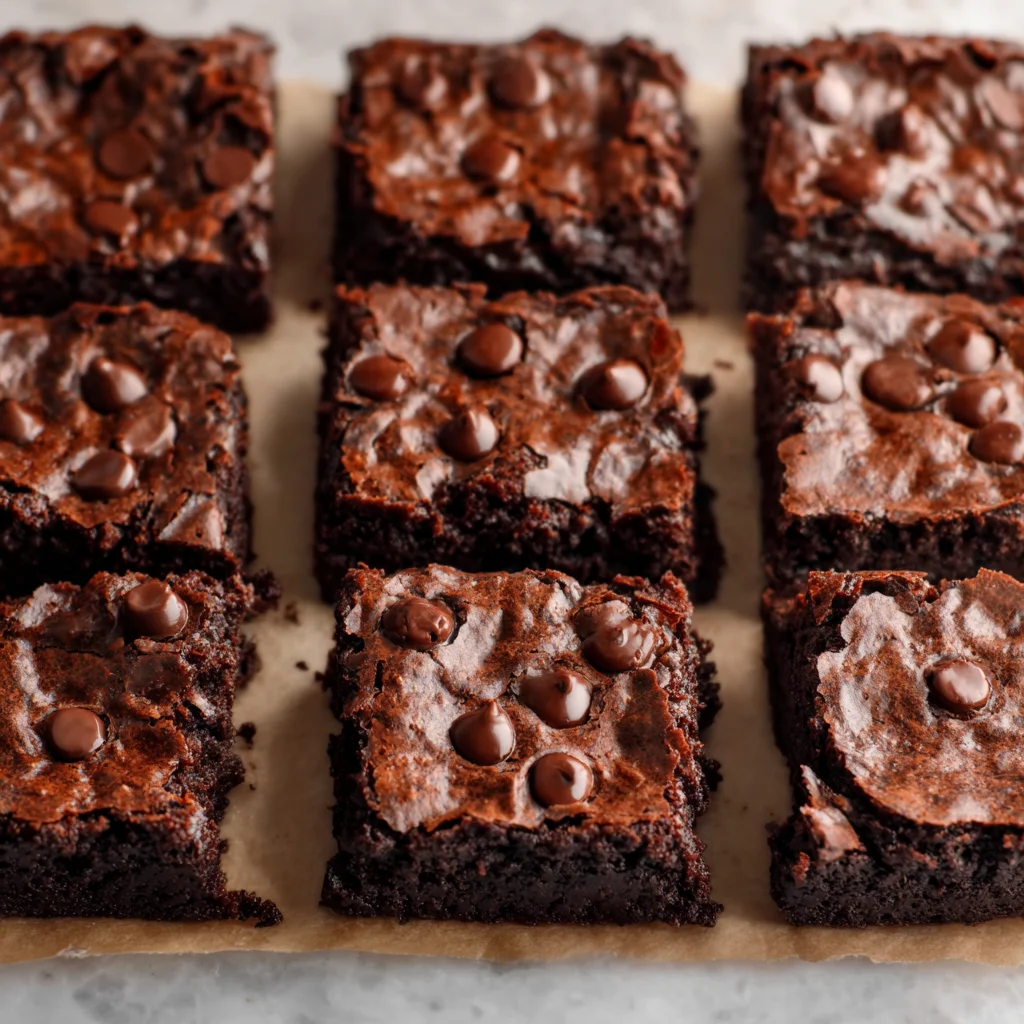
These Fudgy Cocoa Brownies are the answer to every chocolate craving you’ve ever had. They are rich, intensely chocolatey, and require zero fancy equipment. No melting chocolate over a double boiler, no stand mixer required. Just two bowls, a whisk, and a little bit of patience while they cool.
Whether you’re a die-hard edge piece lover or you live for the gooey center, this recipe delivers on every front. Let’s dive into why this is about to become your new go-to dessert.
Why You’ll Love This Recipe
- Better than Box Mix: You get that specific chewy texture and shiny top without the preservatives or artificial flavors.
- One (or Two) Bowl Magic: Minimal cleanup means you can go from craving to oven in less than 15 minutes.
- Pantry Staples: You likely have everything you need in your kitchen right now. No special trips for expensive baking chocolate.
- The Texture: These are strictly in the “fudgy” camp. If you like cakey brownies, you might want to look elsewhere—these are dense, rich, and decadent.
- Customizable: You can swap the oil or add mix-ins to make these your own.
Ingredient Notes: The Secret to Success
Understanding your ingredients is the first step to becoming a master baker. Here is what makes these Fudgy Cocoa Brownies so special:
- Cocoa Powder: Since this is the primary flavor profile, use a high-quality unsweetened cocoa powder. Sifting it is crucial to avoid those pesky little white or brown clumps in your finished brownies.
- Powdered Sugar: This is my “secret” ingredient. While granulated sugar provides the bulk of the sweetness, the cornstarch in the powdered sugar helps create a tender, melt-in-your-mouth crumb and contributes to the shiny top.
- The Oil (Olive vs. Canola): I personally love using a high-quality extra-virgin olive oil. It complements the chocolate beautifully, adding a sophisticated, slightly fruity note. However, if you want a classic “box mix” flavor, stick with a neutral oil like canola or vegetable oil.
- Sea Salt: Do not skip the salt! It balances the sugar and makes the chocolate flavor pop. A little sprinkle on top after baking doesn’t hurt, either.
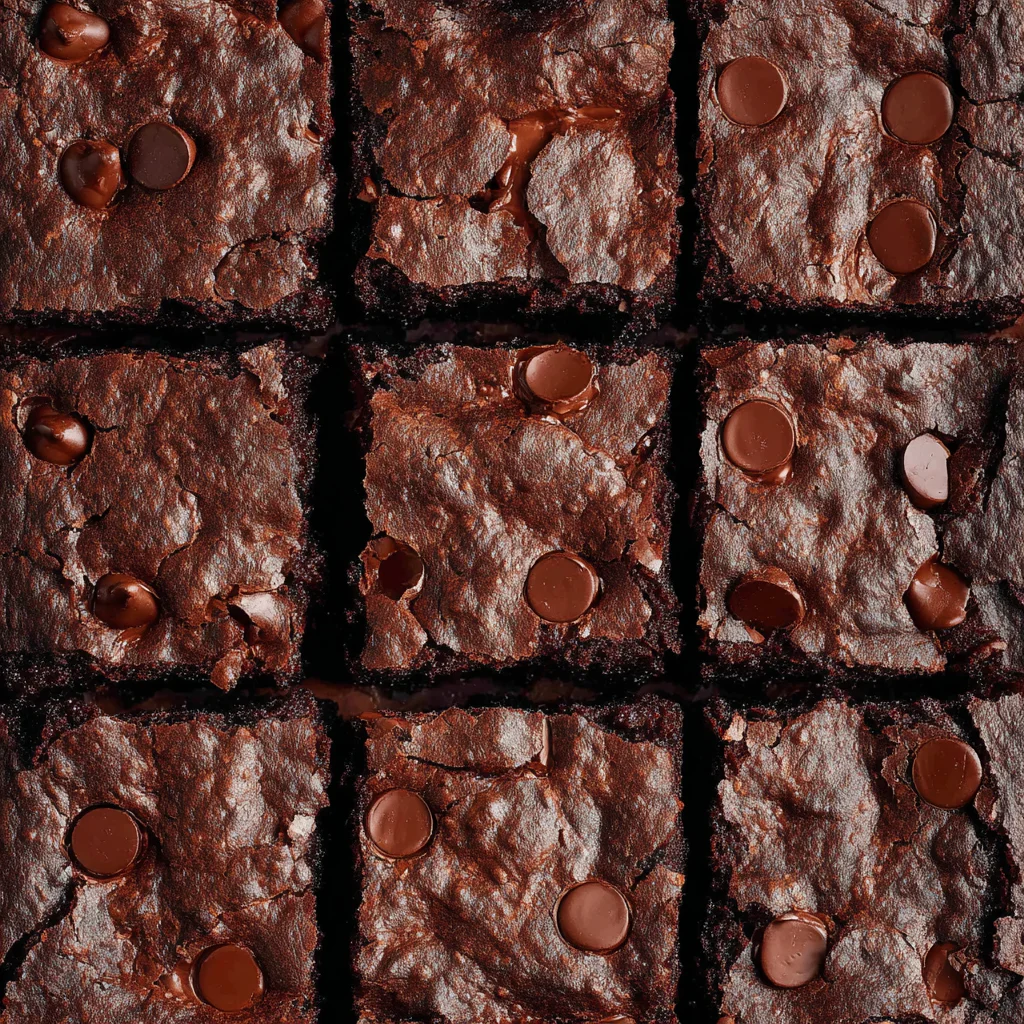
- Dark Chocolate Chips: These provide little “pockets” of molten chocolate throughout the brownie. You can also use chopped-up chocolate bars for a more “puddle-like” effect.
Step-by-Step Instructions
1. Prep Your Station
Preheat your oven to 325°F. Why 325 and not 350? A slightly lower temperature ensures the brownies cook evenly without the edges becoming hard and crusty before the middle is set. Line an 8×8 baking dish with parchment paper, leaving an overhang on the sides so you can lift the brownies out easily.
2. Mix the Dry Ingredients
In a medium bowl, whisk together the granulated sugar, flour, sifted cocoa powder, powdered sugar, chocolate chips, and sea salt. Mixing the dry ingredients first ensures that the cocoa and flour are evenly distributed.
3. Whisk the Wet Ingredients
In a separate large bowl, whisk your eggs with the oil, water, and vanilla extract. You want to whisk until the eggs are fully incorporated and the mixture looks uniform.
4. Combine
Sprinkle the dry mixture over the wet ingredients. Use a sturdy spatula to stir them together. Warning: The batter will be very thick and heavy—this is normal! Avoid overmixing; just stir until no streaks of dry flour remain.

5. Bake to Perfection
Spread the batter into your prepared pan and smooth the top. Bake for 40 to 48 minutes. The “toothpick test” is tricky with fudgy brownies. You want the toothpick to come out with a few moist crumbs attached. If it’s clean, they might be overbaked!
6. The Hardest Part: Waiting
Let the brownies cool in the pan for at least 2 hours. If you cut them while they are hot, they will fall apart and seem undercooked. As they cool, the fats solidify and the structure sets, creating that perfect fudgy bite.
Expert Tips for Best Results
- Don’t Overbake: This is the #1 mistake in brownie baking. Brownies continue to cook in the hot pan after they come out of the oven (carry-over cooking). Pull them out when the center still has a very slight jiggle.
- Use the Right Pan: Use a light-colored metal or glass 8×8 pan. A 9×9 pan will make the brownies too thin, causing them to dry out and overcook quickly.
- Sift Your Cocoa: Cocoa powder is notorious for clumping. Sifting it ensures a smooth batter and prevents you from biting into a bitter ball of dry cocoa.
- The Shiny Top Trick: To get that paper-thin, crackly top, make sure you whisk your eggs and sugar well. The dissolving of the sugar in the egg proteins is what creates that meringue-like crust.
Variations and Substitutions
- Add Nuts: Fold in 1/2 cup of toasted walnuts or pecans for a classic crunch.
- Espresso Powder: Add 1 teaspoon of instant espresso powder to the dry ingredients. You won’t taste the coffee, but it makes the chocolate taste much more intense.
- Salted Caramel: Drizzle salted caramel over the batter before baking and swirl it in with a knife.
- Dairy-Free: This recipe is naturally dairy-free if you use dairy-free chocolate chips!
Storage and Freezing
Room Temperature: Store in an airtight container for up to 3 days. They actually taste better on Day 2!
Fridge: If you like an extra-chewy, almost truffle-like brownie, store them in the refrigerator. They will last up to a week this way.
Freezing: These brownies freeze beautifully. Wrap individual squares in plastic wrap and place them in a freezer bag. They stay fresh for up to 3 months. Thaw at room temperature or pop one in the microwave for 15 seconds for a warm treat.
FAQ
Why are my brownies oily?
This usually happens if the ingredients aren’t fully emulsified or if they were baked at too low a temperature for too long. Ensure you whisk your wet ingredients well before adding the dry.
Can I use butter instead of oil?
Yes, you can substitute 1/2 cup of melted butter. The brownies will be slightly more “cakey” and have a richer, buttery flavor, but they won’t be quite as chewy as the oil-based version.
Why didn’t I get a crackly top?
The crackly top comes from the sugar dissolving into the eggs. Try whisking the eggs and sugar together for an extra minute before adding the other wet ingredients.
Final Thoughts
These Fudgy Cocoa Brownies prove that you don’t need a box or a culinary degree to make a world-class dessert. They are the perfect balance of ease and indulgence. Next time you need a “thank you” gift, a potluck contribution, or just a Tuesday night pick-me-up, reach for this recipe.
Don’t forget to tag me on Instagram if you make these—I love seeing your bakes! Happy whisking!
PrintFudgy Cocoa Brownies

The ultimate recipe for Fudgy Cocoa Brownies. These are thick, chewy, and feature a stunning shiny top. Better than a box mix and incredibly easy to make in one or two bowls!
- Prep Time: 10
- Cook Time: 45
- Total Time: 55
- Yield: 16
- Category: Dessert
- Method: Baking
- Cuisine: American
Ingredients
1 1/2 cups granulated sugar
3/4 cup all-purpose flour
2/3 cup cocoa powder, sifted if lumpy
1/2 cup powdered sugar, sifted if lumpy
1/2 cup dark chocolate chips
3/4 teaspoons sea salt
2 large eggs
1/2 cup canola oil or extra-virgin olive oil
2 tablespoons water
1/2 teaspoon vanilla
Instructions
1. Preheat the oven to 325°F. Lightly spray an 8×8 baking dish with cooking spray and line it with parchment paper. Spray the parchment paper again for easy removal.
2. In a medium bowl, combine the sugar, flour, cocoa powder, powdered sugar, chocolate chips, and salt. Mix well.
3. In a large bowl, whisk together the eggs, oil, water, and vanilla until smooth.
4. Sprinkle the dry mix over the wet mix and stir until just combined. The batter will be very thick.
5. Pour the batter into the prepared pan and use a spatula to smooth the top.
6. Bake for 40 to 48 minutes, or until a toothpick comes out with only a few moist crumbs attached. Pull them out early rather than late!
7. Cool completely (about 2 hours) before slicing to allow them to set.
Notes
Sugar reduction: You can use 1 cup of sugar instead of 1.5 cups for a less sweet brownie.
Oil choice: Olive oil adds a lovely depth but will be subtlely tasted. Use canola for a neutral flavor.
Cooling is key: These brownies are very fudgy and need time to set up or they will be too gooey to slice.