There is something undeniably nostalgic about a poke cake. Whether it was the staple dessert at your grandmother’s Sunday dinners or the highlight of every summer potluck, the “poke” method transforms a standard box mix into a gourmet, melt-in-your-mouth masterpiece.
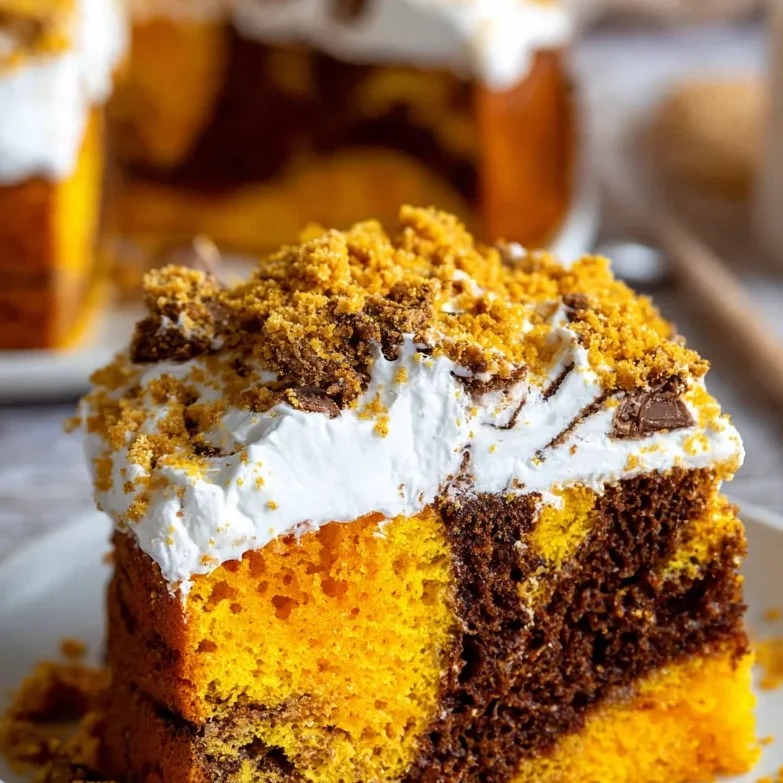
Today, we are taking that nostalgia and cranking up the volume with this Butterfinger Poke Cake. Imagine a moist fudge marble cake, swirled with ribbons of chocolate and vanilla, then drenched in a rich mixture of sweet caramel and creamy condensed milk. Top that with a cloud of whipped topping and the unmistakable “crispety, crunchety” texture of crushed Butterfingers, and you have a dessert that people will be begging you for the recipe for.
If you’re looking for a crowd-pleasing dessert that takes minimal effort but delivers maximum flavor, you’ve found it. Let’s dive into why this cake is a total game-changer for your dessert rotation.
Why You’ll Love This Recipe
- Texture Heaven: You get the soft, moist crumb of the cake, the gooey caramel center, the light whipped topping, and the salty-sweet crunch of the candy. It’s a sensory experience in every bite.
- Simple Ingredients: We use a few clever shortcuts (like a box mix and jarred caramel) to make this accessible for even the busiest home cooks.
- Make-Ahead Friendly: This cake actually tastes better the longer it sits in the fridge, making it the perfect stress-free dessert for parties.
- Crowd Favorite: It’s almost impossible to find someone who doesn’t love the combination of chocolate, peanut butter, and caramel.
- Marble Magic: Using a fudge marble cake mix instead of plain chocolate adds a beautiful visual swirl and a more complex flavor profile.
Ingredient Notes
While the recipe is straightforward, choosing the right ingredients makes all the difference:
- Fudge Marble Cake Mix: This provides the perfect base. The mix of vanilla and chocolate batters ensures the cake isn’t overly heavy while still delivering that cocoa fix.
- Sweetened Condensed Milk: This is the “secret sauce.” When mixed with caramel, it seeps into the holes of the cake, creating a fudgy, pudding-like consistency that keeps the cake moist for days.
- Caramel Topping: Look for a high-quality “thick” caramel topping (usually found near the ice cream syrups). It adds a buttery depth that pairs perfectly with the peanut butter notes in the Butterfinger.
- Butterfinger Candy Bars: You can buy the full-sized bars and crush them yourself (which gives you nice, uneven chunks) or use the pre-crushed “bits” found in the baking aisle.
- Whipped Topping: Ensure your whipped topping is fully thawed in the refrigerator before using. Using it while frozen will make it difficult to spread and may tear the delicate surface of the cake.
Step-by-Step Instructions
1. Bake the Base
Preheat your oven to 350°F. Prepare the marble cake mix according to the box instructions using the required eggs, oil, and water. Bake it in a 9×13-inch pan. You’ll know it’s done when a toothpick inserted into the center comes out clean or with just a few moist crumbs.
2. The “Poke” Process
Allow the cake to cool for about 5 to 10 minutes. While it’s still warm, take a large fork or the handle of a wooden spoon. Poke holes across the entire surface of the cake. Be generous! You want plenty of “tunnels” for the caramel mixture to inhabit. Aim for holes about an inch apart.
3. The Caramel Soak
In a medium bowl, whisk together the entire can of sweetened condensed milk and the jar of caramel topping. Pour this mixture slowly over the warm cake, guiding it into the holes with a spatula if necessary. This is where the magic happens—the cake will drink up all that golden goodness.


4. Chill and Set
Before adding the “frosting,” the cake needs to cool completely. Place it in the refrigerator. This step is crucial; if the cake is warm, the whipped topping will melt into a puddle.
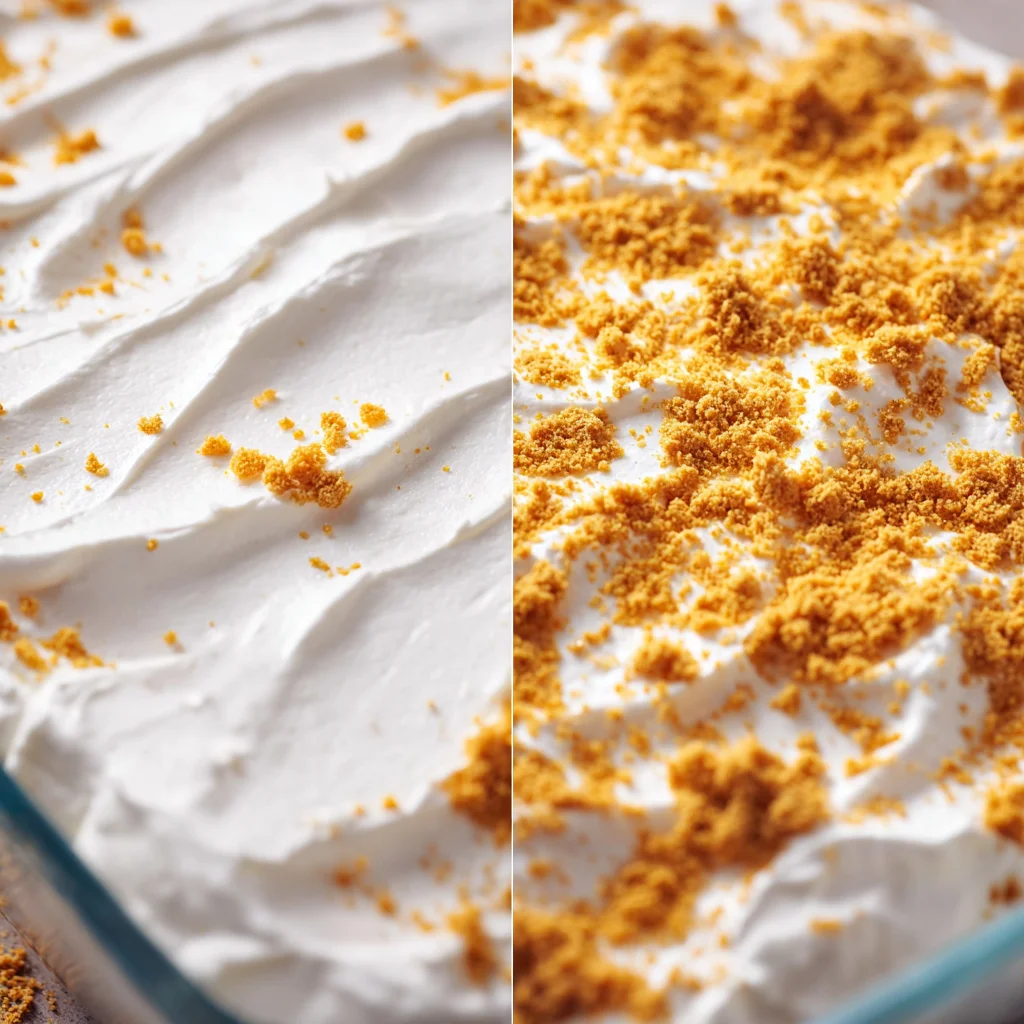
5. Topping and Crunch
Once the cake is cold, spread the thawed whipped topping evenly over the top. Finally, sprinkle your crushed Butterfinger bars over the surface. For a professional look, finish with a drizzle of chocolate syrup right before serving.
Expert Tips for Best Results
- Don’t Poke All the Way Down: When poking your holes, try to stop just before you hit the very bottom of the pan. This prevents the caramel mixture from pooling entirely at the bottom and helps it stay suspended in the cake.
- The “Crush” Technique: To crush your Butterfingers without making a mess, keep them in their wrapper and gently tap them with a rolling pin or the back of a heavy spoon before opening.
- Wait for the Crunch: If you are making this cake a day in advance, wait to add the crushed Butterfingers until you are ready to serve. The candy can soften in the refrigerator over time. Adding them last-minute ensures that signature crunch.
- Warmth is Key for Seepage: Make sure the cake is still slightly warm when you pour the caramel over it. The heat helps the liquid penetrate the crumb more effectively than if the cake were cold.
Variations and Substitutions
- The Chocolate Lover’s Version: Use a Triple Chocolate cake mix and drizzle with extra ganache instead of caramel.
- The Heath Bar Swap: Not a fan of Butterfingers? Use crushed Heath or Skor bars for a toffee-forward flavor.
- Homemade Whipped Cream: If you aren’t a fan of store-bought whipped topping, you can use stabilized homemade whipped cream (using heavy cream, powdered sugar, and a bit of gelatin or cream cheese to keep it firm).
- Nut-Free Option: To make this nut-free, swap the Butterfingers for crushed Oreos or chocolate-covered pretzels.
Storage and Freezing
To Refrigerate: This cake must be stored in the refrigerator because of the dairy in the soak and the whipped topping. Cover it tightly with plastic wrap or a lid. it will stay fresh and delicious for up to 4 days.
To Freeze: You can freeze the baked cake (after the caramel soak) for up to 3 months. However, I recommend adding the whipped topping and candy bars fresh after thawing for the best texture. Thaw in the refrigerator overnight before serving.
FAQ
Can I use a different cake mix?
Absolutely! While fudge marble is my favorite for the balance of flavors, a yellow cake mix, chocolate mix, or even a white cake mix will work perfectly.
How do I get the “marble” look?
Follow the box instructions! Usually, you mix the yellow batter, pour most of it in, then mix a cocoa packet into the remaining batter and swirl it through with a knife.
Why did my whipped topping melt?
The cake was likely still too warm. Poke cakes need a good 1-2 hours in the fridge to bring the internal temperature down before you apply the topping.
A Dessert to Remember
Whether you’re celebrating a birthday, bringing a dish to a neighborhood BBQ, or just satisfying a Wednesday night sweet tooth, this Butterfinger Poke Cake is a guaranteed win. It combines ease of preparation with a flavor profile that tastes like you spent hours in the kitchen.
The way the caramel-infused cake pairs with the salty peanut butter crunch of the Butterfingers is truly a match made in dessert heaven. Give it a try this weekend—your friends and family will thank you!
PrintButterfinger Poke Cake Recipe
A rich and gooey Butterfinger Poke Cake made with a fudge marble base, caramel soak, and crunchy candy bar topping.
- Prep Time: 15 minutes
- Cook Time: 30 minutes
- Total Time: 45 minutes
- Yield: 12 servings
- Category: Dessert
- Method: Baking
- Cuisine: American
Ingredients
1 box fudge marble cake mix
Ingredients needed for cake: eggs, oil and water
14 ounce can sweetened condensed milk
12 ounce jar caramel topping
8 ounce tub whipped topping, thawed (Cool Whip)
1 large Butterfinger candy bar, crushed
Chocolate syrup to drizzle on top, optional
Instructions
1. Preheat oven to 350F degrees. Spray 9×13-inch baking pan with nonstick cooking spray.
2. Prepare 1 box fudge marble cake mix along with ingredients needed to make cake: eggs, oil and water and bake according to cooking times on back of box.
3. When it comes out of oven, allow to cool for just a few minutes.
4. In a medium bowl, combine 14 ounce can sweetened condensed milk with 12 ounce jar caramel topping.
5. Start poking holes in the cake with a fork. Lots of holes! You want plenty of crevices for the caramel mixture to go into.
6. Drizzle caramel mixture over cake.
7. Put cake in the refrigerator to let it finish cooling.
8. Once it is cooled, spread 8 ounce tub whipped topping, thawed evenly over entire cake.
9. Then sprinkle with 1 large Butterfinger candy bar, crushed evenly over the top. Slice and serve!
Notes
Cake must be stored in the refrigerator when not serving.
For extra crunch, wait to add the Butterfinger pieces until just before serving.
Ensure the cake is completely cooled before adding the whipped topping to prevent melting.