There is something inherently magical about breaking open a fresh cookie to reveal a kaleidoscope of colors. Whether you are hosting a birthday party, looking for a rainy-day activity with the kids, or just wanting to brighten up your Tuesday, these Tie-Dye Sugar Cookies are the ultimate answer.
They aren’t just pretty to look at, though. This recipe delivers a cookie that is perfectly soft, slightly chewy, and has that classic “bakery-style” tang thanks to the addition of cream of tartar. Add in a generous handful of sprinkles, and you have a dessert that is as joyful as it is delicious.
In this post, I’ll walk you through how to get that perfect “swirled” look without turning your dough into a muddy mess, plus my top tips for the softest sugar cookies ever. Let’s get baking!
Why You’ll Love This Recipe
- Visual Wow-Factor: Every single cookie comes out unique, like a tiny piece of edible art.
- Perfect Texture: Soft in the middle with a light crunch on the edges.
- Customizable: Easily swap the colors for different holidays (think red and green for Christmas or pastels for Easter!).
- Kid-Friendly: Children love helping to dye the dough and roll the balls in sugar.
- No-Chill Dough: Unlike many sugar cookie recipes, this one doesn’t require hours of chilling in the fridge.
Ingredient Notes
To get the best results, quality matters. Here is what you need to know about the key players in these tie-dye cookies:
- Unsalted Butter: Make sure it is truly at room temperature (you should be able to indent it with your finger, but it shouldn’t be greasy). Room temp butter creams better with sugar, creating those tiny air pockets that make cookies fluffy.
- Cream of Tartar: This is the secret ingredient! It prevents sugar from crystallizing, which results in a softer cookie, and provides that signature subtle tang.
- Gel Food Coloring: I highly recommend using gel colors (like AmeriColor or Wilton) rather than liquid drops. Gel is much more concentrated, so you get vibrant colors without adding excess moisture to the dough.
- Sprinkles: I love using rainbow jimmies (the long ones) because they hold their shape well during baking.
- Pure Vanilla Extract: Since sugar cookies have a simple flavor profile, using high-quality vanilla makes a noticeable difference.
Step-by-Step Instructions
1. Prep the Foundation
Start by preheating your oven to 350° F (175° C). I always recommend lining your baking sheets with parchment paper or a silicone mat. This prevents sticking and ensures the bottoms of your cookies don’t brown too quickly.
2. Cream the Butter and Sugar
In a large bowl or stand mixer, beat the room-temperature butter and granulated sugar together. You want to go for about 2–3 minutes on medium speed until the mixture looks pale and fluffy. Add your eggs and vanilla, beating again until fully incorporated.
3. Mix the Dry Ingredients
In a separate medium bowl, whisk together your flour, baking soda, cream of tartar, and salt. Slowly add this to the wet ingredients. Pro tip: Keep your mixer on low speed here so you don’t end up in a cloud of flour! Once the dough starts to come together, fold in the sprinkles.
4. Create the Tie-Dye Magic
Divide your dough into four equal portions. Leave one plain (white/cream). Use your gel colors to dye the other three portions pink, royal blue, and violet (or whichever colors you love!).
Now, the trick: Place all four colored doughs back into one large bowl. Use a spoon or your hands to give it one or two very light turns. You want the colors to touch, but you don’t want them to mix.
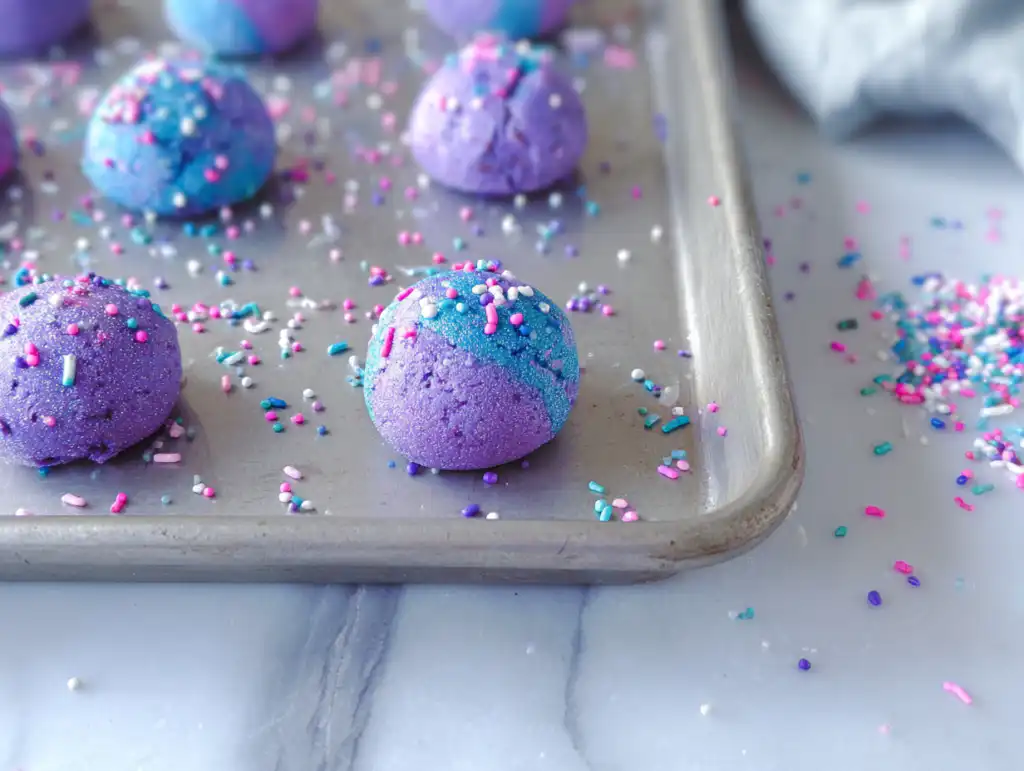
5. Scoop and Roll
Use a cookie scoop to grab a bit of each color in one go. Roll the dough into a ball between your palms—the rolling action is what creates those beautiful swirls. For an extra sparkle, roll the balls in a bowl of granulated sugar before placing them on the tray.
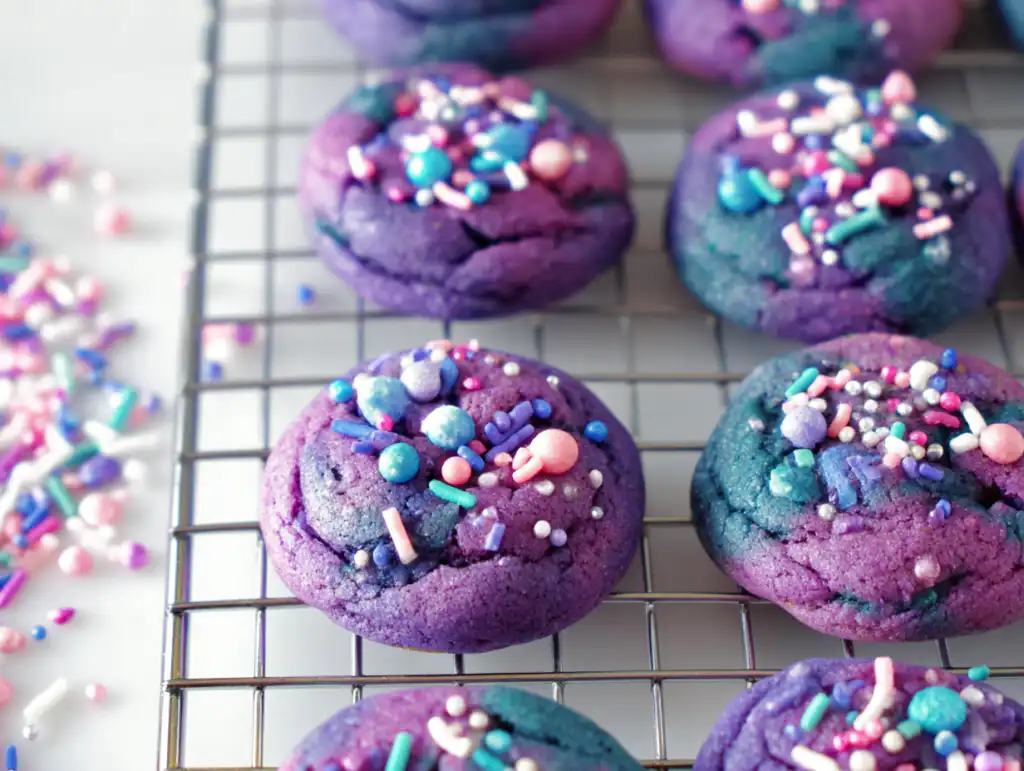
6. Bake to Perfection
Bake for 10–12 minutes. The edges should be set, but the tops should still look slightly soft. They will continue to firm up as they cool on the hot pan.
Expert Tips for Best Results
- Don’t Overmix the Colors: This is the #1 mistake. If you mix the dough too much, the colors will blend into a single, unappealing grey or brown. Think “swirl,” not “blend.”
- Use a Cookie Scoop: This ensures all cookies are the same size, which means they will all bake evenly.
- Measure Flour Correctly: Instead of scooping the measuring cup directly into the flour bag (which packs it down), spoon the flour into the cup and level it off with a knife.
- Watch the Clock: Sugar cookies can go from perfect to overbaked in 60 seconds. Take them out when they look just underdone in the center.
Variations and Substitutions
- Holiday Themes: Use red and green for Christmas, or orange and purple for Halloween.
- Flavor Twists: Swap the vanilla extract for almond extract or lemon zest for a different flavor profile.
- Gluten-Free: You can substitute the all-purpose flour with a 1:1 gluten-free baking flour blend.
- Chocolate Chip Tie-Dye: Add mini chocolate chips along with the sprinkles for a colorful take on a classic.
Storage and Freezing
To Store: Keep your cookies in an airtight container at room temperature for up to 5 days. Placing a piece of white bread in the container can help keep them soft!
To Freeze (Baked): Once completely cool, stack the cookies in a freezer-safe bag with parchment paper between layers. They stay fresh for up to 3 months.
To Freeze (Dough): You can freeze the rolled balls of dough! Just bake them straight from the freezer, adding 1–2 minutes to the bake time.
FAQ
Can I use liquid food coloring?
You can, but the colors won’t be as “neon” or vibrant, and the extra liquid might make the dough a bit sticky. If you use liquid, you may need to add an extra tablespoon of flour.
Why did my cookies spread too much?
Usually, this happens if the butter was too soft (almost melting) or if the oven wasn’t fully preheated. If your kitchen is very warm, try chilling the dough balls for 15 minutes before baking.
Can I make these without cream of tartar?
Yes, you can substitute the baking soda and cream of tartar with 1.5 teaspoons of baking powder. However, the texture will be slightly puffier and less “chewy.”
Happy Baking!
These Tie-Dye Sugar Cookies are more than just a recipe; they are a guaranteed way to put a smile on someone’s face. There is something so satisfying about seeing those bright swirls emerge from the oven.
If you make these, I would love to see your color combinations! Tag me on Instagram or Pinterest so I can see your beautiful creations. Happy baking!
Printvibrant Tie-Dye Sugar Cookies
These vibrant Tie-Dye Sugar Cookies are soft, chewy, and packed with sprinkles! The perfect colorful treat for birthdays or a fun weekend baking project.
Ingredients
1 cup (226g) unsalted butter, at room temperature
1 1/2 cups (285g) granulated sugar
2 large eggs, at room temperature
1 teaspoon (5ml) pure vanilla extract
3 ½ cups (420g) all-purpose flour
½ teaspoon (2g) baking soda
½ teaspoon (2g) cream of tartar
¼ teaspoon (1.2g) salt
½ cup sprinkles
Gel colors (Pink, Royal Blue, and Violet)
Instructions
1. Preheat the oven to 350° F. Line a large cookie sheet with parchment or a silicone baking mat.
2. Combine the butter with the sugar and beat on medium speed until well creamed together. Add the eggs and vanilla extract. Mix the butter and sugar until the eggs are well beaten.
3. In a separate bowl, combine the remaining dry ingredients. Slowly add into the batter and beat on medium-low speed until well combined and the dough starts to form, then add the sprinkles and finish mixing to incorporate.
4. Divide the dough into 4 equal-sized balls. Leave one bowl uncolored and dye the remaining 3 using colors of your choice. Work the color into the dough with a spatula or by hand.
5. Place all four doughs into a large bowl and lightly mix with a spoon or by hand to create a tie-dye effect. Overmixing will result in the colors blending and forming new colors.
6. Use a medium or large cookie scoop and portion the dough. Roll each ball of dough in granulated sugar or add additional sprinkles and then place each one about 2 inches apart.
7. Bake at 350° F for 10-12 minutes. Allow cookie to cool on the baking sheet for several minutes and then transfer to a wire rack to cool completely.
Notes
Use gel food coloring rather than liquid for the most vibrant results without thinning the dough.
Do not overwork the dough once you combine the colors, or it will turn muddy rather than swirled.
Ensure your butter is at room temperature but not melty for the best texture.