If you’ve ever had a slice of sticky coconut cake, you know why it’s a tropical favorite. This rich, chewy dessert balances sweet coconut with a velvety glaze, creating a flavor sensation that pairs perfectly with coffee or tea. Made with coconut milk, shredded coconut, and a touch of vanilla, it’s a dreamy blend of texture and taste that will keep you craving more. Whether you’re a coconut lover or just looking for something new, this cake is a must-try.
Why This Sticky Coconut Cake Recipe is a Must-Try
This Sticky Coconut Cake is a crowd-pleaser for its irresistible combination of soft, chewy layers and the natural sweetness of coconut. The batter is infused with the creamy richness of full-fat coconut milk and the nutty aroma of shredded sweetened coconut, creating a base that feels like a cross between a moist cake and a tender coconut bar. The addition of egg yolks as a glaze elevates the texture even further, giving it a slightly glossy sheen and a touch of indulgence. Whether served chilled or at room temperature, this cake is a guaranteed hit, especially for those who adore the tropical flavor profile and the satisfying, slightly sticky bite of each piece.
Baking this cake is more than just indulging in coconut magic—it’s about creating a dessert that’s universally loved. The chewy consistency makes it perfect for those who prefer something dense and satisfying, while the subtle sweetness ensures it’s not overly saccharine. It’s a versatile treat that can be enjoyed with a cup of tea, as a midnight snack, or even as a centerpiece at a tropical-themed gathering. The ease of preparation, combined with the mouthwatering result, makes it a recipe worth mastering.
Sticky Coconut Cake Recipe
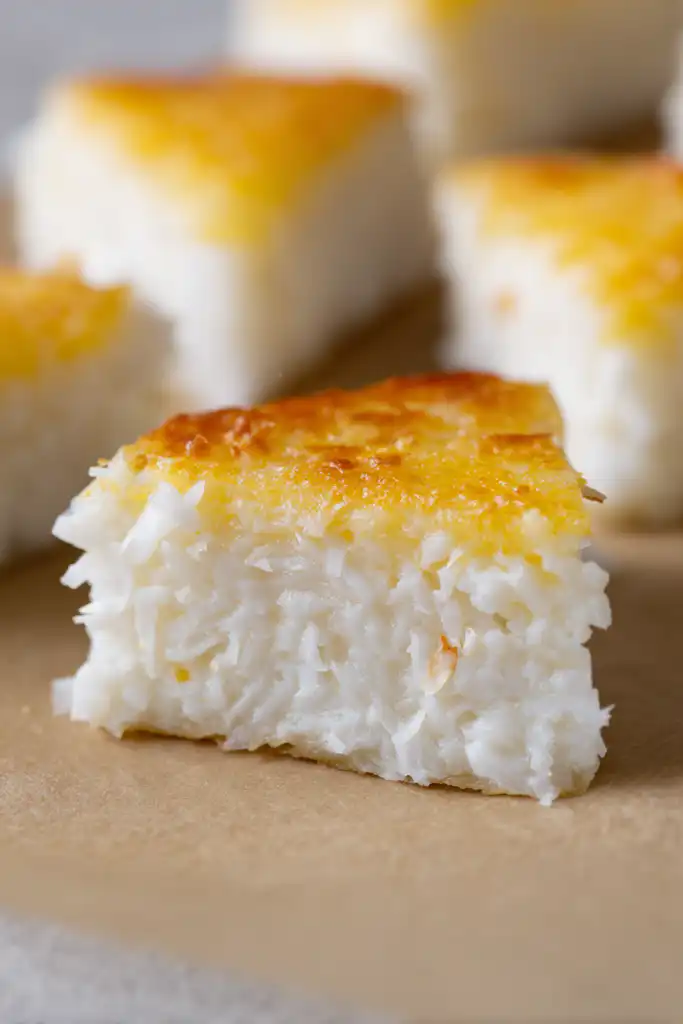
If you’re in the mood for something sweet, rich, and irresistibly chewy, this Sticky Coconut Cake is your answer. It’s a classic recipe that combines the natural sweetness of coconut with the richness of egg yolks to create a dessert that feels like a tropical dream in every bite. What makes this cake unique is the delicate balance between the soft, custard-like texture of the coconut filling and the slightly crunchy glaze that forms when the yolk mixture is broiled to a golden finish. This cake is perfect for those who love the bold but subtle flavors of coconut and the slight indulgence of a gooey, sticky dessert that doesn’t feel too heavy.
Unlike traditional cakes, this recipe doesn’t rely on flour or leavening agents. Instead, it uses glutinous rice flour to create a dense, pillowy texture that’s both satisfying and unique. The result is a cake that’s not only incredibly moist but also a little firm, making it the ideal canvas for the sticky glaze. What really sets this cake apart, though, is how it’s finished—by baking the egg yolks on top to form a rich, glossy crust. It’s a simple but effective technique that adds a layer of complexity to the flavor.
Ingredients
- For the Cake:
- 2 eggs separated – The egg whites provide structure, while the yolks create a rich glaze.
- 1¼ cups granulated sugar – Adds sweetness and helps achieve the right texture when combined with the coconut milk.
- 2¼ cups full-fat canned coconut milk – Essential for the cake’s creamy texture and coconut flavor. If substituting, use unsweetened coconut milk with added sugar.
- 3 cups shredded sweetened coconut – Gives the cake its distinct tropical character. Can be unsweetened coconut with extra sugar if needed.
- 1½ cups glutinous rice flour – Creates a soft, chewy base that’s perfect for holding the coconut filling.
- 1 teaspoon vanilla extract – Enhances the overall flavor and adds a warm, aromatic layer.
How to Make Sticky Coconut Cake
- Preheat oven to 350°F. While the oven heats, prepare a baking dish by greasing an 8×8-inch pan with non-stick spray or a light layer of oil. This ensures the cake doesn’t stick to the pan later.
- Whisk egg whites and sugar. In a medium bowl, whisk the egg whites and granulated sugar until the mixture becomes light and frothy. Slowly pour in the coconut milk, ensuring there are no lumps. This step is crucial for the smooth texture of the cake.
- Add the remaining ingredients. Gently mix in the shredded sweetened coconut, glutinous rice flour, and vanilla extract. Stir until all ingredients are well combined and the batter is thin and liquidy. Make sure there are no clumps of coconut in the mixture.
- Pour the batter into the pan. Transfer the thin, liquidy batter into the prepared 8×8-inch baking dish, spreading it evenly. Avoid overfilling the pan to prevent spillover during baking.
- Bake the cake. Place the pan in the preheated oven and bake for 45 minutes, or until the edges are set and the center is slightly jiggly. Check with a toothpick to ensure it’s not runny in the center.
- Brush the cake with whisked egg yolks. Carefully remove the pan from the oven and use a pastry brush to evenly coat the top of the cake with the whisked egg yolks. This will create the signature golden crust that gives the cake its glossy finish.
- Broil the cake. Turn the oven to the broil setting and place the pan back in for 5–10 minutes, watching closely to avoid burning. The top should turn golden brown and slightly crispy.
- Cool and chill the cake. Once the cake is golden and done, place it on a wire rack to cool to room temperature. Once cooled, cover the pan with plastic wrap and refrigerate for at least 8 hours or overnight. This allows the cake to set and become firm enough to cut without falling apart.
- Serve and enjoy! After chilling, cut the cake into squares or triangles and serve cold from the fridge or at room temperature. The cake pairs beautifully with a cup of coffee, a glass of milk, or a scoop of vanilla ice cream.
Tips for the Best Results
- Use full-fat coconut milk – The richness of full-fat coconut milk is crucial for achieving the cake’s creamy, custard-like consistency. If using a lighter version, adjust the sugar slightly to compensate for the thinner texture.
- Don’t overmix the batter – Once the coconut and rice flour are added, mix just until combined. Overmixing can make the texture denser and less tender.
- Let the cake set properly – Chilling the cake in the fridge overnight is essential for the texture and the glaze to fully adhere. Skipping this step can result in a soft center that doesn’t hold its shape when sliced.
- Adjust the broil time based on your oven – Broil times can vary, so keep a close eye on the cake during the final step. It can go from golden to burnt in just a few minutes.
Common Mistakes to Avoid
- Baking at the wrong temperature – Make sure your oven is fully preheated to 350°F before placing the cake inside. An oven that’s too cool will cause the cake to become undercooked and gummy.
- Overusing the egg yolk glaze – While the egg yolks add a delicious richness, too much can create a greasy texture. Brush the cake sparingly, just enough to form a thin, even layer.
- Skipping the chilling time – If you skip chilling the cake, it won’t set properly, and the slices will be too soft and messy. Always allow it to chill completely before slicing.
- Using dry coconut instead of shredded – The shredded coconut gives the cake its chewy texture. Dry coconut will not have the same result, so make sure you use the right type.
Variations and Substitutions
If you’re looking to tweak this Sticky Coconut Cake to suit your preferences or dietary needs, there are several natural and simple modifications you can consider.
Gluten-free version: This cake is already naturally gluten-free, thanks to the use of glutinous rice flour. However, if you’re avoiding gluten entirely and want to make it vegan, substitute the eggs with a flax egg (1 tablespoon ground flaxseed mixed with 3 tablespoons water) or a commercial egg replacer. The texture might be slightly different, but it should still be delicious.
Sweetness adjustments: If you prefer a less sweet cake, reduce the granulated sugar to ¾ cup. Alternatively, use a natural sweetener like maple syrup or coconut sugar. Keep in mind that some sweeteners can affect the texture or flavor.
Tropical twist: To add more depth of flavor, stir in a teaspoon of lime zest or a dash of coconut extract into the batter. You can also top the cake with a dusting of shredded coconut or a drizzle of toasted coconut butter.
Cooking variations: If you’re pressed for time, you can make the cake ahead of time and store it in the fridge for up to five days. To freeze it, wrap the cake tightly in plastic wrap and place it in an airtight container. It will keep well for up to two months and can be thawed at room temperature before serving.
How to Serve Sticky Coconut Cake
This Sticky Coconut Cake is a versatile dessert that fits into many occasions. As a standalone treat, it’s perfect to enjoy with a cup of coffee or tea, especially after a meal. Its rich, chewy texture makes it an excellent after-dinner dessert that pairs well with hot beverages.
For a more indulgent experience, serve it with a scoop of vanilla ice cream or a light dollop of whipped cream. This adds a cool, creamy contrast to the warm, sticky cake. It’s also a crowd-pleasing option for parties, bake sales, or potlucks, especially if you’re catering to people who love tropical flavors.
Another fun way to serve it is to cut the cake into small squares and present it in a decorative dish or on a plate with a sprinkle of shredded coconut on top. This makes it instantly appealing and a perfect centerpiece for a dessert table. For a more refined touch, pair it with a small glass of warm milk or a cup of chai, which complements the coconut flavors beautifully.
If you’re looking for a unique way to serve it, pair the cake with a tropical fruit like mango or pineapple to create a colorful, refreshing dessert. The sweetness of the fruit and the stickiness of the cake create a delightful contrast that’s sure to impress.
How to Store Sticky Coconut Cake
Proper storage is essential to maintain the texture and flavor of your Sticky Coconut Cake. Since the cake is made with a dense, chewy texture, it’s important to store it in a way that keeps it firm and prevents it from becoming too soft.
Once the cake is fully cooled and chilled, transfer it to an airtight container. If you’re storing it in the fridge, it will last for up to five days. Wrap the cake in plastic wrap before placing it in the container to prevent it from drying out. For longer storage, freeze the cake by wrapping it tightly in plastic wrap and then placing it in an airtight freezer-safe container. It will keep well for up to two months.
When you’re ready to serve it again, thaw the cake at room temperature for a few hours. Avoid placing it in the microwave, as this can cause the texture to become spongy or gooey. Always slice the cake after it has fully chilled, as this makes it easier to cut and prevents the pieces from falling apart.
If you’re planning to take the cake somewhere, consider packing it in a cool bag with ice packs to keep it from melting or getting too warm before serving. If you’re making the cake ahead for a party or event, store it in the fridge until the last minute, so it remains fresh and maintains its firm, sticky texture.
FAQs
Can I make this cake without eggs?
If you want to make this cake without eggs, use a flax egg or chia seed egg. Mix 1 tablespoon of ground flaxseed or chia seeds with 3 tablespoons of water. Let the mixture sit for 10–15 minutes until it becomes gel-like. Then, use this as a substitute for the egg whites and yolks. Keep in mind that the texture may be slightly different, but it will still be tasty.
Can I use a different type of flour instead of glutinous rice flour?
Glutinous rice flour is essential for achieving the chewy texture of the cake, but you can try a combination of all-purpose flour and cornstarch to mimic the same consistency. Mix 1 cup of all-purpose flour with ¼ cup of cornstarch for a close approximation.
How long does it take for the cake to set after chilling?
The cake should be chilled in the fridge for at least 8 hours or overnight. This allows it to fully set and maintain its firm, sticky texture when cutting. If you try to cut it too soon, the slices may be too soft and prone to falling apart.
Can I add other flavors to the cake?
Yes, you can experiment with other flavors by adding a splash of lime juice, a teaspoon of coconut extract, or even a pinch of cinnamon. These additions can enhance the tropical flavor profile and give the cake a unique twist.
Is this cake suitable for gluten-free diets?
Yes, the cake is naturally gluten-free as it uses glutinous rice flour as the main flour. If you have a gluten intolerance, ensure that the coconut milk you use is also gluten-free and that all other ingredients (like vanilla extract) are free from gluten-containing additives.
Can I reheat this cake?
While it’s best served cold, you can reheat the cake if needed. Warm it in the microwave for 10–15 seconds or in the oven at a low temperature (around 200°F) for 5–10 minutes. Be careful not to overheat it, as this can make the texture too soft or spongy.
With its rich texture, chewy consistency, and natural sweetness, Sticky Coconut Cake is a dessert that’s as delightful to make as it is to eat. Whether you’re a fan of tropical treats or simply looking for a new recipe to try, this cake is a must-have in your kitchen. The unique combination of coconut milk, shredded sweetened coconut, and egg yolks creates a dessert that’s both comforting and unforgettable. So, grab your ingredients, follow the recipe, and savor the flavors of this tropical delight. You won’t be disappointed!
PrintSticky Coconut Cake

A rich, chewy tropical cake made with glutinous rice flour, coconut milk, and sweetened shredded coconut. The velvety coconut filling is topped with a glossy egg yolk glaze, creating a moist, pillowy texture perfect for any occasion. A halal-friendly, alcohol-free dessert that pairs beautifully with coffee or tea.
- Prep Time: 20
- Cook Time: 35
- Total Time: 55
- Yield: 12 slices
- Category: cakes
- Method: Baking
- Cuisine: Tropical Fusion
- Diet: Vegetarian
Ingredients
2 cups glutinous rice flour
3/4 cup packed sweetened shredded coconut
1 cup full-fat coconut milk
3 large egg yolks
1/2 cup granulated sugar
1 teaspoon vanilla extract
Pinch of salt
4 tablespoons unsalted butter, melted
2 tablespoons cornstarch
1/4 cup light brown sugar (for glaze)
1/4 teaspoon sea salt (for glaze)
Instructions
Preheat oven to 350°F (175°C) and grease a 9-inch round or square baking dish
In a large bowl, mix rice flour, sweetened shredded coconut, salt, sugar, vanilla, melted butter, and coconut milk until smooth
Spread the batter into the prepared pan and bake for 25 minutes
While baking, prepare the glaze: Whisk egg yolks, brown sugar, cornstarch, and a pinch of sea salt in a small saucepan, then cook over medium heat until thickened
Brush the glaze over the warm cake and broil for 3 minutes until the topping starts to bubble and golden
Let the cake cool completely, then refrigerate for at least 2 hours before slicing
Notes
Use a non-stick pan for easier cleaning
The cake keeps for up to 4 days in the refrigerator in an airtight container
For extra richness, add 1/4 cup toasted coconut flakes to the batter before baking