There’s something so wonderfully nostalgic about cake pops, don’t you think? For me, they always bring back memories of sunny afternoons and celebrations. I love how these little bites of happiness just brighten up any day. These Lemon Cake Pops are no exception – they’re bright, zesty, and so much fun to make and share!
Why You’ll Love These Lemon Cake Pops
- They are bursting with fresh lemon flavor that’s just perfect for spring or summer.
- The texture is incredibly moist and tender, a delightful contrast to the crisp candy coating.
- They look fancy but are surprisingly easy to make, even for beginners!
- Perfect for parties, gifts, or just a sweet treat for yourself.
Ingredients You’ll Need
- Lemon Cake Mix: This is our convenient base! You’ll also need the ingredients listed on the box, usually eggs, oil, and water.
- Unsalted Butter: Make sure it’s softened to room temperature for that perfect creamy buttercream. Unsalted butter gives you control over the saltiness.
- Lemons: We use both the juice and the zest for a double dose of bright, fresh lemon flavor.
- Confectioner’s Sugar: Also known as powdered sugar, this is key for a smooth, lump-free buttercream. Don’t try to substitute with granulated sugar!
- Whole Milk or Heavy Cream: Just a little bit helps achieve the right consistency for our buttercream. Use whole milk for richness or heavy cream for an even more luxurious feel.
- Salt: A tiny pinch really enhances all the other flavors.
- Yellow Food Coloring: This is optional, but it gives our cake pops that cheerful sunny yellow color.
- White Chocolate Chips: The base for our candy coating. High-quality chips will melt more smoothly.
How to Make Lemon Cake Pops Step by Step
First things first, we’re going to bake our lemon cake. Just follow the instructions on your cake mix box – it’s super straightforward! Once it’s baked, let it cool completely. This is important for the next step. Then, carefully trim off any stiff, caramelized edges using a sharp knife. This ensures a perfectly soft cake for our pops.
While your cake is cooling, let’s make that dreamy lemon buttercream. Grab your softened butter and beat it on medium speed for about two minutes until it’s light and fluffy. Then, add in your confectioner’s sugar, milk, fresh lemon juice, and সেই bright lemon zest! Don’t forget a tiny pinch of salt to balance everything out. If you want a sunny yellow color, now’s the time to add your food coloring and stir until you get your desired shade.
Now for the fun part – turning cake into cake pops! Crumble your cooled cake into a large bowl. You can use your hands or a mixer for this. Then, start adding the lemon buttercream, about ¼ cup at a time. Mix it in thoroughly after each addition. The goal is to get a slightly doughy mixture that holds together when you roll it into a ball. Don’t worry if it seems a little crumbly at first; just keep adding buttercream until it’s just right. Once you have your perfect mixture, roll about 2 tablespoons of it into individual balls – you should get around 12. Pop these on a baking sheet and into the fridge for about two hours. This chilling step is crucial for firm cake pops!
My Top Tips for Success
- I always make sure my cake is completely cool before crumbling; warm cake will make a messy mixture.
- In my experience, chilling the cake balls for the full two hours really helps them hold their shape and prevents them from falling apart when dipping.
- Trust me on this one: melt your white chocolate slowly and carefully. Overheating can make it seize up and become unusable.
- When dipping, tap off the excess coating gently. Too much coating can make your cake pops too thick and heavy.
- For easy decorating, have your sprinkles or garnishes ready to go before you start dipping, as the chocolate sets quickly.
Common Mistakes to Avoid
- Not cooling the cake completely: If the cake is warm, it will make the mixture greasy and hard to roll. Always let it cool fully.
- Adding too much buttercream: This can make your cake pops too soft and sticky, causing them to fall off the sticks. Add it gradually until the mixture just holds together.
- Not chilling the cake balls enough: If the balls aren’t firm, they can break apart when dipped. Ensure they are well-chilled for at least two hours.
- Overheating the white chocolate: This will make the chocolate thick and clumpy. Melt it in short bursts at 50% power, stirring frequently, until just smooth.
- Dipping too quickly: Dip the cake pop smoothly and gently, then let any excess coating drip off before decorating. Rushing can lead to uneven coating.
How to Store Lemon Cake Pops
- Countertop: In an airtight container, they’ll last for 2-3 days. Ideal for immediate enjoyment!
- Refrigerator: Store in an airtight container for up to 1 week. This is best for longer freshness, especially if your kitchen is warm.
Frequently Asked Questions
How do I prevent my cake pops from falling off the stick?
Make sure your cake balls are thoroughly chilled and firm. Also, dip the lollipop stick into the melted chocolate first before inserting it halfway into the cake ball; this acts as a “glue.”
Can I make these with a different cake flavor?
Absolutely! This recipe is a great base. Feel free to use any flavor of cake mix and adjust the buttercream flavor to match. Chocolate cake pops with chocolate buttercream are always a hit!
Why is my chocolate coating too thick?
The chocolate might be too hot or you might have used a type not ideal for melting. Try adding a tiny bit of vegetable oil or shortening (about ½ teaspoon) to thin it out, or ensure you’re melting it slowly at a lower temperature.
Can I freeze cake pops?
Yes, you can freeze undecorated cake balls for up to 1 month in an airtight container. Thaw them in the refrigerator before dipping. Frosted and decorated cake pops can also be frozen, but the coating might sweat a bit when thawing.
There you have it – a simple, delicious, and absolutely delightful recipe for Lemon Cake Pops! I truly hope these bring a little burst of sunshine to your day. If you give them a try, please let me know how they turn out!
PrintLemon Cake Pops
These delightful Lemon Cake Pops are moist, zesty, and coated in a sweet candy shell, perfect for any celebration or a fun treat.
- Prep Time: 30
- Cook Time: 30
- Total Time: 180
- Yield: 12 cake pops
- Category: Dessert
- Method: Baking
- Cuisine: American
- Diet: Vegetarian
Ingredients
- 1 box lemon cake mix (and required ingredients)
- 1 stick unsalted butter (softened to room temperature)
- 3 Tablespoons lemons
- 4½ Cups Confectioner's sugar (powdered sugar)
- 1½ Tablespoons Whole milk or heavy cream
- lemon zest of two lemons
- salt (to season)
- yellow food coloring
- 12 ounces white chocolate chips
Instructions
- Prepare the lemon cake mix according to the package instructions.
- Bake the lemon cake as directed.
- Allow the baked cake to cool completely.
- Once cool, use a sharp knife to remove the stiff caramelized edges from the cake.
- Place the softened unsalted butter into a bowl.
- Use a hand-mixer or stand mixer to cream the butter at medium speed for about two minutes until light and fluffy.
- Add the confectioner's sugar to the creamed butter.
- Add the milk or heavy cream to the butter mixture.
- Add the lemon juice to the mixture.
- Add the lemon zest to the mixture.
- Add a pinch of salt to taste.
- Add yellow food coloring, starting with a small amount, and stir until you achieve your desired shade.
- Place the cooled cake into a large mixing bowl.
- Use your hands or a mixer to crumble the cake into small, fine crumbs.
- Add ¼ cup of the prepared lemon buttercream to the cake crumbs.
- Stir the buttercream into the crumbs until well coated.
- Add another ¼ cup of lemon buttercream to the mixture.
- Continue adding buttercream ¼ cup at a time, stirring after each addition, until you achieve a slightly doughy mixture that holds together when rolled into a ball.
- Take about 2 tablespoons of the lemon cake pop mixture.
- Roll the mixture into a smooth ball.
- Repeat for the remaining mixture to create approximately 12 cake balls.
- Place the rolled cake balls onto a baking sheet.
- Refrigerate the cake balls for about 2 hours to firm up.
- Place the white chocolate chips into a small microwave-safe bowl.
- Melt the white chocolate chips in the microwave at 50% power for 1 minute.
- Stir the melted chocolate.
- Continue heating in 30-second increments at 50% power, stirring after each, until the chips are just melted and smooth.
- Add yellow food coloring to the melted white chocolate, if desired, and stir until you achieve your preferred shade.
- Dip one end of a lollipop stick into the melted white chocolate.
- Insert the chocolate-dipped stick about halfway into a chilled cake ball.
- Repeat for all cake balls, allowing the chocolate on the sticks to set slightly.
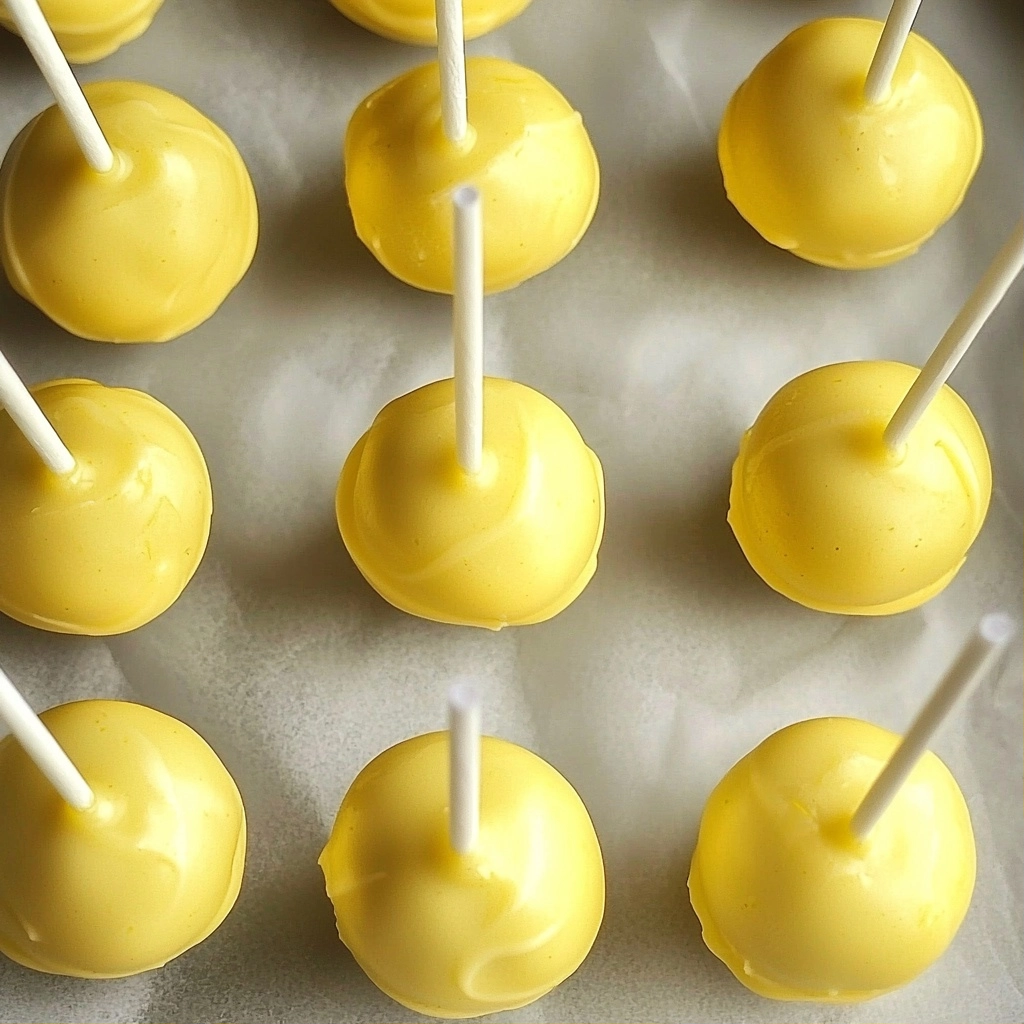
- Carefully dip each cake pop into the melted chocolate coating.
- Gently shake off any excess coating.
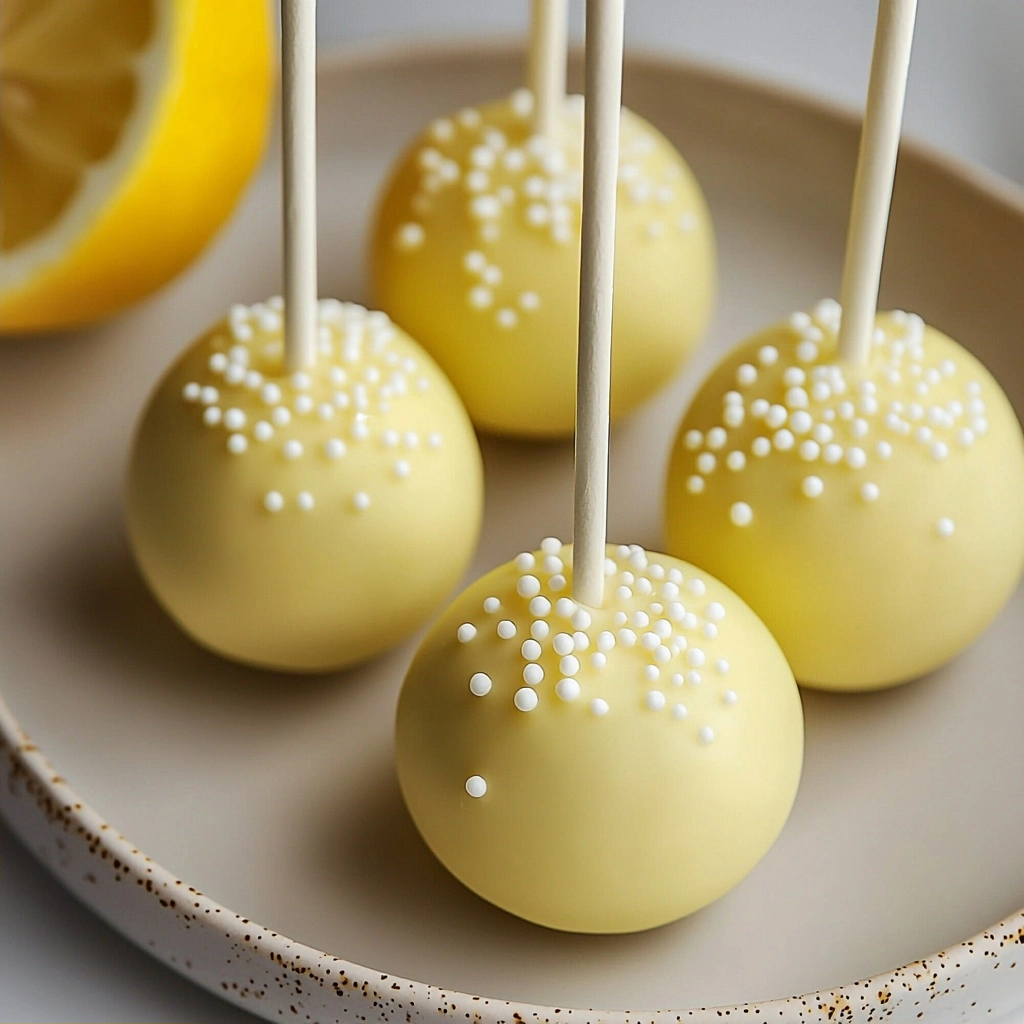
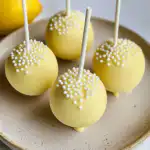
- Decorate the cake pops immediately with garnishes such as sprinkles, dried lavender, or edible glitter.
- Place the decorated cake pops into a block of Styrofoam or a piece of punctuated cardboard to cool and set completely.
Notes
Ensure cake is completely cool before crumbling for best texture.
Chill cake balls for at least 2 hours; this is crucial for firm pops.
Melt white chocolate slowly in short bursts to prevent seizing.
Have garnishes ready as chocolate sets quickly.