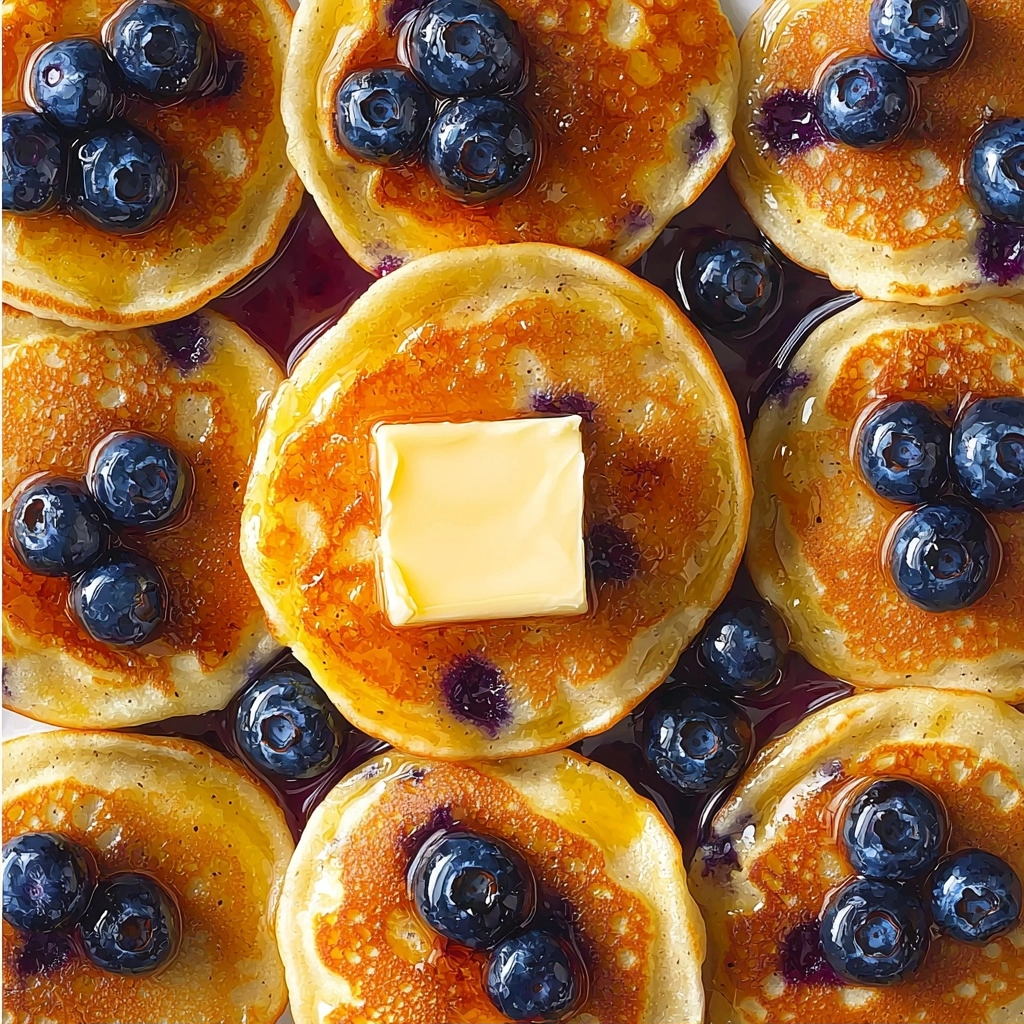
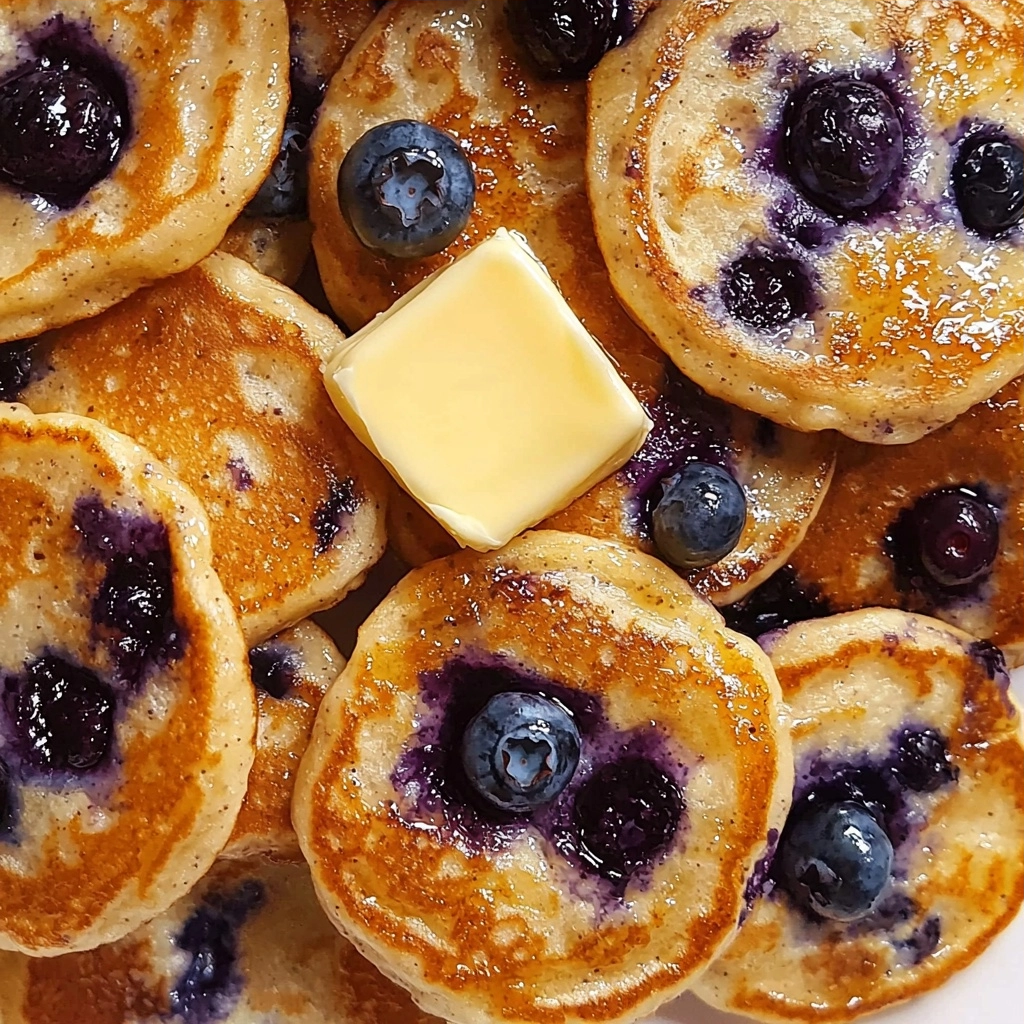
Oh, these pancakes! They bring me right back to lazy weekend mornings, trying to find a way to make breakfast feel special AND fuel my day. I played around in the kitchen for ages, wanting something fluffy and satisfying that didn’t leave me feeling sluggish. That’s how I landed on these amazing Vegan Protein Pancakes. They’re such a simple way to start your day feeling nourished and happy. Trust me, once you try them, you’ll be hooked!
Why You’ll Love This Vegan Protein Pancakes
- They’re incredibly fluffy, just like traditional pancakes, but totally vegan!
- So easy to make, even on a busy weekday morning.
- Packed with protein to keep you full and energized.
- Perfect for a cozy breakfast or a post-workout treat.
Ingredients You’ll Need
- Flour: You’ve got options here! I’ve had great success with spelt, white all-purpose, gluten-free all-purpose, or even oat flour. Feel free to experiment with what you have on hand.
- Protein Powder: This is key for that protein boost! Different brands might absorb liquid differently, so keep an eye on your batter consistency.
- Baking Powder: This little hero is what gives our pancakes that lovely lift and fluffiness. Don’t skip it!
- Milk of Choice or Water: Almond, soy, oat milk—whatever plant-based milk you prefer works beautifully. You can even use water if that’s what you have.
- Oil or Nut Butter: A small amount adds richness and helps with that golden-brown finish. If you’re looking for a fat-free option, you can absolutely leave it out.
- Sugar or Sweetener of Choice: Just a touch of sweetness makes these feel like a real treat. You can adjust it to your liking, or even omit it if you’re going for a savory pancake!
How to Make Vegan Protein Pancakes Step by Step
First things first, let’s get our dry ingredients ready. Grab a medium-sized bowl and add your flour, protein powder, baking powder, and a tiny pinch of salt. Give them a good whisk together. You want to make sure everything is evenly combined before we add the wet ingredients.
Now for the wet ingredients! Pour in your milk (or water), oil (or nut butter), and your chosen sweetener. Stir everything gently until it just comes together. Don’t worry if there are a few small lumps; overmixing can make pancakes tough. You’re looking for a smooth, pourable batter. If it seems too thick, just add a tiny splash more liquid until it’s just right. This is where the magic happens for really fluffy pancakes: let your batter sit for about 10 minutes. This allows the baking powder to activate and the flour to hydrate.
While your batter rests, get your skillet ready. Grease a nonstick skillet really well. You want to make sure your pancakes don’t stick! Place it over medium heat. To test if it’s hot enough, drop a tiny bit of water onto the pan – if it sizzles merrily, you’re good to go! Once hot, use a ladle to drop small amounts of batter onto the pan. Smaller pancakes cook more evenly. Immediately turn the heat down to low. This helps them cook through without burning. When you see the edges start to look dry and little bubbles appear on top, it’s time to flip! Cook for another minute or so until golden brown. Remember to re-grease your skillet after each batch to ensure every pancake is perfect.
My Top Tips for Success
- I always make sure my pan is properly heated before adding batter. It makes all the difference for a good golden crust.
- Trust me on this one: don’t skip letting the batter rest for 10 minutes. It makes these pancakes so much fluffier!
- In my experience, cooking on low heat after the initial sizzle prevents burnt outsides and raw insides.
- I find that making smaller pancakes is easier to manage and they cook more evenly.
- Always re-grease the pan between batches. It keeps them from sticking!
Common Mistakes to Avoid
- Overmixing the Batter: When you mix too much, you develop the gluten in the flour, leading to tough, chewy pancakes instead of light and fluffy ones. Mix until just combined.
- Not Letting Batter Rest: Skipping the 10-minute rest means your baking powder won’t fully activate, and the flour won’t fully hydrate, resulting in flatter pancakes. Patience makes fluffier pancakes!
- Pan Not Hot Enough: If your pan isn’t hot enough, the pancakes will spread out too much and won’t get that lovely golden-brown crust. Test with a drop of water.
- Pan Too Hot: A pan that’s too hot will burn the outside of your pancakes before the inside has a chance to cook through. Turn the heat down to low after adding the batter.
- Not Greasing Pan Between Batches: This is a common culprit for sticky pancakes! Re-greasing ensures each pancake slides off easily.
How to Store Vegan Protein Pancakes
- Refrigerator: Up to 3-4 days in an airtight container.
- Freezer: Up to 2-3 months. Place cooled pancakes in a single layer on a baking sheet to freeze, then transfer to a freezer-safe bag with parchment paper between them to prevent sticking.
Frequently Asked Questions
Can I make these gluten-free?
Yes, absolutely! This recipe works beautifully with gluten-free all-purpose flour. Just make sure your protein powder is also gluten-free if that’s a concern.
What kind of protein powder should I use?
I typically use a plant-based protein powder like pea or soy protein. Different brands can absorb liquid differently, so you might need to adjust the milk slightly.
Can I prepare the batter ahead of time?
While you can mix the dry ingredients ahead, I recommend adding the wet ingredients just before cooking. The baking powder works best when activated right before it hits the pan.
How do I know when to flip the pancakes?
Look for bubbles forming on the surface and the edges starting to look dry. That’s your cue! They should easily release from the pan with a spatula.
Can I add mix-ins to the batter?
Definitely! Blueberries, chocolate chips, or chopped nuts are all great additions. Just stir them in gently after the batter has rested.
I hope these Vegan Protein Pancakes become a new favorite in your kitchen, just like they are in mine. They’re such a delicious and nourishing way to start your day! If you try them, I’d love to hear how they turn out for you!