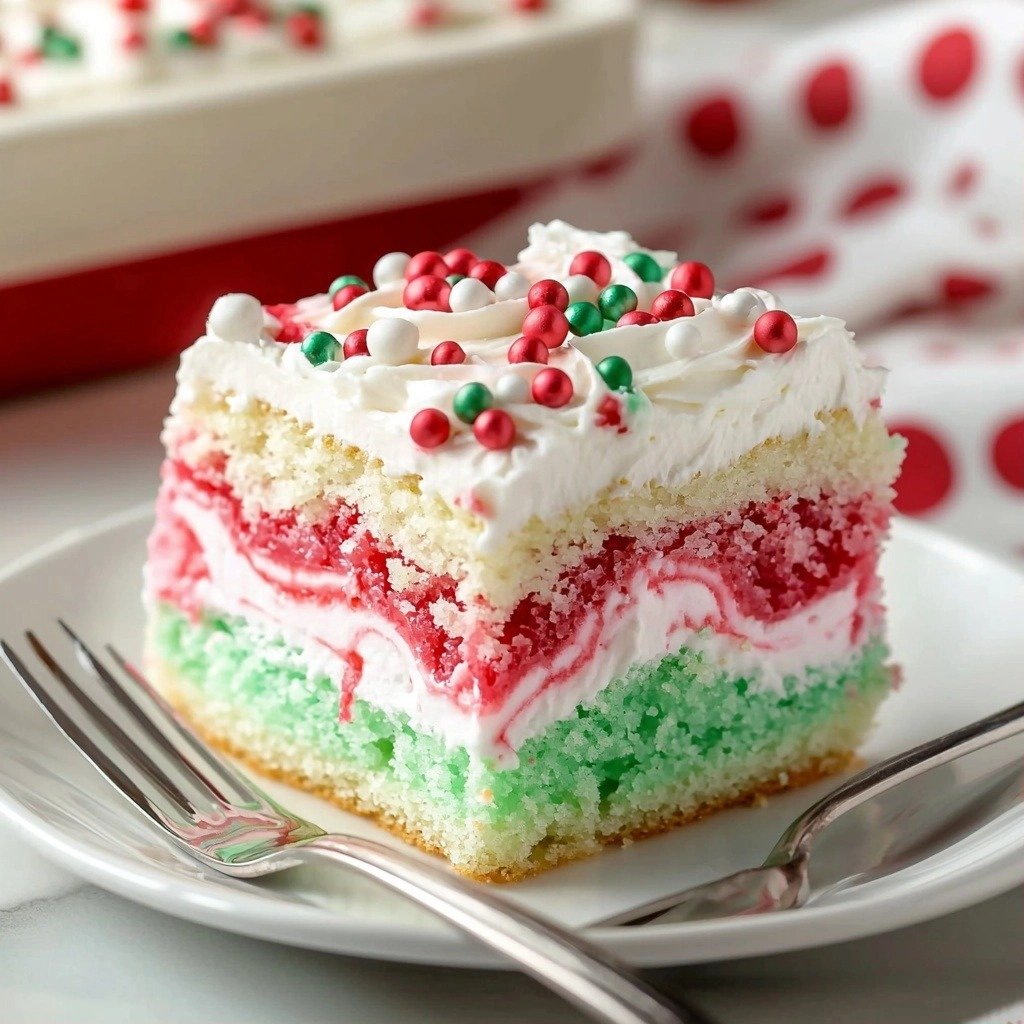
Christmas is my absolute favorite time of year for baking. There’s just something magical about whipping up treats that bring a smile to everyone’s face! This year, I wanted something vibrant, fun, and totally festive, and that’s how this gorgeous Christmas Jello Poke Cake came to be. It’s so easy to make, and it truly brightens up any holiday table. Plus, it’s a total crowd-pleaser!
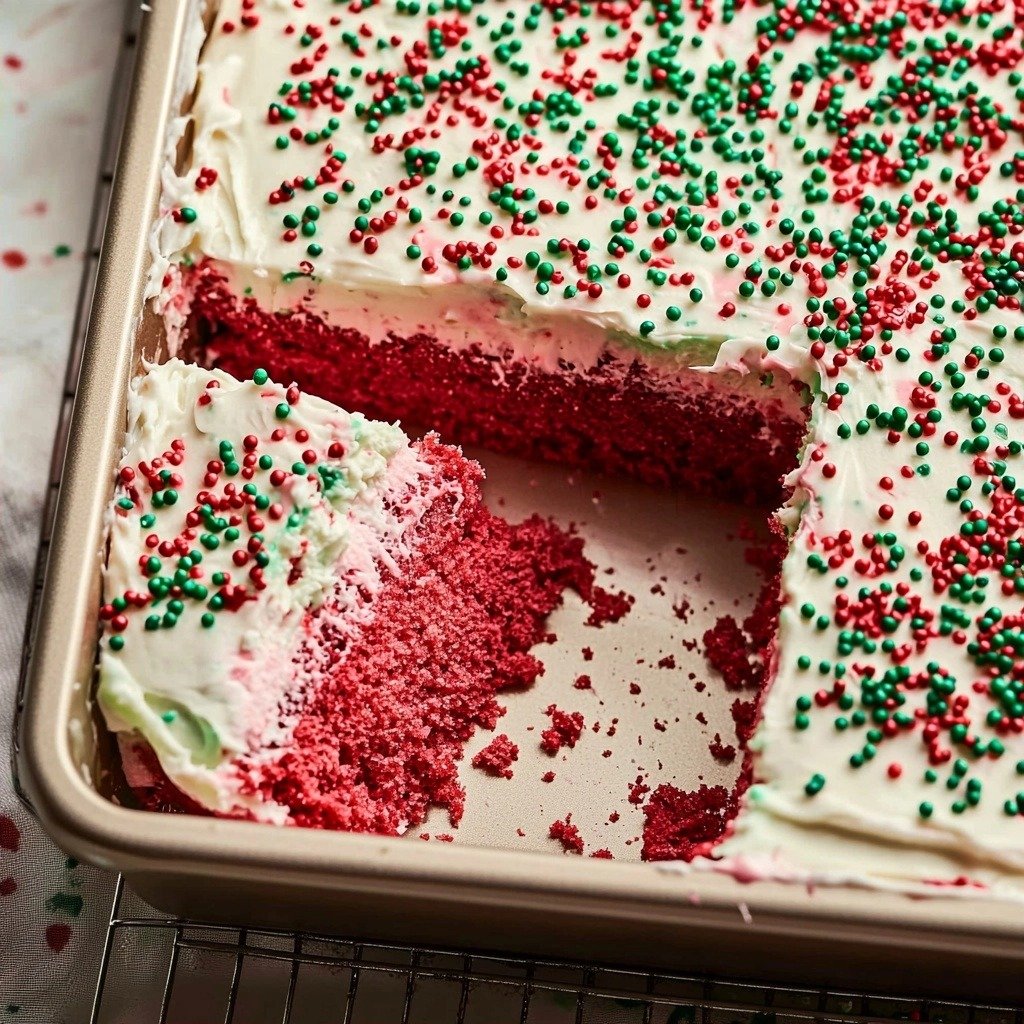
Why You’ll Love This Christmas Jello Poke Cake
- It’s incredibly festive with those bright red and green colors.
- The cake is super moist and flavorful, thanks to the Jell-O soaking in.
- It’s surprisingly easy to make, even for beginner bakers.
- Perfect for holiday parties or a simple family dessert!
Ingredients You’ll Need
- White Cake Mix: This is our delicious base! Just use whatever brand you love, and follow the box instructions for the additional ingredients like eggs and oil. You can totally use your favorite from-scratch recipe too, if you prefer.
- Lime Jell-O & Cherry Jell-O: These are what give our cake its signature festive colors and fruity flavor. We’ll be using a little less cold water than the package suggests to make the Jell-O a bit more concentrated and vibrant.
- Cool Whip: This makes for an airy, creamy topping that perfectly complements the cake. Make sure it’s thawed before you use it! If you’re feeling fancy, homemade whipped cream works wonderfully too.
- Red and Green Sprinkles: These are essential for that extra touch of holiday cheer!
How to Make Christmas Jello Poke Cake Step by Step
First things first, let’s get our cake baking! You’ll want to prepare your favorite white cake mix according to the package directions. Bake it in a greased 9×13 inch pan. Once it’s out of the oven, let it cool down for about 20 minutes. This little cooling period is important before the next step.
Now, for the fun part – poking holes! Grab a straw or even the handle of a small wooden spoon and poke holes all over the surface of the cake. Don’t be shy here; you want lots of little pockets for that Jell-O to seep into. This is where the magic happens, giving the cake its beautiful colors and moist texture.
Next, prepare your Jell-O. For each box, you’ll mix it with 1 cup of boiling water until dissolved, then add 1/2 cup of cold water. This is a bit less cold water than the package calls for, making the colors more intense. Carefully pour or spoon the green Jell-O over one portion of the cake, making sure it gets into all those lovely holes. Then do the same with the red Jell-O on the other portion. Don’t worry if it looks a little messy at first; it will all soak in! Pop the cake into the fridge for at least 6 hours, or ideally overnight, to let that Jell-O really set up inside.
My Top Tips for Success
- I always make sure my Cool Whip is fully thawed. It makes it so much easier to spread smoothly without tearing the cake.
- In my experience, letting the cake cool for the full 20 minutes before poking holes prevents it from crumbling too much.
- Trust me on this one: chilling the cake overnight really makes a difference. The Jell-O sets perfectly, and the flavors meld beautifully.
- Don’t be afraid to poke lots of holes! The more holes, the more Jell-O soaks in, and the more vibrant your cake will be.
- Use a spoon to drizzle the Jell-O over the holes, rather than pouring directly from the bowl. This gives you more control.
Common Mistakes to Avoid
- Not cooling the cake enough: If you poke holes and add Jell-O to a very hot cake, it can make the cake fall apart or the Jell-O won’t set properly. Always let it cool for at least 20 minutes.
- Using too much cold water for the Jell-O: The recipe specifically calls for less cold water than the package. Using the package amount will result in less vibrant colors and a less firm Jell-O in the cake.
- Not chilling long enough: If you cut into the cake before the Jell-O has had at least 6 hours (ideally overnight) to set, it will be runny and messy. Patience is key here!
How to Store Christmas Jello Poke Cake
- Refrigerated: Up to 3-4 days. Cover loosely with plastic wrap to prevent drying out.
Frequently Asked Questions
Can I use a homemade white cake recipe?
Absolutely! If you have a favorite from-scratch white cake recipe, feel free to use it. Just make sure it bakes into a 9×13 inch pan.
What if I don’t have a straw for poking holes?
No problem at all! The handle of a small wooden spoon, a skewer, or even a chopstick works perfectly for poking the holes.
Can I use different Jell-O flavors?
You definitely can! While cherry and lime give it that classic Christmas look, feel free to experiment with other festive colors or flavors you enjoy.
Do I have to use Cool Whip?
You don’t have to, but it’s very convenient! If you prefer, you can make your own homemade whipped cream for the topping. Just make sure it’s stabilized if you need it to hold up for a longer period.
I truly hope this Christmas Jello Poke Cake brings a little extra cheer and deliciousness to your holiday season! It’s such a simple way to add a burst of festive color and flavor to any gathering. If you make it, please let me know how it turns out!
PrintChristmas Jello Poke Cake
A festive and fun poke cake featuring vibrant red cherry and green lime Jell-O, topped with creamy Cool Whip and holiday sprinkles.
- Prep Time: 20
- Cook Time: 30
- Total Time: 390
- Yield: 12-16 servings
- Category: Dessert
- Method: Baking
- Cuisine: American
Ingredients
- 15 ounce box white cake mix + ingredients to make it (such as eggs, oil, etc – whatever it lists on the box)
- 3 ounce box Lime Jell-O
- 3 ounce box Cherry Jell-O
- 8 ounce tub Cool Whip, thawed
- red and green sprinkles
Instructions
- Prepare white cake mix according to package directions.
- Bake the cake in a greased 9×13 inch pan.
- Allow the baked cake to cool for about 20 minutes.
- Using a straw or the handle of a small wooden spoon, poke holes all over the surface of the cake.
- Prepare the Lime Jell-O by dissolving it in 1 cup of boiling water, then stirring in 1/2 cup of cold water.
- Prepare the Cherry Jell-O by dissolving it in 1 cup of boiling water, then stirring in 1/2 cup of cold water.
- Carefully pour or spoon the green Jell-O over one portion of the cake, ensuring the liquid gets into the holes.
- Carefully pour or spoon the red Jell-O over the other portion of the cake, ensuring the liquid gets into the holes.
- Refrigerate the cake for at least 6 hours or ideally overnight to allow the Jell-O to set.
- Spread the thawed Cool Whip evenly over the top of the chilled cake.
- Add red and green holiday sprinkles on top.
- Cut into squares and serve.
Notes
Ensure Cool Whip is fully thawed for easy spreading.
Cool the cake for at least 20 minutes before poking holes to prevent crumbling.
Chilling the cake overnight allows the Jell-O to set perfectly for best results.
Poke plenty of holes for maximum Jell-O saturation and vibrant colors.