There’s just something about Christmas that brings out my inner baker, and this year, I’m absolutely smitten with a classic that gets a festive makeover. Every holiday season, I find myself reaching for comforting, joyful recipes that are as much about making memories as they are about delicious treats. This year, it’s all about this incredible Christmas Rocky Road!
Why You’ll Love This Christmas Rocky Road
- It’s bursting with festive flavors and textures – sweet, chewy, crunchy, and chocolatey!
- So incredibly easy to make, even for beginners. No baking required!
- Perfect for holiday gifting or serving at your Christmas gatherings.
- It’s a beautiful, colorful treat that looks impressive but takes minimal effort.
Ingredients You’ll Need
- Milk Chocolate & Dark Chocolate: We use a blend for the perfect balance of richness and sweetness. Make sure to chop them into even pieces so they melt smoothly.
- Desiccated Coconut: This adds a lovely tropical hint and texture.
- White Marshmallows: Quartering them ensures they’re evenly distributed throughout the rocky road, giving you a soft, chewy bite in every piece.
- Pistachios: Unsalted and shelled, these add a beautiful green color and a fantastic crunch.
- Glacé/Candied Red Cherries: These are the stars of the Christmas colors, adding a lovely chewiness and a pop of festive red. Halving them helps spread the color and flavor.
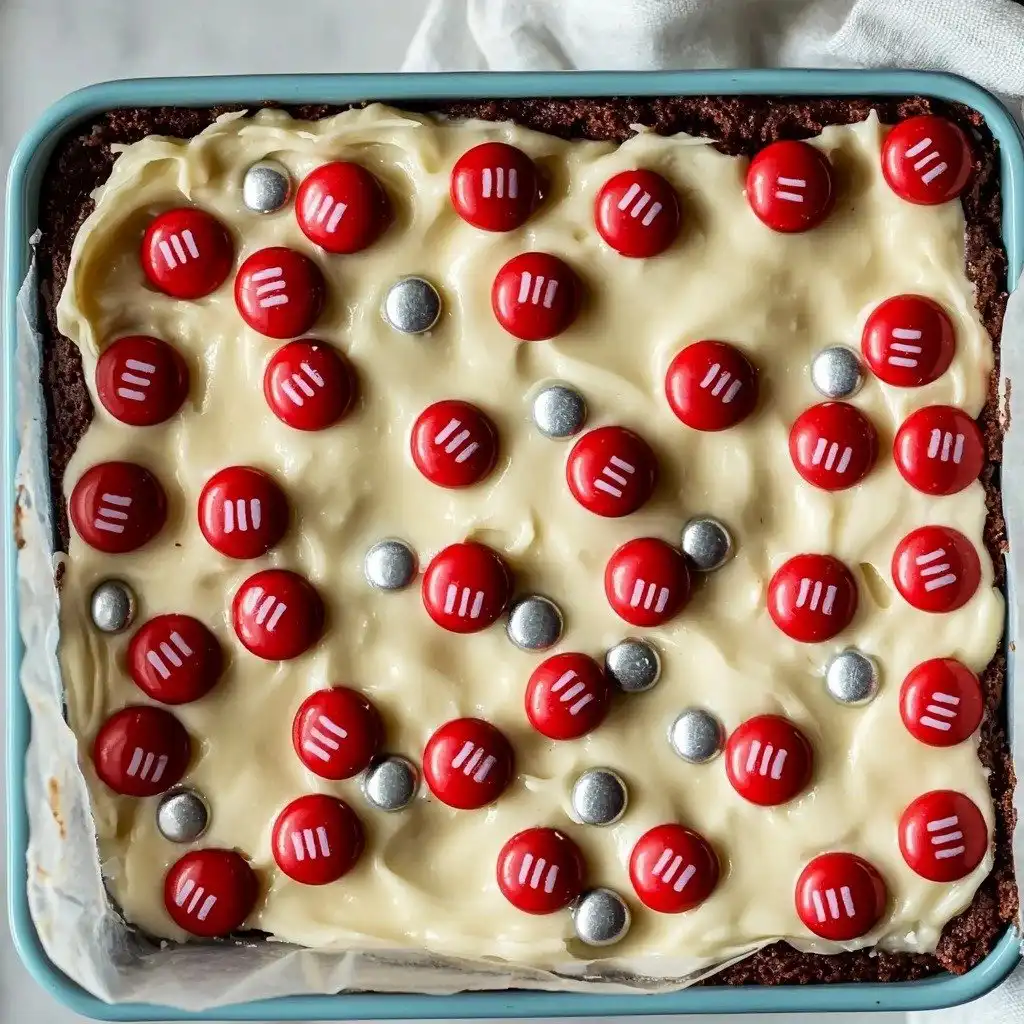
- White Chocolate: For the beautiful contrasting topping.
- Red M&M’s: Or any other small red candy you love for that extra festive touch.
- Silver Cachous: These are the little silver balls that add a touch of sparkle and magic!
How to Make Christmas Rocky Road Step by Step
First things first, let’s get our tin ready. Grab an 18 cm x 13 cm (7 inch x 5 inch) slice tin and line it with baking paper. This makes it super easy to lift out your rocky road later!
Now, in a big bowl, combine your desiccated coconut, those quartered marshmallows, the pistachios, and the halved cherries. This is where all the good stuff comes together before the chocolate joins the party.
Time for the chocolate magic! Gently melt your milk and dark chocolate. The best way is to use a bain-marie or a double boiler – that’s just a fancy way of saying a heatproof bowl set over a pan of barely simmering water. Make sure the bowl doesn’t touch the water, okay? Stir it with a metal spoon or spatula until it’s almost completely melted. Then, take it off the heat; the residual warmth will melt those last few stubborn pieces. Let it cool for just a couple of minutes – don’t worry if it’s still warm, we just don’t want it piping hot.
Once your chocolate has cooled slightly, pour it over the mixture in your bowl. Stir everything really well, making sure every marshmallow, every bit of coconut, and every cherry is coated in that gorgeous chocolate. Then, pour this delicious mixture into your prepared tin and press it down firmly and evenly with a spatula or the back of a spoon. Pop it into the fridge for 30 minutes to firm up a bit.
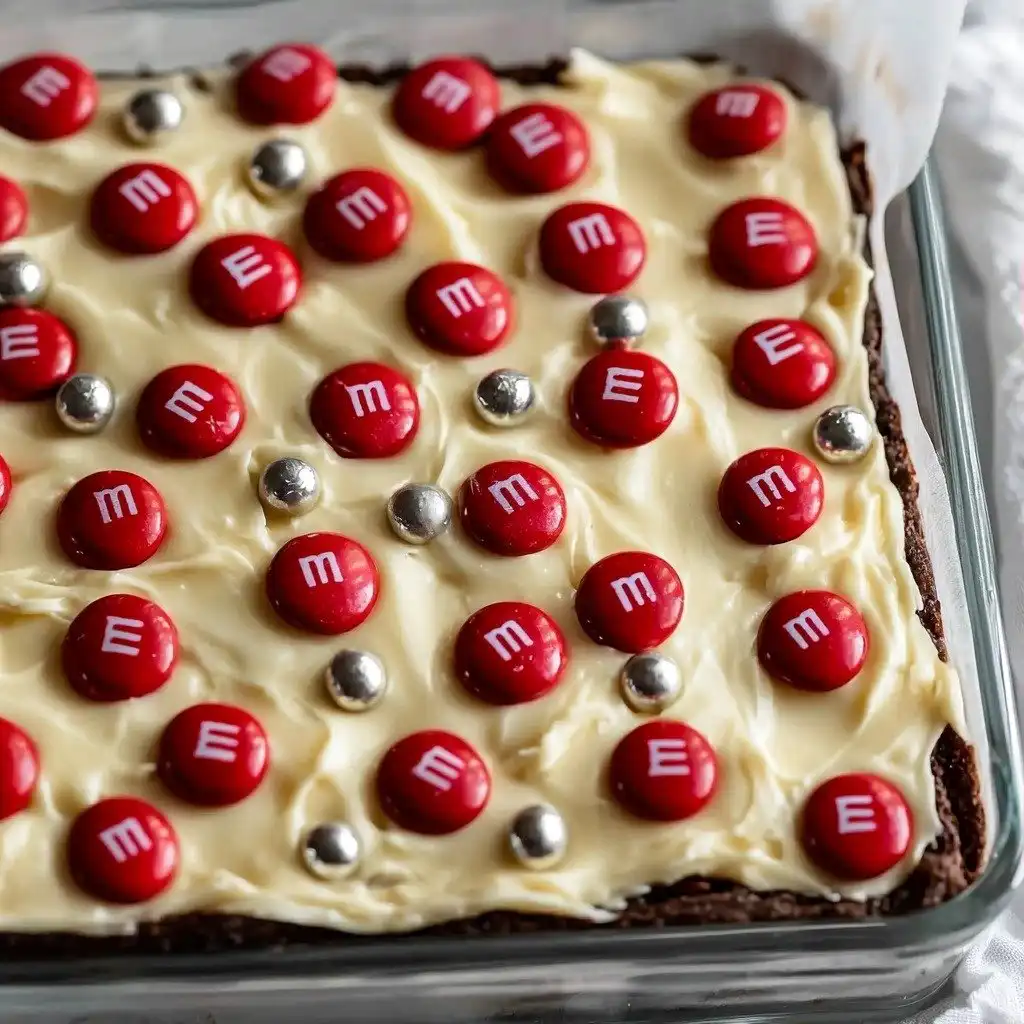
While that’s chilling, melt your white chocolate in a clean bowl. After 30 minutes, pull your rocky road out of the fridge, drizzle it with the melted white chocolate, and then quickly decorate with your red M&M’s and those lovely silver cachous. Back into the fridge it goes for at least 2 hours, or until it’s completely set. When you’re ready to cut, a warm, sharp knife works wonders. I always take it out of the fridge for 15-30 minutes beforehand – trust me, it makes cutting so much easier!
My Top Tips for Success
- I always chop my chocolate into small, even pieces. This helps it melt smoothly and prevents any burnt bits.
- In my experience, using a double boiler for melting chocolate prevents it from seizing or burning. Low and slow is the way to go!
- Trust me on this one: let the melted chocolate cool slightly before mixing it with the other ingredients. This stops the marshmallows from melting too much.
- Don’t skip lining your tin with baking paper. It makes removing and cutting the rocky road a breeze.
- For clean cuts, warm your knife under hot water, wipe it dry, and then slice. Re-warm and wipe as needed!
Common Mistakes to Avoid
- Overheating the chocolate: This can make your chocolate seize or become grainy. Melt it gently over simmering water, never boiling, and remove it once almost melted.
- Mixing warm chocolate with marshmallows: This will melt your marshmallows, creating a sticky mess instead of distinct chewy pieces. Always let the chocolate cool slightly first.
- Not pressing the mixture firmly: If you don’t press it down well, your rocky road might crumble when you cut it. Use a spatula to compact it evenly.
- Cutting cold rocky road: Trying to cut it straight from the fridge can lead to cracked chocolate and uneven pieces. Let it sit out for a bit to soften slightly before cutting.
How to Store Christmas Rocky Road
- Refrigerator: Store in an airtight container in the fridge for up to 2 weeks.
Can I use different types of chocolate?
Yes, you can absolutely adjust the chocolate types! You could use all milk chocolate, all dark chocolate, or even a mix of white and milk chocolate for the base. Just make sure the total quantity remains the same.
What if I don’t have glacé cherries?
No problem! You can substitute them with other dried fruits like cranberries, sultanas, or even candied orange peel. Just keep the quantity similar for the best texture.
Can I add other mix-ins?
Of course! Rocky road is very forgiving. Feel free to add other nuts, small biscuits, or even some small pretzels for a salty crunch. Just be mindful not to add too many, or it might not hold together.
How do I prevent the chocolate from seizing?
The key is gentle heat and avoiding any water getting into your chocolate. Use a double boiler, ensure the bowl doesn’t touch the water, and stir gently. If it does seize, sometimes adding a teaspoon of vegetable oil can help smooth it out.
I really hope this Christmas Rocky Road brings a little extra sparkle and joy to your holiday season! It’s such a simple treat but always a huge hit. If you make it, I’d absolutely love to hear how it turned out and what festive touches you added!
PrintChristmas Rocky Road

A festive, no-bake treat packed with chocolate, marshmallows, pistachios, and cherries, topped with white chocolate and sprinkles.
- Prep Time: 15
- Cook Time: 5
- Total Time: 150
- Yield: 10 pieces
- Category: Dessert
- Method: No-Bake
- Cuisine: American
- Diet: Vegetarian
Ingredients
- 200 g (7 oz) milk chocolate – cut into even pieces
- 100 g (3.5 oz) dark chocolate – cut into even pieces
- 20 g (¼ cup) desiccated coconut
- 80 g (1 cup) white marshmallows – quartered
- 45 g (⅓ cup) pistachios – unsalted/shells removed
- 100 g (½ cup) glacé/candied red cherries – halved
- 100 g (3.5 oz) white chocolate
- 2 tablespoon red m&m's – or other candy
- 1 teaspoon silver cachous
Instructions
- Line an 18 cm x 13 cm (7 inch x 5 inch) slice tin with baking paper.
- Place the desiccated coconut, quartered marshmallows, pistachios, and halved cherries in a bowl.
- Prepare a bain-marie or double boiler by placing a heatproof bowl over a pan of barely simmering water, ensuring the bowl does not touch the water.
- Add the chopped milk and dark chocolate pieces to the heatproof bowl.
- Stir the chocolate with a metal spoon or spatula until it has almost melted.
- Remove the bowl from the heat and let the residual heat melt the remaining chocolate.
- Allow the melted chocolate to cool for a couple of minutes.
- Pour the slightly cooled melted chocolate into the bowl with the marshmallows, coconut, pistachios, and cherries.
- Stir well until all ingredients are completely covered in chocolate.
- Pour the mixture into the prepared tin.
- Flatten the mixture down evenly with a spatula or metal spoon.
- Place the tin in the refrigerator for 30 minutes.
- In a clean bowl, melt the white chocolate.
- Remove the rocky road from the fridge.
- Drizzle the melted white chocolate over the slightly chilled rocky road.
- Decorate immediately with red M&M's and silver cachous.
- Place the rocky road back in the fridge for 2 hours or until fully set.
- Take the rocky road out of the fridge and let it sit at room temperature for 15-30 minutes before cutting.
- Using a warm, sharp knife, cut the rocky road into 10 pieces.
Notes
Chop chocolates into small, even pieces for smooth melting.
Do not overheat chocolate; melt gently over simmering water.
Allow melted chocolate to cool slightly before mixing with marshmallows to prevent melting.
Warm your knife under hot water and wipe dry for clean cuts.