There’s something so magical about the holidays, isn’t there? For me, it’s all about creating those little moments of joy, especially in the kitchen. My kids absolutely light up when we make these Pocky Christmas Trees. They’re so simple to put together, but they look incredibly festive and are always a huge hit at our holiday gatherings. It’s become a sweet, easy tradition we all look forward to!
Why You’ll Love These Pocky Christmas Trees
- They’re super quick to make – perfect for a last-minute treat or a fun activity with kids.
- No baking required! Just melt, drizzle, and decorate.
- You get that satisfying crunch from the Pocky stick with rich, decadent chocolate.
- They’re absolutely adorable and will bring a festive sparkle to any holiday table.
Ingredients You’ll Need
- Pocky: These are the star of the show! You’ll find them in the international aisle of most grocery stores. They come in many flavors, but the classic chocolate-covered biscuit stick works best here.
- Dark Ghirardelli melting wafers: These are fantastic because they melt smoothly and set up beautifully without needing tempering. Look for them in the baking aisle. You could use other melting wafers, but I find these give the best results.
- Small colorful sprinkles: These add that essential festive sparkle! Use whatever colors make you happy.
- Star Sprinkle: A must-have for the top of your Christmas tree!
How to Make Pocky Christmas Trees Step by Step
Making these Pocky Christmas Trees is truly one of the easiest and most fun holiday projects you can do! First, grab a sheet of wax paper and lay out your Pocky sticks. This will be your workspace, and the wax paper makes for easy cleanup and removal once they’re dry. Make sure they’re spaced out a bit so you have room to decorate.
Next, it’s time for the chocolate magic! You’ll want to melt your Ghirardelli melting wafers according to the package directions. This usually involves microwaving them in short intervals, stirring often, until they’re smooth and creamy. Don’t worry if it seems a little thick at first; just keep stirring gently until it’s completely melted. Once melted, carefully spoon the chocolate into a sandwich baggie. This is where the decorating fun begins!
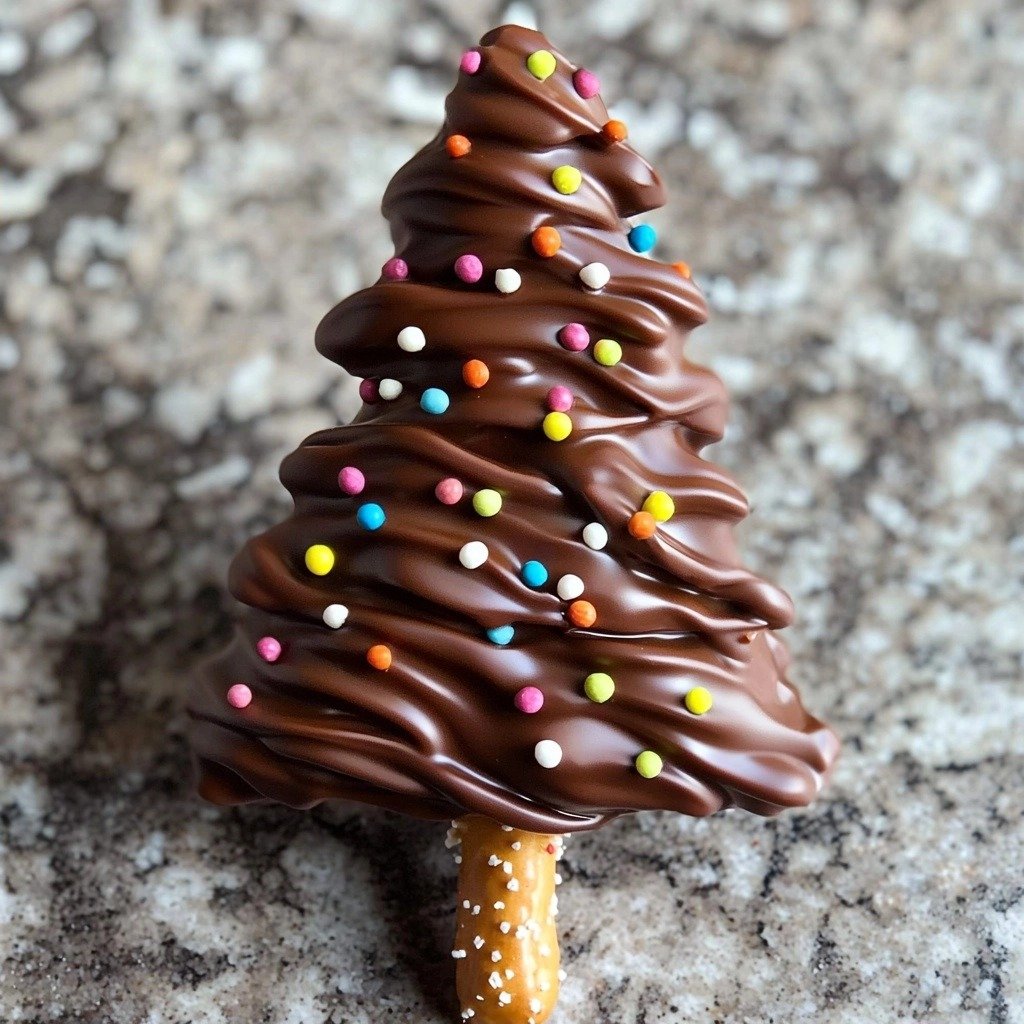
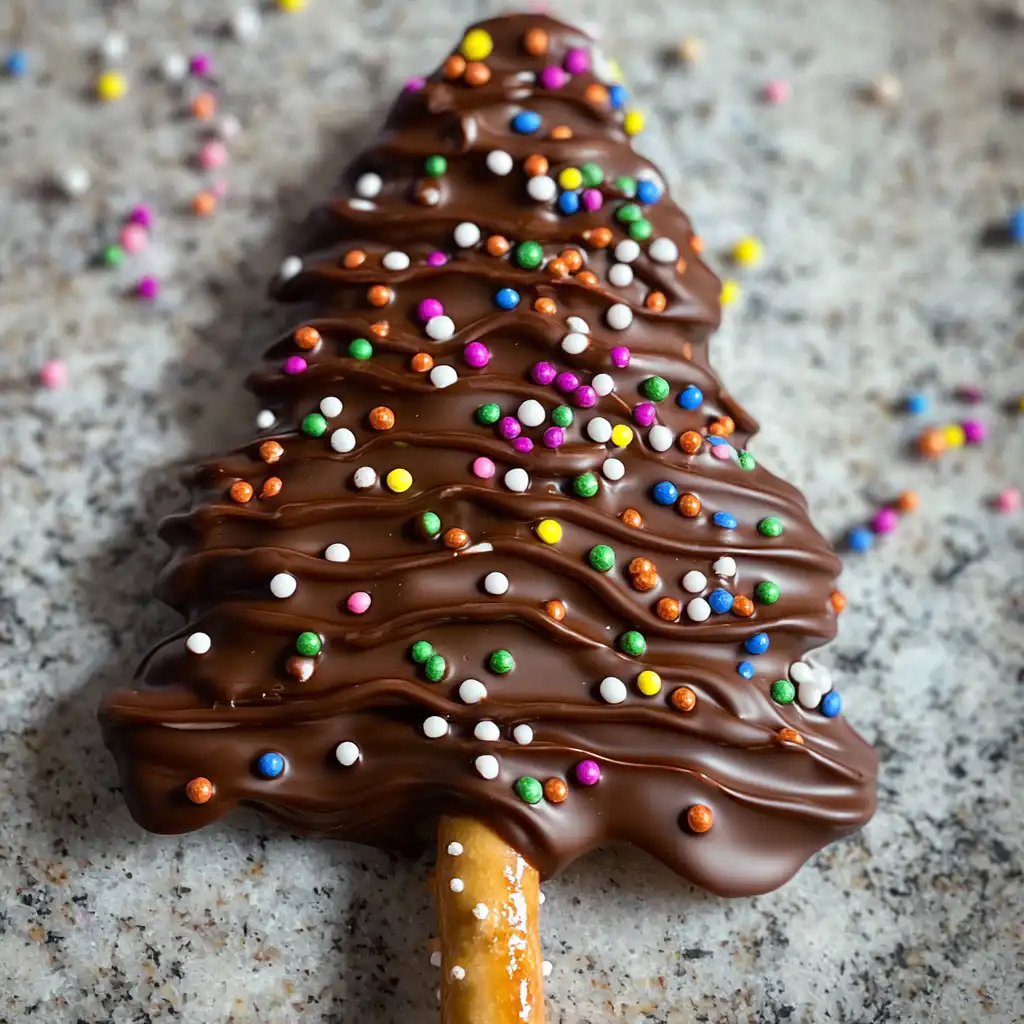
Snip a tiny bit off one corner of the baggie – you want a small opening, just enough for a controlled drizzle. Now, hold a Pocky stick with one hand and, with the other, drizzle the melted chocolate over it in a zigzag pattern, working your way down to create a Christmas tree shape. Before the chocolate sets, quickly sprinkle your colorful sprinkles over the tree. Then, gently place a star-shaped sprinkle right on top. Let all your beautiful trees dry completely on the wax paper, and then they’re ready to enjoy!
My Top Tips for Success
- I always make sure my Pocky sticks are well-spaced on the wax paper; it gives me plenty of room to drizzle without making a mess.
- In my experience, melting the chocolate in short bursts (like 30 seconds at a time) and stirring well in between prevents it from overheating and seizing.
- Trust me on this one: a small snip off the corner of the baggie gives you much more control for drizzling those perfect tree shapes.
- Work quickly with the sprinkles! The chocolate sets fast, especially if your kitchen is cool.
- Don’t be afraid to get creative with your sprinkles! Different shapes and colors can make each tree unique.
Common Mistakes to Avoid
- Overheating the chocolate: This can make the chocolate seize and become clumpy. To fix it, melt in short intervals and stir constantly.
- Cutting the baggie tip too large: A big opening means less control over your drizzle, leading to messy trees. Start with a tiny snip, you can always make it a little larger if needed.
- Waiting too long to add sprinkles: The chocolate sets fairly quickly. If you wait, the sprinkles won’t stick. Add them immediately after drizzling.
- Not using wax paper: The trees will stick to regular plates or parchment paper. Wax paper ensures easy removal once dry.
How to Store Pocky Christmas Trees
- At room temperature: Store in an airtight container for up to 5-7 days.
- In the refrigerator: If your home is very warm, you can store them in an airtight container in the fridge for up to 2 weeks. Let them come to room temperature for a few minutes before serving for best texture.
Frequently Asked Questions
Can I use white chocolate instead of dark chocolate?
Yes, absolutely! White melting wafers would work beautifully and give a different look. You could even color the white chocolate with gel food coloring.
What if I don’t have a star sprinkle?
No problem! You can use a small round sprinkle, a tiny dot of yellow icing, or even just a little extra drizzle of chocolate to create a star shape.
How long do these take to dry?
They typically dry and set within 15-30 minutes at room temperature. If you’re in a hurry, you can pop them in the fridge for 5-10 minutes to speed up the process.
Can kids help make these?
Definitely! This is a fantastic recipe for kids to help with. They can lay out the Pocky, add the sprinkles, and even help with the drizzling under supervision.
I hope these Pocky Christmas Trees bring as much festive cheer and deliciousness to your holiday season as they do to mine. They’re such a simple joy to make and share! If you give these a try, please let me know how your Pocky Christmas Trees turned out. Happy holidays and happy baking!
PrintPocky Christmas Trees
Easy, no-bake Pocky sticks transformed into festive Christmas trees with melted chocolate and sprinkles.
- Prep Time: 15
- Cook Time: 5
- Total Time: 20
- Yield: 12-15 trees
- Category: Dessert
- Method: No-Bake
- Cuisine: American
Ingredients
- Pocky
- Dark Ghiradelli melting wafers
- Small colorful sprinkles
- Star Sprinkle
Instructions
- Place wax paper on a clean surface.
- Lay Pocky pieces onto the wax paper, spaced apart.
- Melt the Ghirardelli melting wafers according to package directions, typically in microwave intervals, stirring until smooth.
- Carefully pour the melted chocolate into a sandwich baggie.
- Snip a very small tip off one corner of the baggie.
- Drizzle the melted chocolate over each Pocky stick in a zigzag pattern, forming a Christmas tree shape.
- Immediately sprinkle colorful sprinkles over the chocolate tree before it dries.
- Place a star-shaped sprinkle on top of each tree.
- Allow the Pocky Christmas Trees to dry completely on the wax paper before handling or serving.
- Enjoy your festive treats!
Notes
Work quickly once the chocolate is drizzled, as it sets fast.
Use a very small snip on the baggie for better control over the chocolate drizzle.
Ensure Pocky sticks are spaced out on the wax paper to prevent sticking.
Store in an airtight container at room temperature for best results.