There’s just something about autumn, isn’t there? The crisp air, the cozy sweaters, and of course, all things pumpkin! Every year, as soon as the leaves start to turn, I get this craving for a warm, comforting treat. That’s how my love affair with these Instant Pot Pumpkin Bites began. They’re like little pockets of fall, bursting with that classic pumpkin spice flavor and a delightful creamy center. Seriously, they’re pure magic in every bite!
Why You’ll Love This Instant Pot Pumpkin Bites
- They’re incredibly moist and tender, thanks to the Instant Pot. No dry pumpkin bread here!
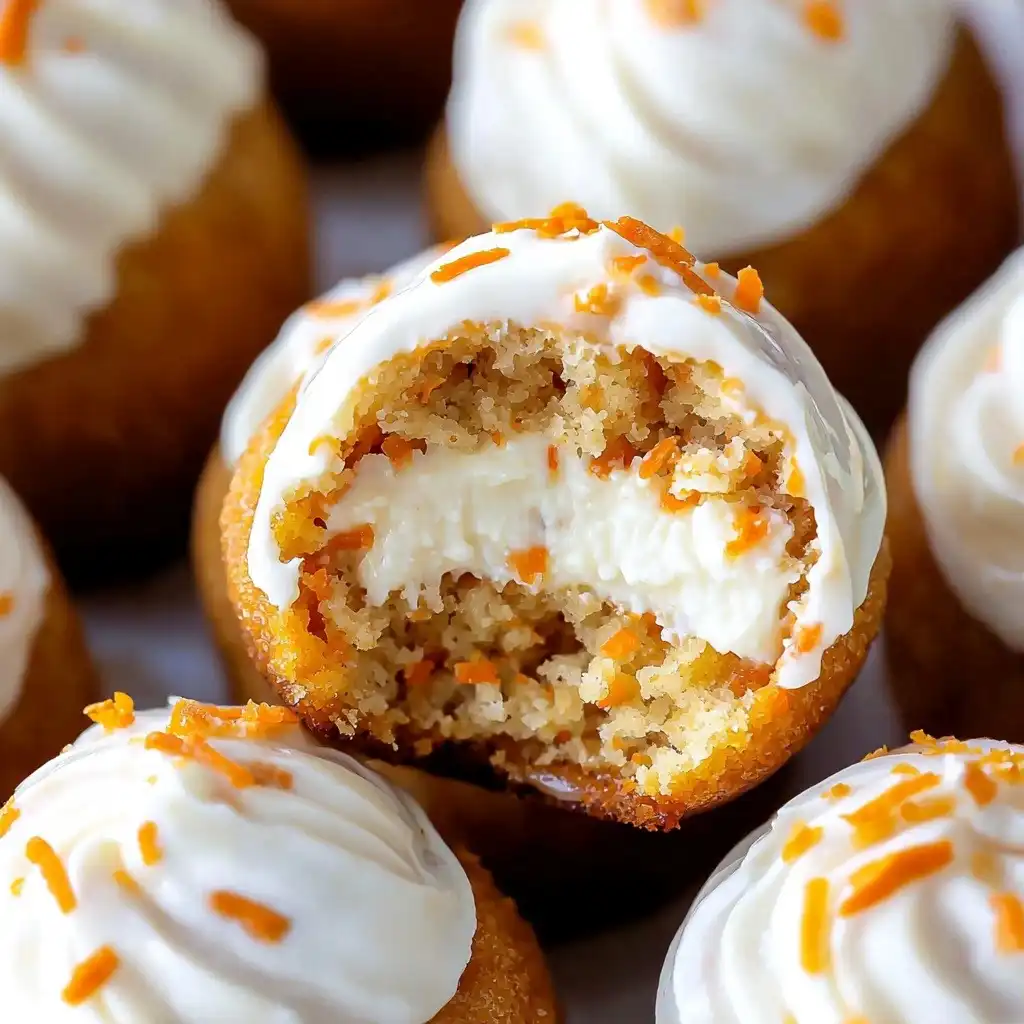
- The sweet cream cheese filling is a delightful surprise in the middle of each bite.
- Super easy to make! The Instant Pot does most of the work, making them perfect for busy days.
- They’re perfectly portioned, so you can enjoy a little taste of fall without overdoing it.
Ingredients You’ll Need
- Canned Pumpkin Puree: Make sure it’s 100% pure pumpkin, not pumpkin pie filling! That has added sugars and spices that we don’t want.
- Egg: Always use a room temperature egg. It incorporates much better into the batter, giving you a smoother, more consistent texture.
- Brown Sugar: Packed brown sugar adds a lovely depth of flavor and moisture.
- Honey or Maple Syrup: Either works beautifully here, adding natural sweetness and that cozy fall vibe.
- Vegetable Oil: This keeps our pumpkin bites wonderfully moist. You could also use a neutral-flavored oil like canola.
- Pumpkin Spice: This is your shortcut to all those warm, comforting fall flavors.
- Pure Vanilla Extract: A must for enhancing all the other sweet flavors.
- Baking Powder and Baking Soda: These are our leavening agents, making the bites light and fluffy.
- All-Purpose Flour: The structure of our bites! Don’t overmix once you add it.
- Cream Cheese: Softened cream cheese is key for a smooth, lump-free filling. Let it sit out on the counter for a bit beforehand.
- Powdered Sugar: Essential for that smooth, pourable glaze. It dissolves easily without leaving a grainy texture.
How to Make Instant Pot Pumpkin Bites Step by Step
First things first, let’s get that dreamy cream cheese filling ready. Grab a small bowl and beat together your softened cream cheese, a little sugar, and some vanilla extract until it’s super smooth. It should look light and fluffy. Once that’s done, just set it aside for a moment.
Now, for the pumpkin batter! In a larger bowl, whisk together all your wet ingredients: the pumpkin puree, egg, brown sugar, milk, honey (or maple syrup), vegetable oil, pumpkin spice, and vanilla. Give it a good whisk until everything is nicely combined and looks smooth. This is where all those wonderful fall flavors start to come alive!
Next, it’s time to add the dry ingredients – the baking powder, baking soda, salt, and flour. Stir this in gently until everything is just combined. Be careful not to overmix here; we want tender bites, not tough ones! Now, grab your silicone molds and give them a quick spray with non-stick cooking spray, including the lids. This is super important for easy release. Spoon about half of your pumpkin batter into the molds, filling them only halfway. Then, dollop spoonfuls of that cream cheese mixture right on top of the batter. Finish by topping with the remaining pumpkin batter. For a pretty swirl, use a toothpick to gently marble the batter and filling. Cover your molds with their lids and stack them up on your Instant Pot trivet.
This is where the magic happens! Pour 1 cup of water into your Instant Pot liner. Carefully lower the trivet with your stacked molds into the pot. Lock the lid into place and make sure your pressure release valve is set to “sealing.” Now, set your Instant Pot to pressure cook on High Pressure for 10 minutes. Once it’s done, let it naturally release pressure for another 10 minutes – this helps keep the bites moist and prevents them from deflating. After that, you can carefully release any remaining pressure. Lift out the trivet and let your pumpkin bites cool in the molds for about 10 minutes before turning them out onto a plate. While they’re cooling completely, mix up your glaze ingredients in a bowl until it’s smooth and pourable. Once the bites are completely cool, drizzle that glorious glaze all over them. And there you have it!
My Top Tips for Success
- I always make sure my cream cheese is really softened. It makes for a much smoother filling, and you won’t have any lumps.
- Trust me on this one: don’t overmix the batter once you add the flour. Just stir until it’s combined, and stop. Overmixing develops the gluten too much, leading to tough bites.
- Don’t skip the natural pressure release! That 10 minutes is crucial for the texture of these Instant Pot Pumpkin Bites.
- I find that cooling the bites in the molds for 10 minutes before turning them out helps them keep their shape perfectly.
- Make sure the bites are completely cool before glazing. Otherwise, the glaze will just melt right off!
Common Mistakes to Avoid
- Using pumpkin pie filling instead of pumpkin puree: Pumpkin pie filling has added sugars and spices, which will throw off the flavor and sweetness balance of these bites. Always use 100% pure canned pumpkin puree.
- Overmixing the batter: Once the flour is added, overmixing can develop too much gluten, resulting in tough, chewy pumpkin bites. Stir just until the flour streaks disappear.
- Not softening the cream cheese: If your cream cheese isn’t soft enough, you’ll end up with a lumpy filling. Let it sit at room temperature for at least 30 minutes, or gently warm it in the microwave for a few seconds.
- Glazing warm bites: Applying the glaze to warm pumpkin bites will cause it to melt and run off, creating a messy situation. Be patient and wait until they are completely cool.
How to Store Instant Pot Pumpkin Bites
- Countertop: Glazed pumpkin bites can be stored in an airtight container at room temperature for up to 1 day.
- Refrigerator: For longer storage, keep them in an airtight container in the refrigerator for up to 3-4 days.
- Freezer: To freeze, place unglazed bites in a single layer on a baking sheet and freeze until solid. Transfer to a freezer-safe bag or container for up to 2-3 months. Thaw in the refrigerator and then glaze.
Frequently Asked Questions
Can I make these without an Instant Pot?
This recipe is specifically designed for the Instant Pot. The steam environment is key to their incredibly moist texture. You could try baking them, but the texture won’t be the same.
What if I don’t have silicone molds?
Silicone molds are pretty essential for this recipe as they allow for easy release after steaming. You can find them online or in most kitchen stores.
Can I use a different spice blend?
Absolutely! If you don’t have pumpkin spice, you can make your own with cinnamon, nutmeg, ginger, and cloves. Or, feel free to use just cinnamon for a simpler flavor.
Can I skip the cream cheese filling?
You can, but the cream cheese filling adds such a wonderful surprise and moistness to the center. If you omit it, the bites will still be good, just a little less decadent.
How do I know when they’re done?
Since they are steamed, a toothpick test won’t work perfectly. The 10 minutes of high-pressure cooking followed by 10 minutes of natural release is the ideal timing for perfectly cooked bites.
I hope these Instant Pot Pumpkin Bites bring a little bit of fall joy to your kitchen! They’re truly a favorite around here, and I just know you’ll love them too. If you give them a try, please let me know how they turn out!
PrintInstant Pot Pumpkin Bites

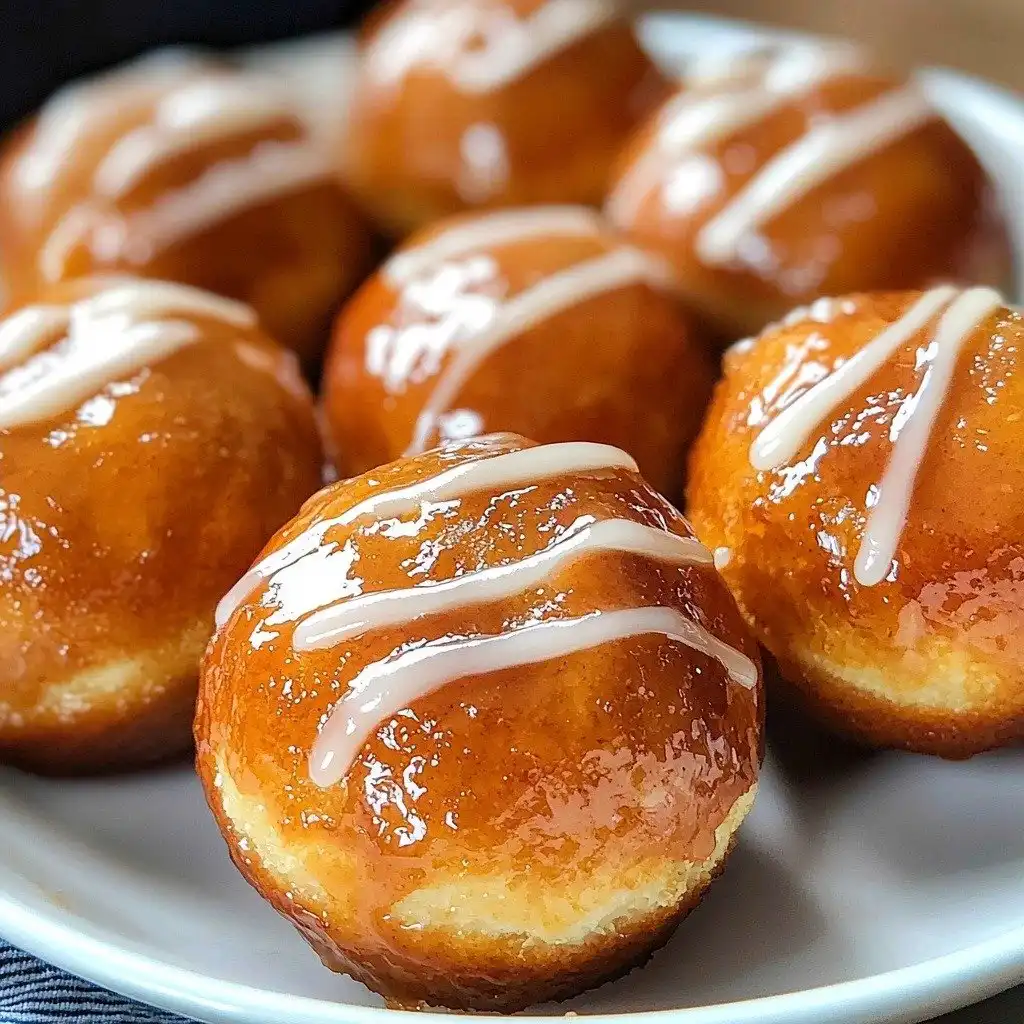
Deliciously moist and tender pumpkin bites with a creamy cream cheese filling, made easily in your Instant Pot.
- Prep Time: 20
- Cook Time: 10
- Total Time: 40
- Yield: 12-18 bites (depending on mold size)
- Category: Dessert
- Method: Pressure Cook
- Cuisine: American
- Diet: Vegetarian
Ingredients
- 1/2 cup canned pumpkin puree
- 1 egg room temperature
- 1/4 cup brown sugar packed
- 2 tablespoons milk
- 2 tablespoons honey or maple syrup
- 1 1/2 tablespoons vegetable oil
- 1 teaspoon pumpkin spice
- 1 teaspoon pure vanilla extract
- 1/2 teaspoon baking powder
- 1/4 teaspoon baking soda
- 1/4 teaspoon salt
- 3/4 cup all-purpose flour
- 4 oz cream cheese softened
- 2 tablespoons sugar
- 1/4 teaspoon pure vanilla extract
- 1 1/2 cups powdered sugar
- 1 tablespoon maple syrup
- 1 teaspoon vanilla extract
- 1 tablespoon milk
Instructions
- In a small mixing bowl, beat together the softened cream cheese, 2 tablespoons sugar, and 1/4 teaspoon pure vanilla extract until smooth.
- Set the cream cheese filling aside.
- In a large mixing bowl, whisk together the pumpkin puree, room temperature egg, packed brown sugar, 2 tablespoons milk, honey or maple syrup, vegetable oil, pumpkin spice, and 1 teaspoon pure vanilla extract.
- Add the baking powder, baking soda, and salt to the wet ingredients.
- Add the all-purpose flour to the mixture.
- Stir the batter just until all ingredients are combined and no dry streaks of flour remain.
- Spray the inside of silicone molds and their lids with non-stick cooking spray.
- Spoon half of the pumpkin batter into the prepared silicone molds, filling each mold only halfway.
- Place dollops of the reserved cream cheese mixture on top of the batter in each mold.
- Top the cream cheese mixture with the remaining pumpkin batter.
- Using a toothpick, gently swirl the batter and filling together in each mold to create a marbled effect.
- Cover the filled molds with their lids.
- Stack the covered molds on a trivet.
- Pour 1 cup of water into your Instant Pot liner.
- Carefully lower the trivet with the stacked molds into the Instant Pot.
- Lock the Instant Pot lid into place.
- Set the Pressure Release Valve to the 'sealing' position.
- Select the 'Pressure Cook' or 'Manual' setting and set the cooking time to 10 minutes on High Pressure.
- Once cooking is complete, allow a Natural Pressure Release for 10 minutes.
- After 10 minutes of natural release, carefully release any remaining pressure by turning the valve to 'venting'.
- Remove the molds from the Instant Pot by lifting the trivet.
- Allow the pumpkin bites to cool in the molds for 10 minutes.
- After 10 minutes, carefully turn the pumpkin bites out onto a plate.
- Let the pumpkin bites cool completely before glazing.
- While the bites are cooling, prepare the glaze: in a bowl, whisk together the powdered sugar, 1 tablespoon maple syrup, 1 teaspoon vanilla extract, and 1 tablespoon milk until smooth.
- Once the pumpkin bites are completely cooled, drizzle or spread the prepared glaze over them.
- Serve immediately and enjoy!
Notes
Ensure your cream cheese is very soft for a smooth filling.
Do not overmix the batter once flour is added to keep the bites tender.
Allow the full 10-minute natural pressure release for best texture.
Cool the bites completely before glazing to prevent the glaze from melting.