
Whether you are hosting a puppy-themed birthday party, a “Gotcha Day” celebration for your furry friend, or just looking for a creative baking project to do with the kids, these Paw Print Sugar Cookies are the ultimate solution. These aren’t your average flat sugar cookies; they feature a clever 3D design using different-sized dough balls to create a realistic “paw” shape. Infused with both vanilla and almond extracts, they offer a sophisticated flavor profile that matches their charming appearance. The soft, pillowy texture of the cookie base combined with the sweet, smooth icing makes them an instant crowd-pleaser. Best of all, you don’t need a cookie cutter to achieve this look—just a couple of measuring spoons and a little bit of rolling. Get ready to bake a batch of cookies that are almost too cute to eat!
Why You’ll Love This Recipe
You will fall in love with these Paw Print Sugar Cookies for several reasons. First, the texture is exceptional; thanks to the use of powdered sugar in the dough instead of granulated sugar, these cookies have a “melt-in-your-mouth” quality that is reminiscent of high-end bakery shortbread. Second, the visual “wow factor” is high, yet the technique is surprisingly simple. You don’t need expert piping skills or expensive equipment. Third, the flavor is perfectly balanced. The hint of almond extract adds a professional depth that offsets the sweetness of the pink icing. It’s a versatile recipe that can be adapted for any color scheme, making it perfect for baby showers (pink or blue paws!) or holiday events.
What Is a Paw Print Sugar Cookie?
A Paw Print Sugar Cookie is a structural variation of the classic American sugar cookie. Instead of being rolled flat and cut into shapes, the dough is divided into specific portions—one larger “pad” and three smaller “toes”—which are placed together on the baking sheet. As they bake, the dough balls fuse together to create a single cohesive paw shape. A unique feature of this specific recipe is the “indentation method.” By pressing down on the warm cookies immediately after they leave the oven, you create deep wells that are later filled with a vivid icing. This results in a vibrant, jewel-like center that defines the paw print and provides a delightful contrast in texture between the soft cookie and the set icing.
Ingredients Overview
To create these perfect cookies, you will need a mix of pantry staples and a few specific ingredients that ensure the best texture and flavor.
- Butter (1 cup): Use unsalted, softened butter. This provides the fat necessary for a tender crumb.
- Powdered Sugar (1 1/2 cups): Using powdered sugar in the dough is the “secret” to the cookie’s delicate, soft texture.
- Egg (1): Acts as the binder to hold the paw structure together.
- Extracts: A combination of Vanilla and Almond extract provides that classic “wedding cake” flavor profile.
- All-Purpose Flour (2 1/2 cups): The structural foundation of the cookie.
- Baking Soda & Cream of Tartar: This combination acts as the leavening agent. The cream of tartar is essential here as it prevents the sugar from crystallizing, resulting in a softer, more pillowy cookie.
- Icing Components: A simple glaze made of powdered sugar, milk, and vanilla.
- Red Food Coloring: Just a few drops turn the white icing into a vibrant pink or red, perfect for the “pads” of the paw.
Ingredient Substitutions & Tips
If you find yourself missing an ingredient, there are a few ways to pivot. If you are allergic to nuts, feel free to omit the almond extract and double the vanilla extract; the cookies will still be delicious. For a gluten-free version, a high-quality 1:1 gluten-free flour blend with xanthan gum works well, though the cookies may spread slightly more. If you don’t have cream of tartar, you can substitute the baking soda and cream of tartar with 1 1/2 teaspoons of baking powder, though the texture will be slightly more “cake-like” and less “melt-in-your-mouth.” Always ensure your butter is softened to room temperature but not melted, as melted butter will cause the paws to lose their shape in the oven.
Step-by-Step Instructions
- Cream the Base: In a stand mixer or using a hand mixer, cream together the softened butter and 1 1/2 cups of powdered sugar until light and fluffy. This should take about 2-3 minutes.
- Add Wet Ingredients: Incorporate the egg, vanilla extract, and almond extract. Mix until the egg is fully integrated and the mixture is smooth.
- Mix Dry Ingredients: In a separate medium-sized bowl, whisk together the flour, baking soda, and cream of tartar. This ensures the leavening agents are evenly distributed.
- Combine: Gradually add the dry ingredients to the butter mixture. Mix on low speed just until the flour disappears. Overmixing at this stage can lead to tough cookies.
- Shape the Paws: This is the creative part! For each cookie, use a Tablespoon to scoop dough and roll it into a ball (the foot). Place it on the sheet. Then, use a teaspoon to roll three smaller balls (the toes) and place them around the top of the foot.
- Flatten Slightly: Use two fingers to gently press down on the larger ball to ensure it bakes at the same rate as the smaller ones.
- Bake: Bake at 375°F (190°C) for exactly 7-8 minutes. They should look set but not browned.
- The Indent: This is critical! The moment they come out of the oven, use the back of a Tablespoon and teaspoon to press deep indents into the center of each ball.
- Cool: Let them cool completely on a wire rack before icing.
- Prepare Icing: Whisk the icing ingredients until smooth. It should be thick but flowable.
- Fill: Pipe the icing into the indents. Start in the center and move outward in a circular motion.
Expert Baking Tips
To ensure your Paw Print Sugar Cookies look like they came from a professional bakery, follow these expert tips. First, spacing is key. Only place about 6 paw prints per cookie sheet; because each cookie is made of four separate balls, they take up more surface area than you might expect. Second, temperature control is vital. If your kitchen is very warm and the dough feels oily, chill the rolled balls for 15 minutes before baking to prevent excessive spreading. Finally, when making the icing, add the extra teaspoon of milk very gradually. You want the icing to be thick enough that it stays within the “well” you created, but thin enough to settle into a smooth, glossy finish.
Perfect Occasions for Paw Print Cookies
These cookies are incredibly versatile and can be adapted for various themes. They are a “must-have” for a Puppy Adoption Party or a Blue’s Clues themed birthday. However, they also work beautifully for wildlife-themed events like a “Wild One” first birthday or a forest-themed baby shower. By simply changing the food coloring, you can transform these into “Bear Paws” (using chocolate icing or brown dye) or “Polar Bear Paws” (keeping the icing white and adding sparkling sugar). They are also a fantastic addition to school bake sales because their unique shape makes them stand out from standard round cookies, often selling out in minutes!
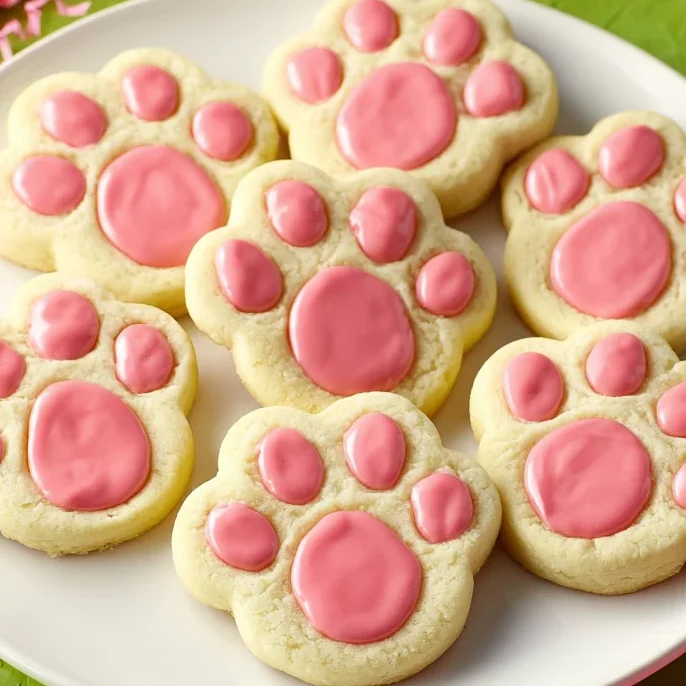
Serving Suggestions
Serve these cookies on a flat white platter to let the vibrant pink paw prints really pop. For a themed party, you can serve them alongside “kibble” (a mix of chocolate cereal and peanut butter chips) in clean, food-safe dog bowls for a whimsical touch. They pair wonderfully with a cold glass of milk or a hot cup of tea. If you’re serving adults, the almond notes in the cookie complement a latte or an amaretto-flavored coffee perfectly.
Storage & Make-Ahead Tips
These cookies store exceptionally well. Once the icing has completely set (usually about 2-4 hours), you can stack them between layers of parchment paper in an airtight container. They will stay fresh at room temperature for up to 5 days. If you want to make them ahead of time, you can freeze the un-iced baked cookies for up to 3 months. When ready to serve, thaw them at room temperature and then add the fresh icing. This ensures the icing remains glossy and bright for your event.

FAQs
Q: Why did my cookies spread too much and lose their paw shape?
A: This usually happens if the butter was too soft or if the oven wasn’t fully preheated. Try chilling the dough balls for 15 minutes before baking to help them hold their shape.
Q: Can I use granulated sugar instead of powdered sugar in the dough?
A: You can, but the texture will change significantly. Powdered sugar gives these cookies a delicate, melt-in-your-mouth crumb that granulated sugar cannot replicate.
Q: My icing is too runny. How do I fix it?
A: Simply whisk in more powdered sugar, one tablespoon at a time, until it reaches a thick, honey-like consistency.
Q: Do I really need to indent them while hot?
A: Yes! Once the cookies cool, the structure sets. If you try to indent them cold, the cookie will crack and crumble.
Q: Can I use store-bought frosting?
A: You can, but a “flood-style” icing (like the recipe provided) creates a smoother, more professional look that fills the indents perfectly.
Making Paw Print Sugar Cookies is as much a craft project as it is a baking endeavor. The process of rolling the little “toes” and “feet” is therapeutic, and the results are undeniably charming. These cookies prove that you don’t need fancy tools to create memorable, professional-looking treats. With their soft texture and sweet almond flavor, they are sure to become a requested favorite for all your future celebrations. Happy baking!
PrintPaw Print Sugar Cookies

These Paw Print Sugar Cookies are the ultimate treat for animal lovers. Using a clever shaping technique and a vibrant icing fill, these soft, almond-kissed cookies look professional but are simple enough for beginners.
Ingredients
1 cup butter, softened
1 1/2 cups powdered sugar
1 egg
1 tsp vanilla
1/2 tsp almond extract
2 1/2 cups all-purpose flour
1 tsp baking soda
1 tsp cream of tartar
2 cups powdered sugar (for icing)
2 Tbsp milk (plus extra 1 tsp)
1/2 tsp vanilla (for icing)
5–6 drops red food coloring
Instructions
1. In a mixer, combine the butter and powdered sugar. Add the egg, vanilla and almond extract and mix well.
2. In a separate small bowl, mix together the flour, baking soda and cream of tartar. Add the dry ingredients to the butter sugar mixture and mix until combined.
3. Take a Tablespoon measuring spoon of dough and roll it in a ball to make the foot of the paw print. Place it on a cookie sheet.
4. Make three toes by using a teaspoon measuring spoon and rolling 3 separate teaspoons of dough into balls. Place the three small dough balls next to the large dough ball. (6 paw prints per sheet).
5. Using two fingers, slightly flatten the larger dough ball for even baking.
6. Bake at 375 degrees for 7-8 minutes. Do not overbake.
7. Remove from oven and immediately use a Tablespoon to indent the foot and a teaspoon to indent the toes.
8. Allow to cool on a cooling rack.
9. For icing: Mix powdered sugar, milk, vanilla, and food coloring in a bowl with a hand mixer.
10. Pipe the icing into the indents in a circular motion and let set.
Notes
Don’t skip the cream of tartar; it provides the unique soft-yet-stable texture.
Indent the cookies while they are still hot and soft from the oven.


