
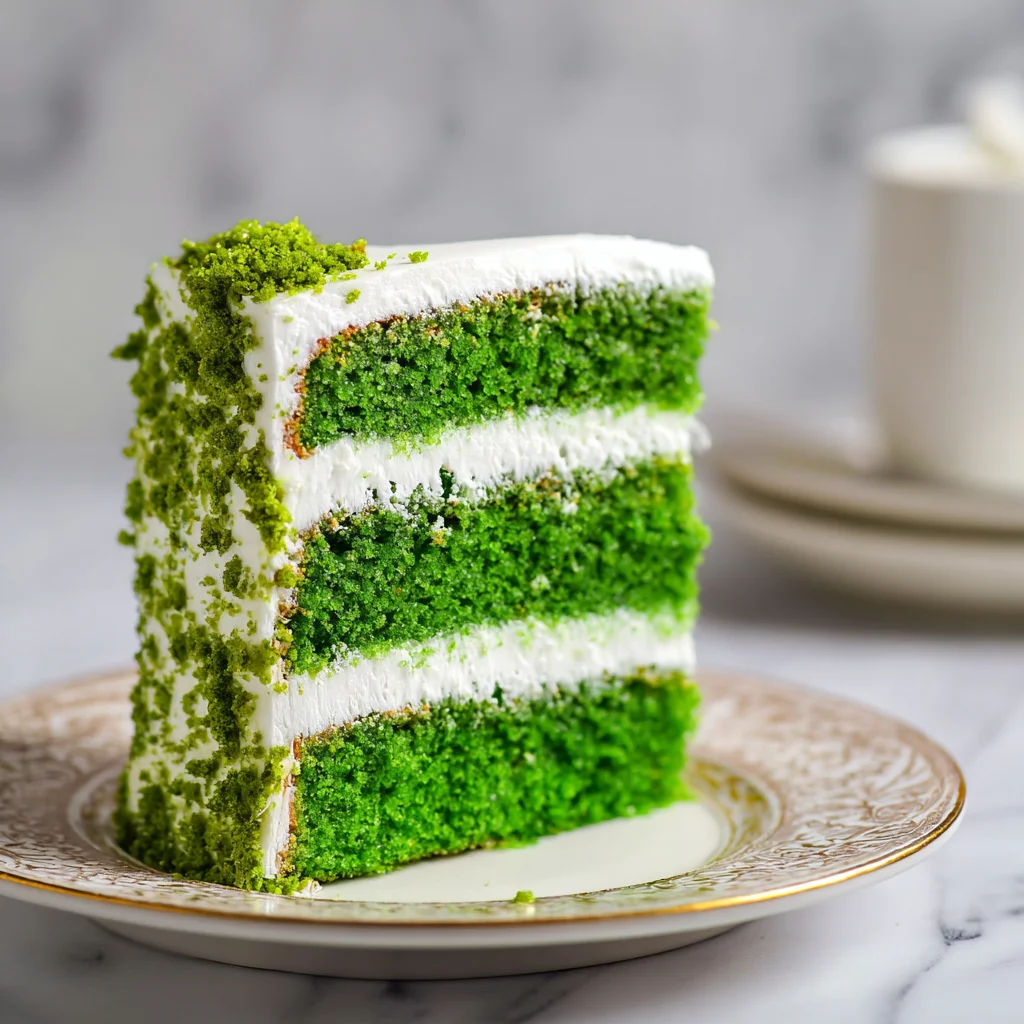
There is something inherently magical about a “velvet” cake. It isn’t just about the flavor; it’s about the unparalleled texture—that tight, fine-grained crumb that feels soft as silk on the tongue. While red is the traditional hue, this Green Velvet Cake is a show-stopping alternative that brings a vibrant, festive energy to your dessert table. Whether you are celebrating St. Patrick’s Day, a garden-themed birthday, or simply want a cake that stands out from the crowd, this recipe delivers on every front. Forget the dry, boxed mixes of the past; we are diving into a scratch-made masterpiece that utilizes professional techniques to ensure a moist result every single time. Paired with a legendary, old-fashioned Ermine frosting, this cake is a sophisticated nod to baking history with a modern, colorful twist.
Why You’ll Love This Recipe
You will fall in love with this Green Velvet Cake because it strikes the perfect balance between nostalgia and novelty. Unlike modern velvet cakes that rely heavily on oil, our recipe uses high-quality unsalted butter and buttermilk to create a rich, tangy profile that lingers beautifully. The addition of a small amount of cocoa powder provides that signature “velvet” depth without overpowering the vanilla notes. Furthermore, the Ermine frosting—a traditional cooked flour buttercream—is a revelation. It is significantly less sweet than standard American buttercream and has a light, whipped texture similar to Chantilly cream. It’s the perfect, sophisticated topping for a cake this special.
What Is Green Velvet Cake?
At its core, Green Velvet Cake is a variation of the classic American Red Velvet. Historically, “velvet” cakes emerged in the Victorian era, characterized by the use of cocoa, acid (like buttermilk or vinegar), and flour to break down protein strands, resulting in a “velvety” texture. The color originally came from a chemical reaction between non-alkalized cocoa and acid, though modern versions use food coloring for impact. Green Velvet simply swaps the red hue for a striking emerald or leaf green. It retains the iconic mild cocoa flavor and the signature buttermilk tang, making it a distinct dessert that is neither fully chocolate nor fully vanilla, but something wonderfully in between.
Ingredients
To achieve the perfect bake, quality ingredients are paramount. Here is what you will need:
- All-Purpose Flour: Provides the structure. We use a specific ratio to ensure the cake isn’t too heavy.
- Unsweetened Cocoa Powder: Use “natural” (non-Dutch process) cocoa. It reacts with the leavening agents to help create that soft crumb.
- Buttermilk: This is the secret to moisture. The acid in buttermilk tenderizes the gluten and adds a subtle tang.
- Unsalted Butter: Using room-temperature butter allows for proper aeration during the creaming process.
- Green Food Coloring: Liquid coloring works well for a classic look, while gel provides a deeper, more intense emerald shade.
- Leavening Agents: A combination of baking powder and baking soda gives this cake its necessary lift and fluffiness.
- Ermine Frosting Components: This unique frosting requires flour, milk, sugar, and butter. It creates a “roux-like” base that results in a silkiness you can’t get with powdered sugar.
Ingredient Substitutions & Tips
If you find yourself missing an ingredient, don’t worry! For the buttermilk, you can create a DIY version by adding one tablespoon of lemon juice or white vinegar to a cup of regular whole milk and letting it sit for five minutes. If you prefer to avoid artificial dyes, you can experiment with matcha powder or spinach powder, though the color will be more “earthy” than vibrant green. For the frosting, if you find Ermine too technical, a classic cream cheese frosting is a delicious, tangy alternative that pairs perfectly with the cocoa notes in the cake layers.
Step-by-Step Instructions
1. Prepare the Cake Base
Preheat your oven to 375°F. This slightly higher temperature helps set the structure of the velvet cake quickly. Butter three 8-inch round pans and line them with parchment. In a medium bowl, whisk together the flour, cocoa powder, baking powder, baking soda, and salt. In a separate spouted cup, whisk your buttermilk, green food coloring, and vanilla extract.
2. Cream the Butter and Sugar
In a stand mixer, beat the butter and sugar on medium speed for a full 5 minutes. Do not skip this! You want the mixture to be pale and very fluffy. Add the eggs one at a time, ensuring each is fully incorporated before adding the next.
3. Mix the Batter
With the mixer on the lowest setting, alternate adding the flour mixture and the buttermilk mixture. Start with 1/3 of the flour, then 1/2 of the buttermilk, and repeat. This “dry-wet-dry” method prevents the batter from curdling and keeps the crumb tender.
4. Bake and Cool
Divide the batter evenly. Bake for 20 to 25 minutes. A toothpick should come out clean. Let them cool in the pans for 15 minutes before transferring them to a wire rack.
5. Create the Ermine Frosting
Whisk flour and a bit of milk in a saucepan to form a paste, then add the rest of the milk. Cook over medium heat until it becomes a very thick paste. Chill this mixture in the fridge for 45 minutes.
6. Finish the Frosting and Assemble
Beat butter and sugar until fluffy, then add the chilled flour paste one tablespoon at a time. Whip for 10-12 minutes until it looks like whipped cream. Layer the cake, frost the exterior, and decorate with green candies or sanding sugar.
Expert Baking Tips
- Room Temperature is Key: Ensure your eggs, butter, and buttermilk are all at room temperature. This creates an emulsion that traps air, leading to a lighter cake.
- The Frosting Secret: When making Ermine frosting, the sugar is beaten with the butter, not cooked in the milk. This allows the sugar crystals to tear through the butter, creating a much fluffier texture.
- Don’t Overbake: Velvet cakes can turn from moist to dry in a matter of two minutes. Start checking at the 20-minute mark.
- Sift Your Cocoa: Cocoa powder is notoriously lumpy. Sift it with your flour to ensure no brown streaks appear in your beautiful green cake.
Special Section: The Magic of Ermine Frosting
While many modern bakers reach for cream cheese frosting, the traditional pairing for velvet cake is actually Ermine frosting (also known as boiled milk frosting). Before powdered sugar was a pantry staple, bakers used a cooked roux of flour and milk to provide structure to their frostings. This method results in a topping that is incredibly stable yet light as air. It tastes remarkably like high-quality vanilla ice cream. The key to success is the final whipping stage—don’t be afraid to let your mixer run for 10 minutes. The longer you whip, the more the sugar dissolves and the silkier the mouthfeel becomes.
Serving Suggestions
This cake is a centerpiece in itself. Serve it on a white or gold cake stand to make the green pop. For an elegant touch, garnish the top with fresh mint leaves or white chocolate shavings. If you’re serving this for St. Patrick’s Day, a dusting of gold leaf or gold sanding sugar adds a “pot of gold” finish. Pair a slice with a cup of Earl Grey tea or a glass of cold milk to balance the richness.
Storage & Make-Ahead Tips
The Green Velvet Cake layers can be made up to two days in advance; wrap them tightly in plastic wrap and store at room temperature. Once frosted, the cake should be stored in the refrigerator due to the milk content in the Ermine frosting. However, always bring the cake back to room temperature for at least 30 minutes before serving, as the butter in the cake and frosting needs to soften to regain its “velvet” texture.
FAQs
Q: Why is my green cake turning brown?
A: This usually happens if you use too much cocoa powder or a Dutch-processed cocoa. The dark pigments of the cocoa can muddy the green. Stick to the 2 tablespoons of natural cocoa for the best color retention.
Q: Can I make this in 9-inch pans?
A: Yes! You can use two 9-inch pans. The layers will be slightly thicker, so you may need to increase the bake time by 3 to 5 minutes.
Q: Is Ermine frosting stable for outdoor events?
A: It is more stable than whipped cream but less stable than traditional shortening-based buttercreams. If it’s a very hot day, keep the cake chilled until just before serving.
Q: Can I freeze this cake?
A: Absolutely. You can freeze the unfrosted layers for up to 3 months. Wrap them in double layers of plastic wrap and foil. Thaw in the fridge overnight before frosting.
Baking a Green Velvet Cake is more than just making a dessert; it’s an exercise in culinary craftsmanship. From the careful creaming of the butter to the patient whisking of the Ermine roux, every step contributes to a final product that is as delicious as it is visually stunning. This cake proves that you don’t need complex flavors to make an impact—sometimes, the perfect texture and a splash of color are all you need to create a lasting memory.
PrintGreen Velvet Cake Recipe
A show-stopping Green Velvet Cake that is incredibly moist and tender. This recipe uses the traditional ‘boiled milk’ or Ermine frosting, which is less sweet than buttercream and exceptionally silky. Perfect for holidays, St. Patrick’s Day, or any event needing a splash of color.
- Prep Time: 45 minutes
- Cook Time: 25 minutes
- Total Time: 70 minutes
- Yield: 12 servings
- Cuisine: American
Ingredients
2 1/2 cups all-purpose flour
2 tablespoons unsweetened cocoa powder (not Dutch process)
1 teaspoon baking powder
1/2 teaspoon baking soda
1/2 teaspoon fine salt
1 1/4 cups buttermilk, well shaken
1 tablespoon green liquid food coloring
2 teaspoons pure vanilla extract
2 cups granulated sugar
1 cup (2 sticks) unsalted butter, at room temperature
3 large eggs, lightly beaten
1/2 cup all-purpose flour (for frosting)
1 1/2 cups milk
1 1/2 cups (3 sticks) unsalted butter, at room temperature
1 1/2 cups granulated sugar (for frosting)
4 teaspoons pure vanilla extract (for frosting)
Pinch fine salt
Green candies and sanding sugar for decorating
Instructions
Preheat oven to 375°F. Butter and parchment-line three 8-inch round pans.
Whisk flour, cocoa, baking powder, baking soda, and salt.
Mix buttermilk, green food coloring, and vanilla in a measuring cup.
Cream 1 cup butter and 2 cups sugar for 5 minutes until fluffy.
Slowly beat in eggs.
Alternate adding flour mixture and buttermilk mixture to the batter, beginning and ending with flour.
Divide batter into pans and bake for 20-25 minutes. Cool completely.
For frosting: Whisk 1/2 cup flour into 1/2 cup milk to form a paste in a saucepan. Whisk in remaining milk.
Cook over medium heat, whisking constantly until very thick (about 5 minutes).
Cool frosting base in the fridge for 45 minutes with plastic wrap on the surface.
Beat 1 1/2 cups butter and 1 1/2 cups sugar for 5 minutes.
Add cooled flour paste one tablespoon at a time while beating.
Switch to whisk attachment and whip for 10 minutes until light and fluffy.
Assemble cake by frosting between layers and on the outside.
Notes
• Ensure the cooked flour mixture is completely cold before adding to the butter to prevent melting.
• Use a stand mixer for the frosting to achieve the proper ‘whipped cream’ texture.
• This recipe can be adapted for 24 cupcakes (bake for 18-20 minutes).
• For a deeper green, use a high-quality gel food coloring instead of liquid.


