
There is something undeniably magical about the aroma of a Classic Homemade Apple Pie wafting through the house. It’s the scent of crisp autumn air, holiday gatherings, and the kind of comfort that only a scratch-made dessert can provide.
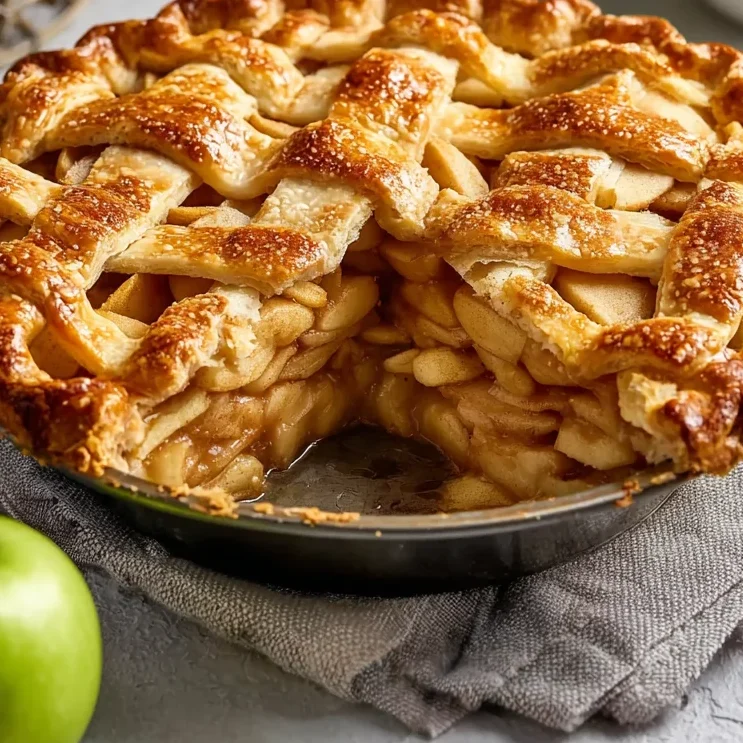
If you’ve ever been intimidated by the thought of making a pie from scratch—especially that beautiful lattice top let me stop you right there. This recipe is designed to be approachable, reliable, and, above all, the most delicious version of this American staple you’ve ever tasted. We’re talking about a deep-dish masterpiece with a buttery, shortbread-like crust and a filling that strikes the perfect balance between tart and sweet.
Whether you’re prepping for Thanksgiving or just want to treat your family to a Sunday night surprise, this is the only apple pie recipe you’ll ever need.
Why You’ll Love This Recipe
- The Crust is Foolproof: Using cold butter and a minimal kneading technique, you get a crust that is flaky, sturdy, and melts in your mouth.
- Perfectly Spiced Filling: We use a generous amount of cinnamon and tart apples to ensure the filling isn’t cloyingly sweet.
- Deep-Dish Satisfaction: This isn’t a skimpy pie. We use 4 pounds of apples to ensure every slice is thick and satisfying.
- The Lattice Technique: I’ll walk you through the lattice top, which makes your pie look like it came straight from a professional bakery.
- Great for Prepping Ahead: You can make the dough days in advance, making your holiday baking stress-free.
Ingredient Notes
The secret to an award-winning apple pie lies in the quality and temperature of your ingredients. Here’s what you need to know:
For the Flaky Crust
- All-Purpose Flour: This provides the structure we need for a sturdy lattice.
- Cold Unsalted Butter: “Cold” is the keyword here! When those tiny bits of cold butter hit the hot oven, they create steam, which is what gives you those coveted flaky layers. You can also use vegetable shortening for an even more tender (though less buttery) finish.
- Kosher Salt: Never skip the salt in pastry; it enhances the flavor of the butter.
- Ice Cold Water: Use water that is literally sitting with ice cubes in it. This prevents the butter from melting while you work the dough.
For the Tart Apple Filling
- The Apple Blend: I highly recommend using a mix. Granny Smith apples provide the tartness and hold their shape beautifully, while McIntosh apples soften more and create a luscious, jammy texture.
- Granulated Sugar: Just enough to macerate the apples and draw out their juices.
- Cinnamon: The classic warm spice that makes an apple pie feel like home.
- Flour (for the filling): This is crucial for thickening the juices so you don’t end up with a “soggy bottom” or a soup-like center.
Step-by-Step Instructions
1. Master the Crust
Start by mixing your flour, salt, and cold butter pieces in a large bowl. Use your fingers or a pastry cutter to rub the butter into the flour until it looks like coarse crumbs with some pea-sized pieces remaining.
Gradually add the ice water. You want the dough to just come together. If it’s too dry, it will crumble; if it’s too wet, it will be tough. Divide it into two disks, wrap them tightly, and let them chill in the fridge for at least 2 hours. Chilling relaxes the gluten and ensures the fat stays cold.
2. Prepare the Base
Roll out your first disk on a lightly floured surface into a 12-inch circle. Gently drape it over your 9-inch deep-dish pie plate. Don’t pull or stretch the dough; just let it fall into the corners. Keep this in the fridge while you prep the apples to keep that butter cold!
3. The Filling Secret
Peel, core, and thinly slice your 4 pounds of apples. In a large bowl, toss them with sugar, flour, cinnamon, and a dash of salt. The flour will coat the apples and turn those escaping juices into a thick, delicious syrup as it bakes.
4. Create the Lattice Top
This is where the magic happens. Roll out your second disk and cut 12 strips (about 3/4 inch wide). Lay 6 strips vertically across the pie. Fold back every other strip and lay a horizontal strip across. Unfold the vertical strips back over the horizontal one. Repeat this weaving process until you have a beautiful grid.
5. The Two-Stage Bake
We start the oven at 425°F for the first 15 minutes. This high heat “sets” the crust quickly. Then, we drop the temperature to 350°F to allow the apples to cook through without burning the pastry.
Expert Tips for Best Results
- Don’t Overwork the Dough: The more you handle the dough, the more the gluten develops and the more the butter melts. Handle it as little as possible for a tender crust.
- Check for “Bubbly” Juices: Your pie isn’t done until the juices are bubbling thick through the lattice. If the crust is getting too dark but the juices aren’t thick, tent the pie loosely with aluminum foil.
- The Patience Phase: You must let the pie cool for at least one hour (preferably two) before slicing. This allows the filling to set. If you cut it too early, the filling will run out everywhere.
- Use a Baking Sheet: Always place your pie plate on a rimmed baking sheet. Apple pie is notorious for bubbling over, and cleaning burnt sugar off the bottom of your oven is no fun!
Variations and Substitutions
- Dutch Apple Pie: Instead of a lattice top, use a crumble topping made of flour, brown sugar, butter, and oats.
- Caramel Apple: Drizzle a bit of salted caramel sauce over the apples before adding the top crust.
- Spice it Up: Add a pinch of nutmeg, cloves, or allspice for a deeper, more complex flavor profile.
- Vegan Option: Use a high-quality vegan butter stick (ensure it is cold) and omit any egg wash on the crust.
Storage and Freezing
To Store: You can keep your apple pie at room temperature, covered loosely, for up to 2 days. For longer storage, keep it in the refrigerator for up to 5 days. Reheat slices in a 350°F oven for 10 minutes to crisp up the crust.
To Freeze: You can freeze the unbaked pie! Assemble it completely, wrap it tightly in several layers of plastic wrap and foil, and freeze for up to 3 months. Bake directly from frozen, adding about 15-20 minutes to the total baking time.
FAQ
Which apples are best for pie?
A mix is best! Granny Smith provides a tart punch and holds its shape, while McIntosh or Honeycrisp add sweetness and a softer texture. Avoid Red Delicious, as they become mealy when baked.
How do I avoid a soggy bottom crust?
Baking the pie on the lowest oven rack helps the bottom crust get direct heat. Also, the flour in the filling acts as a thickener to prevent the juices from soaking into the dough.
Can I make the dough in a food processor?
Yes! Pulse the flour and butter until you have small crumbs, then pulse in the water one tablespoon at a time. Be careful not to over-process into a solid ball.
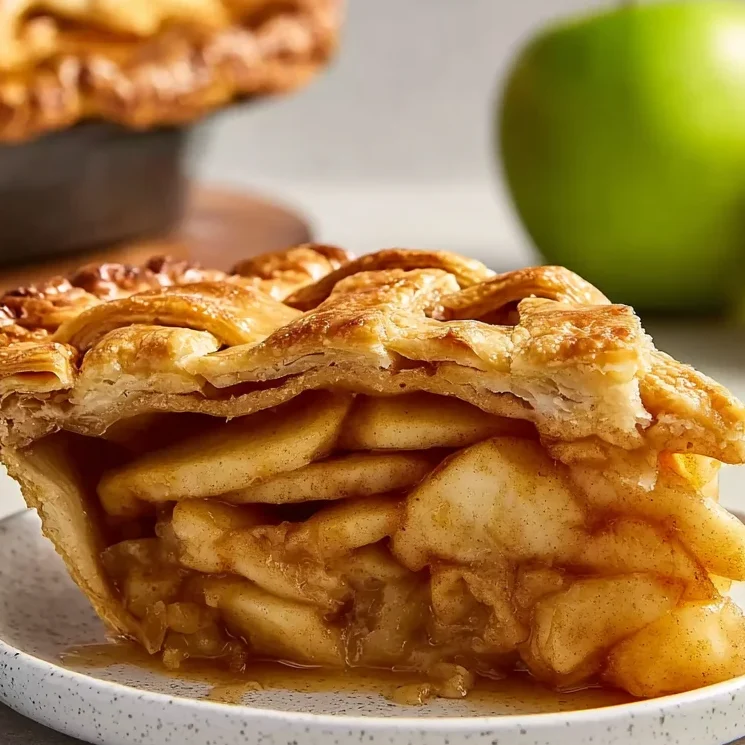
The Perfect Slice
There is nothing quite like a slice of this pie served warm with a scoop of high-quality vanilla bean ice cream (a la mode!). The cold cream melting into the warm, cinnamon-spiced apples is the ultimate dessert experience.
This recipe is a labor of love, but the results are worth every second of chilling and rolling. I hope this classic homemade apple pie becomes a staple in your home just as it has in mine.
Happy baking!
PrintClassic Homemade Apple Pie with a Flaky Lattice Crust

A quintessential American dessert featuring a mountain of tart, cinnamon-spiced apples tucked inside a buttery, handcrafted flaky crust.
Ingredients
2 cups all-purpose flour, plus more for work surface
1 cup cold unsalted butter or cold vegetable shortening, cut into small pieces
1 tsp. kosher salt
2 to 4 tablespoons very cold water
9 to 10 tart apples (Granny Smith or McIntosh), peeled and thinly sliced
1/2 cup granulated sugar
1/4 cup all-purpose flour (for filling)
1 tsp. ground cinnamon
Dash of kosher salt
2 Tbsp. unsalted butter, cut into pieces (for topping filling)
Instructions
1. Prepare the Crust: Mix flour, butter, and salt. Gradually add cold water until dough forms. Knead 2-3 times, divide into two disks, and chill for at least 2 hours.
2. Roll the Bottom: Roll one disk into a 12-inch circle. Fit into a 9-inch deep-dish pie plate. Refrigerate.
3. Fill: Preheat oven to 425°F. Toss apples with sugar, flour, cinnamon, and salt. Spoon into crust and dot with butter.
4. Lattice Top: Roll second disk and cut into 12 strips. Create a lattice pattern over the apples. Fold and crimp edges.
5. Bake: Place on a baking sheet. Bake 15 mins at 425°F. Lower to 350°F and bake 45 mins. Cover with foil and bake 30 more mins until bubbly.
6. Cool: Let rest on a wire rack for at least 1 hour before serving.
Notes
For the best results, use a mix of Granny Smith and McIntosh apples.
Ensure your butter and water are ice-cold to get those flaky layers.
Place a baking sheet on the lower rack to catch any drips.


