
If there is one thing I’ve learned in my years of baking, it’s that everything tastes better when it’s bite-sized. There is something so nostalgic and charming about Mini Vanilla Cupcake Bites. They remind me of those high end bakery treats that come in a little box, yet they are remarkably simple to make in your own kitchen.
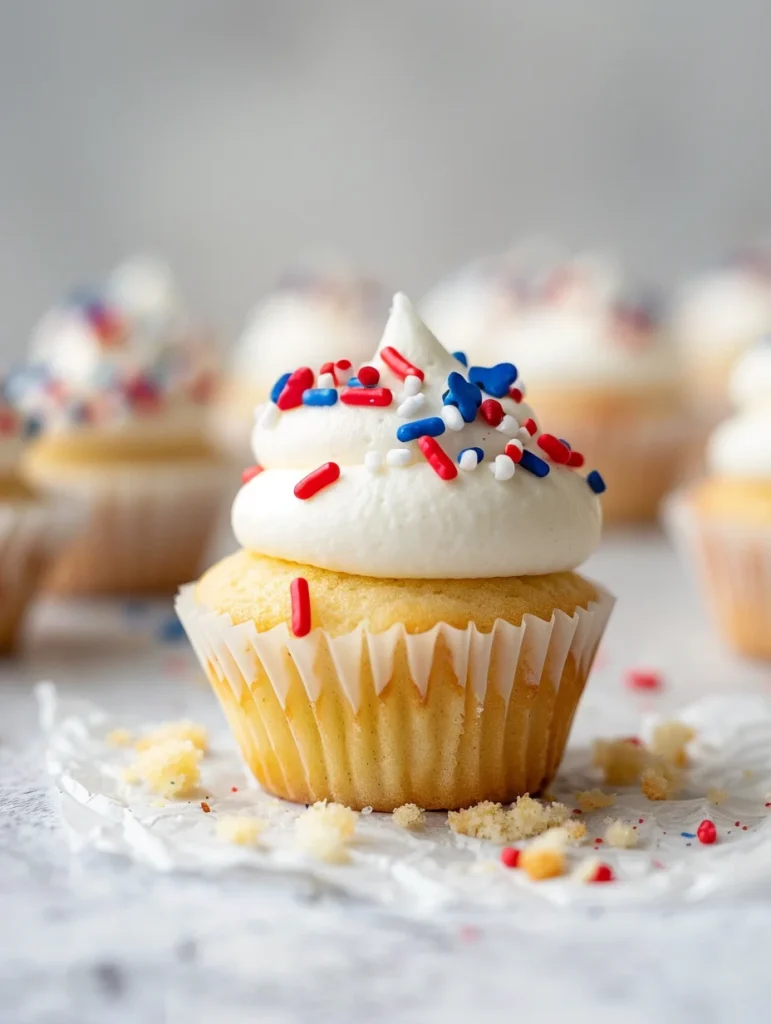
Whether you are hosting a birthday party, prepping for a school bake sale, or just want a sweet treat to keep in the fridge for “emergencies,” these little bites are the answer. They aren’t just your standard cupcake; they have a dense, moist, melt-in-your-mouth texture that feels more like a cross between a pound cake and a traditional cupcake.
The secret lies in the combination of buttermilk and a mix of cake flour and all-purpose flour. It creates a tender crumb that holds up perfectly under a rich, buttery vanilla glaze. Let’s get into why these are about to become your new favorite recipe!
Why You’ll Love This Recipe
- Perfect Texture: The use of cake flour and buttermilk ensures these are never dry. They are “springy” and soft every single time.
- Bite-Sized Convenience: No need for forks or plates! These are the ultimate finger-food dessert.
- Better-Than-Bakery Flavor: The addition of a tiny bit of butter flavor makes these taste exactly like the fancy ones you’d buy at a specialty boutique.
- Kid-Friendly: They are the perfect size for little hands, and who can resist sprinkles?
- Make-Ahead Friendly: These store beautifully and actually taste even better the next day once the icing has set.
Ingredient Notes
Before you start preheating your oven, let’s talk about a few key ingredients that make these Mini Vanilla Cupcake Bites stand out.
- Cake Flour vs. All-Purpose: We use a mix of both. Cake flour has a lower protein content, which makes the cake lighter and more delicate. All-purpose flour provides the structure needed so they don’t crumble apart when you pick them up.
- Buttermilk: This is the MVP of moisture. If you don’t have buttermilk on hand, you can make a quick substitute by adding 1 teaspoon of lemon juice or vinegar to 2/3 cup of regular milk and letting it sit for 5 minutes.
- Butter Flavor: This is my “secret” ingredient. It’s often found in the baking aisle near the vanilla. It gives that deep, “yellow cake” nostalgia that vanilla alone can’t quite achieve.
- Salted Butter: I love using salted butter in the batter to balance the sweetness of the sugar and the icing.
- Clear Vanilla Extract: For the icing, I recommend clear vanilla if you want that stark white look. Regular vanilla works just as well but will give the icing a slight ivory tint.
Step-by-Step Instructions
1. Prep and Mix the Base
Start by preheating your oven to 350°F (180°C). In your stand mixer, cream together the melted butter, canola oil, and sugar. The oil keeps them moist for days, while the butter provides that classic flavor.
2. Add the Aromatics
Beat in the eggs one at a time. This ensures they are fully emulsified into the fats. Then, stir in your vanilla and that special butter flavor.
3. Combine Dry and Wet
Whisk your flours, baking soda, baking powder, and salt in a separate bowl. Gradually add this to the mixer. Just as it’s almost combined, pour in the buttermilk. Mix until smooth, but be careful not to overmix—overmixing leads to tough cupcakes!
4. Bake to Perfection
Divide the batter into your mini silicone muffin molds. You want to fill them about 3/4 full. Bake for 17-20 minutes. You’ll know they are done when they spring back when lightly touched or a toothpick comes out with just a few moist crumbs.
5. The Warm Butter Glaze
This isn’t a heavy buttercream; it’s a pourable, setting icing. Melt your butter and milk together until hot, then whisk in the powdered sugar and vanilla. It should be thick but pourable.
Expert Tips for Best Results
- Room Temp is Vital: Ensure your eggs and buttermilk are at room temperature. Cold ingredients can cause the melted butter to seize, resulting in a lumpy batter.
- Silicone Molds are Key: I highly recommend using silicone mini muffin molds. They make popping the bites out a breeze without any sticking or the need for paper liners.
- Don’t Overbake: Because these are so small, they can go from perfect to overdone in a matter of two minutes. Start checking them at the 15-minute mark.
- Glaze While Warm-ish: I like to glaze these when they are just slightly warm. It helps the icing “hug” the cupcake and create a smooth finish.
Variations and Substitutions
- Chocolate Version: Swap 1/4 cup of the flour for high-quality cocoa powder and use a chocolate ganache on top.
- Lemon Blueberry: Add a tablespoon of lemon zest to the batter and press a single blueberry into the center of each bite before baking.
- Color Themes: Use food coloring in the icing to match your party theme—pink for baby showers, blue for birthdays, or orange for Halloween!
Storage and Freezing
To Store: These Mini Vanilla Cupcake Bites stay fresh in an airtight container at room temperature for up to 4 days. If it’s particularly humid, you may want to store them in the fridge to keep the icing from getting tacky.
To Freeze: You can freeze these! Place the un-iced or iced bites on a baking sheet in a single layer to flash-freeze for an hour. Then, transfer them to a freezer-safe bag for up to 3 months. Thaw at room temperature for about 30 minutes before serving.
FAQ
Can I use a regular muffin tin?
Yes! If you use a standard muffin tin, you will need to increase the bake time to approximately 22-25 minutes. However, the “bite-sized” charm is best achieved with the mini versions!
Why did my cupcakes sink in the middle?
This usually happens if the oven door is opened too early or if the baking powder/soda is expired. Make sure your leavening agents are fresh!
Can I use only All-Purpose flour?
You can, but the texture will be a bit denser and “breadier.” The cake flour is really what gives them that professional bakery crumb.
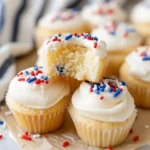
Making these Mini Vanilla Cupcake Bites is such a rewarding experience because they look so professional with very little effort. There is something so satisfying about seeing a tray of perfectly glazed, sprinkle-topped treats ready to be enjoyed.
If you make these for your next gathering, be sure to tag me or leave a comment below! I love seeing your creations. Happy baking!
PrintMini Vanilla Cupcake Bites
These Mini Vanilla Cupcake Bites are the ultimate crowd-pleaser! They are incredibly soft thanks to the buttermilk and cake flour, featuring a rich vanilla flavor that tastes just like a high-end bakery treat. Perfect for birthdays, school snacks, or just a Tuesday afternoon craving.
Ingredients
1/4 cup (56g) salted butter, melted
1/4 cup (60mL) canola oil
1 cup (230g) granulated sugar
2 eggs, room temperature
1/2 Tbsp vanilla extract
1/4 tsp butter flavor
1 cup (139g) cake flour
1/4 cup (38g) all-purpose flour
1/4 tsp baking soda
1/4 tsp baking powder
1/2 tsp salt
2/3 cup (177mL) buttermilk, room temperature
1/4 cup (59mL) milk
10 Tbsp butter
2 tsp clear vanilla extract
3 1/2 cups (375g) powdered sugar
White food coloring, if desired
Sprinkles
Instructions
1. Preheat the oven to 350°F (180°C).
2. In the bowl of a stand mixer with the paddle attachment, combine the melted salted butter, canola oil and granulated sugar until well combined.
3. Add in the eggs, one at a time, mixing thoroughly between each addition.
4. Once mixed in, add the vanilla extract and butter flavor.
5. In a separate bowl, whisk together the cake flour, all-purpose flour, baking soda, baking powder and salt.
6. Add the dry ingredients to the mixer and slowly begin to incorporate. Once the dry ingredients are almost all combined with the wet ingredients, slowly pour in the buttermilk and mix until well combined and smooth.
7. Divide the batter into mini silicone muffin molds, filling each 3/4 of the way full.
8. Bake for 17-20 minutes or until the cake springs back when tapped.
9. Allow to rest for 5 minutes and then turn the bites out. Let them cool while making the icing.
10. Add the milk and butter to a microwave safe bowl and microwave for 45 seconds or until bubbling.
11. Whisk in the vanilla and powdered sugar. Add more milk to thin, if needed.
12. Scoop and spread the icing onto the top of each cupcake and top with sprinkles.
Notes
Room temperature ingredients are key for a smooth batter.
Don’t skip the cake flour! It’s what gives these that ‘bite-sized’ tender crumb.
If you don’t have butter flavor, you can substitute with extra vanilla, but the butter flavor adds that nostalgic bakery taste.


