
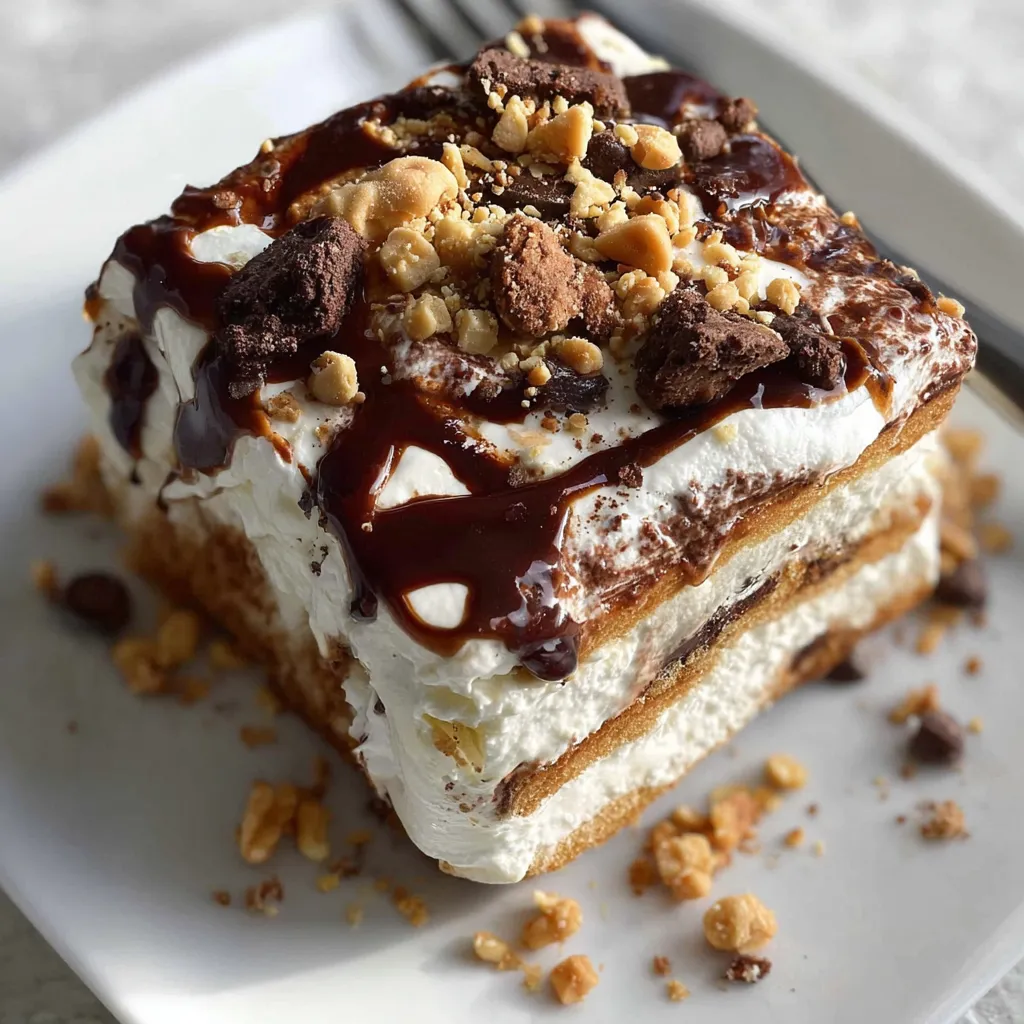
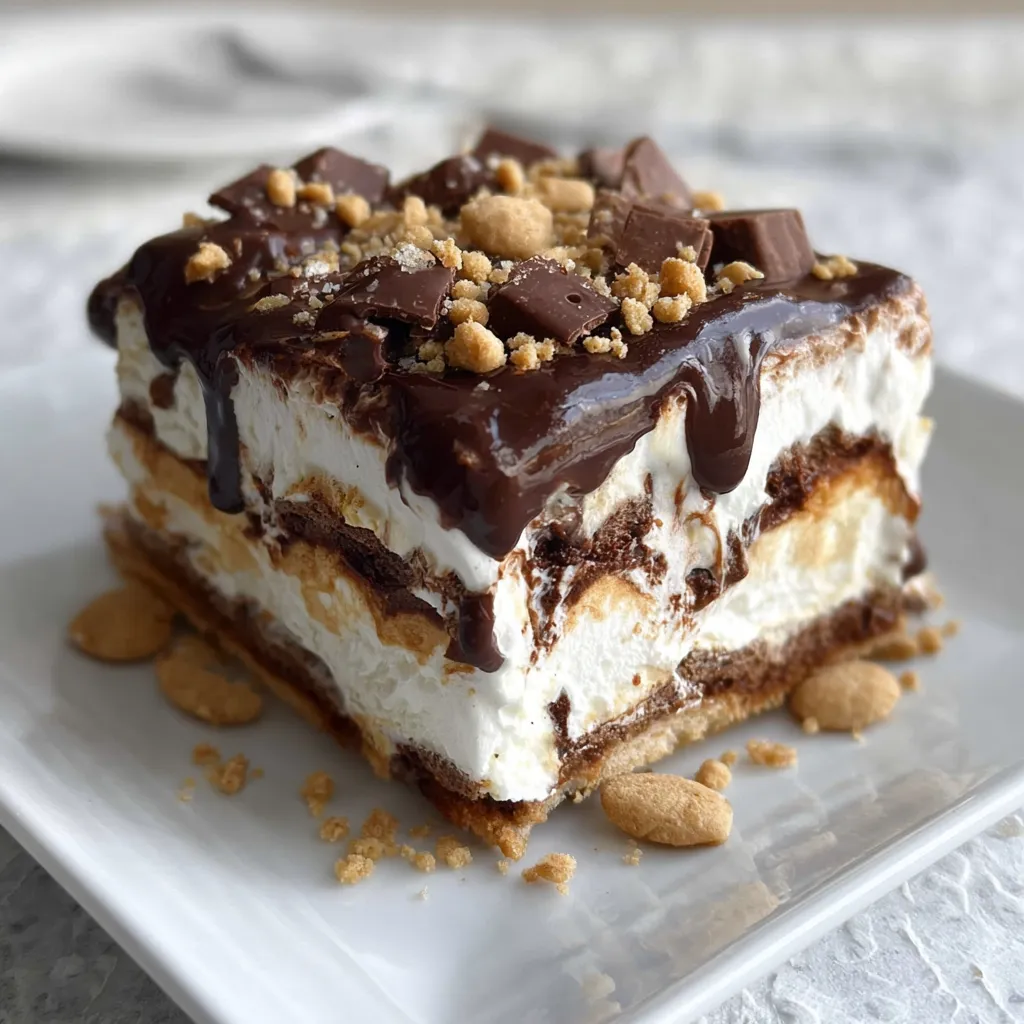
When the temperature rises and the humidity peaks, the last thing anyone wants to do is preheat an oven. Enter the Ice Cream Sandwich Cake, a dessert so deceptively simple yet impressively decadent that it has become the unofficial king of summer potlucks. Imagine layers of classic rectangular ice cream sandwiches—the kind that instantly transport you back to childhood—transformed into a sophisticated, multi-tiered masterpiece. Smothered in rich hot fudge, silky caramel, and airy whipped topping, this cake offers a delightful symphony of textures. The crunch of the toffee pieces against the velvety creaminess of the ice cream creates a dessert experience that rivals expensive parlor cakes. Whether you are hosting a backyard BBQ or a last-minute birthday celebration, this no-bake wonder is your secret weapon for a stress-free, high-impact finale that everyone will rave about.
Why You’ll Love This Recipe
This recipe is a total game-changer for several reasons. First and foremost, it is entirely no-bake, meaning your kitchen stays cool even on the hottest July afternoon. With only five or six pantry-staple ingredients, the preparation is incredibly straightforward, requiring no specialized culinary skills or expensive equipment. It is also the ultimate make-ahead dessert; you can assemble it days in advance and keep it tucked away in the freezer until the moment you’re ready to serve. Furthermore, it is highly customizable. From switching up the toppings to using different flavored ice cream bars, the variations are endless. It’s a “crowd-pleaser” in the truest sense of the word, appealing to both kids and adults alike with its nostalgic charm and indulgent flavors.
What Is Ice Cream Sandwich Cake?
An Ice Cream Sandwich Cake is a “hack” dessert that utilizes pre-made ice cream sandwiches as the “sponge” or cake layers. Instead of baking layers of cake and waiting for them to cool, you simply stack these frozen treats. The genius lies in the construction: as the sandwiches slightly soften during assembly and then refreeze with the toppings, they meld together into a singular, sliceable unit. Historically, this dessert gained popularity in the mid-century American kitchen as part of the “refrigerator cake” movement, where convenience met creativity. Today, it stands as a testament to the idea that you don’t need a pastry degree to create a visually stunning and delicious dessert. It’s essentially a deconstructed sundae in cake form, offering the perfect ratio of cake, cream, and sauce in every bite.
Ingredients Overview
To create this frozen masterpiece, you will need a handful of high-quality ingredients that work together to balance sweetness and texture.
- Ice Cream Sandwiches (20 bars): These are the foundation. Traditional vanilla-and-chocolate sandwiches work best because they are easy to cut and stack. Ensure they are kept frozen until the very second you are ready to layer them to prevent melting.
- Hot Fudge Topping (2 cups): This provides the rich, cocoa-heavy contrast to the sweet ice cream. Using a high-quality fudge that stays slightly soft even when frozen ensures the cake is easy to bite into.
- Caramel Topping (3/4 cup): The caramel adds a buttery, salty-sweet dimension. It weaves through the layers, providing that “gourmet” sundae feel.
- Cool Whip (8 ounces): While you can use homemade whipped cream, Cool Whip (or a similar stabilized whipped topping) is preferred here. Its structure holds up significantly better in the freezer and won’t deflate or become icy over time.
- Mini Chocolate Chips & Toffee Pieces (1/2 cup each): These provide the necessary “crunch factor.” The toffee pieces, in particular, offer a hint of burnt sugar and salt that cuts through the richness of the chocolate and cream.
Ingredient Substitutions & Tips
If you want to put your own spin on this classic, the possibilities are vast. For a nut-free version, ensure your toffee pieces don’t contain almonds, or replace them with crushed chocolate sandwich cookies (like Oreos). If you’re a fan of fruit, try replacing the caramel with a thick strawberry or raspberry swirl. For those looking for a dairy-free alternative, many brands now offer vegan ice cream sandwiches and coconut-based whipped toppings. Another pro tip: if you can’t find toffee bits, simply crush up a few Heath or Skor candy bars. The irregular chunks add a lovely rustic look to the top of the cake. Always ensure your sauces are at room temperature or only slightly warmed; if they are too hot, they will melt your ice cream layers instantly.
Step-by-Step Instructions
- Prepare the Sauces: Start by checking the consistency of your hot fudge and caramel. If they are too thick to spread easily, pop the jars into the microwave for 15-20 seconds. You want them to be “loosened” but not hot. Stir them well so the heat is evenly distributed.
- The Base Layer: Take a 9×13-inch glass or ceramic baking dish. Quickly unwrap 10 ice cream sandwiches and line the bottom of the dish. You may need to cut one or two sandwiches in half or into strips to fill any gaps at the edges. The goal is a solid, flat layer of ice cream bars.
- The Middle Fillings: Pour 1 cup of the warmed hot fudge over the sandwiches. Use an offset spatula or the back of a spoon to spread it to the very edges. Drizzle half of the caramel topping over the fudge. Next, spread half of the thawed Cool Whip over the caramel layer. This acts as the “glue” for your toppings. Sprinkle half of your chocolate chips and half of the toffee pieces evenly across the surface.
- Repeat and Finish: Add the second layer of 10 ice cream sandwiches directly on top of the first. Repeat the layers: the remaining hot fudge, the remaining caramel, and the rest of the Cool Whip. Finish by generously garnishing the top with the remaining chocolate chips and toffee.
- The Deep Freeze: This is the most critical step. Cover the dish tightly with plastic wrap or foil. Place it in the coldest part of your freezer for at least one hour, though 4-6 hours (or overnight) is better for achieving a clean, cake-like slice.
- Slicing and Serving: When ready to serve, remove from the freezer and let it sit on the counter for 5 minutes. Use a sharp knife dipped in hot water to cut into 12-15 squares.
Expert Baking/Cooking Tips
To achieve professional-looking results, always thaw your Cool Whip in the refrigerator, never on the counter. Counter-thawing can cause the topping to become watery, which will lead to an icy texture once refrozen. Secondly, speed is your friend. Have all your ingredients measured and ready before you pull the ice cream sandwiches out of the freezer. If the sandwiches melt too much during assembly, the layers will blur together. Finally, for the cleanest slices, clean your knife between every single cut. Dipping the blade in a tall glass of hot water and wiping it dry with a towel ensures that the fudge and cream don’t smear across the beautiful white layers of the ice cream bars.
The Best Occasions for This Cake
This Ice Cream Sandwich Cake is the ultimate “utility” dessert. Because it serves a large group and requires zero oven time, it is the premier choice for summer holidays like the 4th of July or Labor Day. It’s also a fantastic option for children’s birthday parties; kids love the familiar taste of ice cream sandwiches, and parents love that the cake can be made days in advance, leaving more time for party games and decorations. Additionally, it travels surprisingly well in a cooler, making it a hit for community potlucks or lake house weekends. It’s elegant enough for a casual dinner party but simple enough for a Tuesday night treat when the family needs a “pick-me-up” during a heatwave.
Serving Suggestions
For a truly indulgent experience, serve each slice on a chilled plate to prevent the bottom from melting too quickly. You can elevate the presentation by adding a fresh mint sprig or a few fresh raspberries on the side to provide a tart contrast to the sweetness. If you want to go “all out,” provide an extra jar of warmed hot fudge or a can of whipped cream at the table for guests to add their own extra garnishes.
Storage & Make-Ahead Tips
This cake is the definition of make-ahead friendly. It can stay in the freezer, tightly wrapped in plastic wrap and then a layer of aluminum foil, for up to two weeks without losing quality. If you have leftovers, ensure they are covered immediately to prevent the “freezer taste” from setting in. To prevent the toppings from sticking to the foil, you can insert a few toothpicks into the cake before wrapping it.
FAQs
Q: Can I use real whipped cream instead of Cool Whip?
A: You can, but you must stabilize it first (using gelatin or a stabilizer) to ensure it doesn’t deflate or become “weepy” when frozen. Cool Whip is designed to withstand freezing and thawing, making it the more reliable choice for this specific recipe.
Q: How do I get the sandwiches to fit perfectly in my dish?
A: Don’t be afraid to use a sharp knife to trim the sandwiches. Most 9×13 dishes will fit two rows of sandwiches perfectly, with a small gap at the end that can be filled by cutting a sandwich into thirds.
Q: Can I make this in a springform pan?
A: Yes! A 9-inch or 10-inch springform pan works beautifully for a round “torte” look. You will just need to cut the sandwiches into smaller pieces to fit the circular shape.
Q: Is there a way to make this less sweet?
A: You can use “No Sugar Added” ice cream sandwiches and swap the hot fudge for a dark chocolate ganache made with 70% cocoa chocolate and heavy cream.
Q: My fudge is too hard to spread. What should I do?
A: Ensure you are using “Hot Fudge” and not “Chocolate Syrup.” Fudge is thicker. If it’s too hard, microwave it in 10-second intervals until it reaches the consistency of peanut butter.
Final Thoughts
The Ice Cream Sandwich Cake is a testament to the fact that great desserts don’t have to be complicated. By taking simple, beloved ingredients and layering them with intention, you create a treat that is greater than the sum of its parts. It’s a nostalgic, cooling, and utterly delicious way to celebrate any occasion. Give this recipe a try this weekend, and watch it become a new staple in your family’s dessert rotation!


