
There is something deeply nostalgic about the smell of a fresh batch of vanilla buttercream frosting whipping up in the kitchen. It’s the scent of birthday parties, holiday sugar cookies, and Sunday afternoon “just because” cupcakes.
If you’ve ever wondered why bakery frosting tastes so much better than the tub stuff at the grocery store, I have a secret for you: it isn’t fancy ingredients. It’s the technique.
This recipe is my “old faithful.” It’s a classic American Buttercream that uses just four pantry staples to create a cloud-like texture that is stable enough for intricate piping but soft enough to melt in your mouth. Whether you’re a beginner baker or a seasoned pro, this is the only vanilla frosting recipe you will ever need.
Why You’ll Love This Recipe
- Only 4 Ingredients: You likely have everything in your kitchen right now.
- Perfect for Piping: It holds its shape beautifully for tall cupcake swirls or sharp cake edges.
- Quick & Easy: Goes from the pantry to the cake in under 10 minutes.
- Customizable: It’s a blank canvas for any flavor or color you can imagine.
- Crusting Recipe: It develops a very thin “crust” on the outside, which makes it ideal for decorated sugar cookies.
Ingredient Notes
To get that professional finish, the quality and temperature of your ingredients matter more than you think.
- Salted Butter: I prefer salted butter for buttercream because it cuts through the intense sweetness of the powdered sugar. If you use unsalted, add a pinch of fine sea salt. Crucial Tip: Your butter must be “cool room temperature.” If it’s too soft (melty), your frosting will be greasy. If it’s too cold, it will be lumpy.
- Confectioners Powdered Sugar: Also known as icing sugar. If your sugar looks particularly lumpy in the bag, give it a quick sift. This ensures a silk-smooth finish.
- Vanilla Extract: For the best flavor, use pure vanilla extract. However, if you are making a wedding cake and want a pure white icing, use “clear vanilla.” Regular extract will tint the frosting a very slight ivory color.
- Milk (or Heavy Cream): Milk works perfectly, but if you want an even richer, more decadent mouthfeel, swap the milk for heavy whipping cream.
Step-by-Step Instructions
1. Cream the Butter
Start by placing your softened butter into a large mixing bowl. Using an electric hand mixer or a stand mixer fitted with the paddle attachment, beat the butter on medium-high speed for at least 1 minute. You want it to look pale and creamy. This step incorporates air, which is the foundation of a fluffy frosting.
2. The Sugar Cloud Prevention
Turn your mixer to the lowest setting. Add the powdered sugar one cup at a time. I know it’s tempting to dump it all in, but doing it gradually prevents a literal cloud of sugar from covering your kitchen counters! Mix until the sugar is mostly incorporated after each cup.
3. The “Fluff” Factor
Once all the sugar is in, add your vanilla and milk. Now, turn that mixer up to high! Beat the mixture for another 2 to 3 minutes. You will actually see the frosting transform from a dense paste into a light, voluminous, and airy whipped delight.
4. Final Touch
If you notice air bubbles, turn the mixer to the lowest speed for 30 seconds at the very end to “knock out” the large bubbles. This creates a smoother surface for spreading.
Expert Tips for Best Results
- The Scrape-Down: Use a silicone spatula to scrape the bottom and sides of the bowl at least twice during the process. Butter often hides at the bottom!
- Adjusting Consistency: If your frosting is too thin, add more sugar (1/4 cup at a time). If it’s too stiff for piping, add more milk (1 teaspoon at a time).
- Don’t Over-Soften: Never microwave your butter to soften it for frosting. It creates an oily texture that won’t ever whip up properly. Leave it on the counter for 30–60 minutes instead.
- Beat it Longer: Most people stop mixing too soon. That final 3-minute whip is where the magic happens!
Variations and Substitutions
This recipe is incredibly versatile. Here is how to switch it up:
- Chocolate Buttercream: Add 1 1/4 cups of unsweetened cocoa powder when you add the powdered sugar. You may need an extra tablespoon of milk to keep it creamy.
- Lemon or Orange: Replace the vanilla with 1 tablespoon of fresh zest and swap the milk for fresh citrus juice.
- Berry Frosting: Pulse freeze-dried strawberries or raspberries into a fine powder and mix it in. It adds a vibrant color and punchy flavor without making the frosting runny.
- Colored Frosting: Use gel food coloring rather than liquid drops. Gel is more concentrated and won’t change the consistency of your buttercream.
Storage and Freezing
In the Fridge: You can make this buttercream up to a week in advance. Store it in an airtight container. Before using, let it come to room temperature and give it a quick 1-minute whip with the mixer to restore the texture.
In the Freezer: Buttercream freezes beautifully! Store in a freezer bag for up to 3 months. Thaw overnight in the refrigerator, then bring to room temp before re-whipping.
FAQ
Why is my buttercream grainy?
This usually happens if the powdered sugar wasn’t sifted or if you didn’t beat the frosting long enough. The sugar needs time to “dissolve” into the fat of the butter. Mix for another 2 minutes on high!
Can I use a stand mixer?
Absolutely! Use the paddle attachment for the smoothest results. Avoid the whisk attachment unless you want a lot of air bubbles (which is fine for home cupcakes, but harder for smooth cake finishes).
How much does this frost?
This recipe makes enough to generously frost 24 cupcakes with a high swirl, or to fill and frost a 2-layer 8-inch round cake.
Can I leave this out on the counter?
Yes. Because of the high sugar content, American Buttercream is shelf-stable for 2-3 days at room temperature, provided your kitchen isn’t too hot!
Ready to Bake?
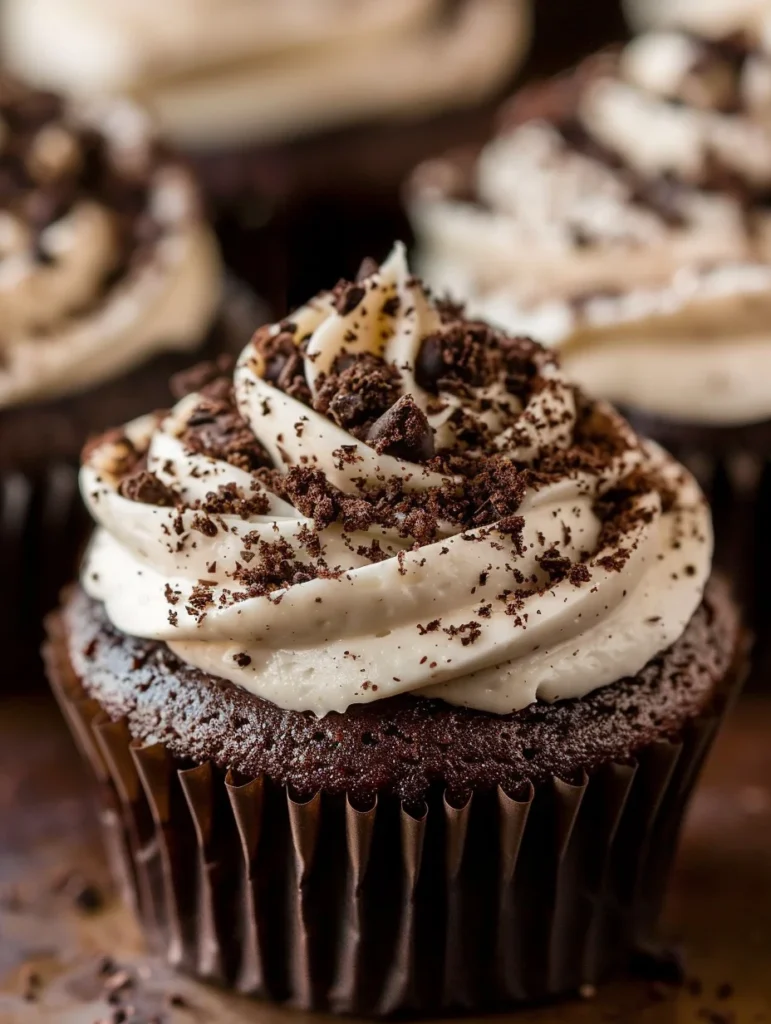
There is nothing quite like the pride of a perfectly frosted cake. This vanilla buttercream is a staple in my kitchen, and I hope it becomes one in yours too! Whether you’re topping a classic yellow cake or a batch of decadent chocolate cupcakes, this frosting is the “cherry on top” of any dessert.
Pin this recipe to your Baking Recipes board on Pinterest and tag me if you try it! Happy baking!
PrintVanilla Buttercream Frosting
This classic Vanilla Buttercream Frosting is the ultimate “everything” icing. It’s light, airy, and stable enough for high-swirl piping on cupcakes or smoothing onto a multi-layer birthday cake. Use clear vanilla for a snow-white finish or pure vanilla extract for that deep, nostalgic flavor.
Ingredients
1 cup salted butter, softened
4 cups confectioners powdered sugar
2 teaspoons vanilla extract
2 tablespoons milk
Instructions
1. In a large mixing bowl, cream the softened salted butter with an electric hand mixer (or stand mixer) on medium-high speed for 1 full minute until smooth and pale.
2. Turn the mixer to low and add the powdered sugar one cup at a time, mixing well after each addition until incorporated to avoid a “sugar cloud.”
3. Add the vanilla extract and milk. Increase the speed to high and beat for 2-3 minutes until the frosting is light, fluffy, and increased in volume.
4. Use immediately to pipe onto cooled cupcakes, spread over a cake, or frost sugar cookies.
Notes
Chocolate Version: Add 1 1/4 cup cocoa powder along with the powdered sugar.
Colored Frosting: Add 3-6 drops of gel food coloring when you add the milk.
Storage: Store in an airtight container in the fridge for up to 1 week or freezer for 3 months.


