There is something truly magical about the first signs of spring. The air gets a bit crisper, the flowers start to peek through the soil, and of course, the Easter candy aisles begin to overflow. But let’s be honest: while we all have a soft spot for those yellow-packaged peanut butter eggs, they often leave us wanting something a little more… special.
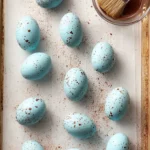
Enter these Robin’s Egg Peanut Butter Eggs. Not only do they have that nostalgic, creamy peanut butter center we all crave, but they are wrapped in a stunning, naturally-colored “robins egg blue” shell. Finished with delicate cocoa speckles, they look like they were plucked straight from a boutique confectionery.
Whether you are looking for the perfect addition to an Easter brunch spread or a fun weekend project with the kids, these eggs are as much a joy to make as they are to eat.
Why You’ll Love This Recipe
- Aesthetic & Photo-Ready: These are quite possibly the most beautiful treats you’ll make all year. The soft teal color and brown speckles make them look like real bird eggs.
- Better-Than-Store-Bought: By using high-quality peanut butter and a touch of maple syrup, the flavor is deeper and less “waxy” than commercial candy.
- Naturally Colored: No artificial food dyes here! We use the power of blue spirulina and matcha to achieve that perfect spring hue.
- No-Bake Ease: You don’t even need to turn on the oven. This is a simple assembly-style recipe that yields professional results.
- Customizable: You can easily swap out the nut butter or sweeteners to fit your dietary needs.
Ingredient Notes
To get that professional finish and perfect texture, the quality of your ingredients matters. Here is what you need to know:
- White Chocolate Melting Wafers: Unlike standard chocolate chips, melting wafers (like Ghirardelli or Merckens) are formulated with more cocoa butter, allowing them to melt smoothly and harden with a beautiful sheen.
- Natural Peanut Butter: I love the Trader Joe’s creamy salted peanut butter for this. It’s runny enough to mix well but thickens up beautifully once chilled.
- Blue Spirulina & Matcha: This is the “secret sauce.” Blue spirulina provides the blue base, while a tiny hint of matcha adds a touch of green to create that specific “Robin’s Egg” teal. Plus, they add a boost of antioxidants!
- Almond Flour: This acts as a binder for the peanut butter filling. It keeps the center light and slightly nutty without making it overly sweet like traditional recipes that use only powdered sugar.
- Coconut Oil: Adding a teaspoon to your melting chocolate helps thin it out, making the dipping process much easier and giving the shell a nice “snap.”
Step-by-Step Instructions
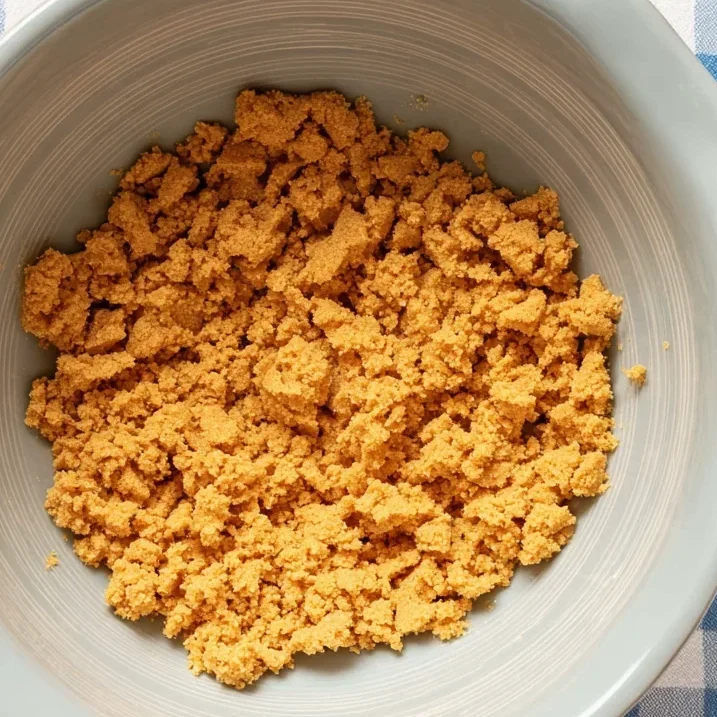
1. Prepare the Filling
In the bowl of a standing mixer, combine your almond flour, creamy peanut butter, maple syrup, sea salt, vanilla, and powdered sugar. Beat on medium speed until the mixture is uniform. It should look like a thick, moldable dough. Scrape the sides to ensure no flour pockets remain. Pro Tip: Chill this mixture for 30 minutes before shaping; it makes the dough much easier to handle.
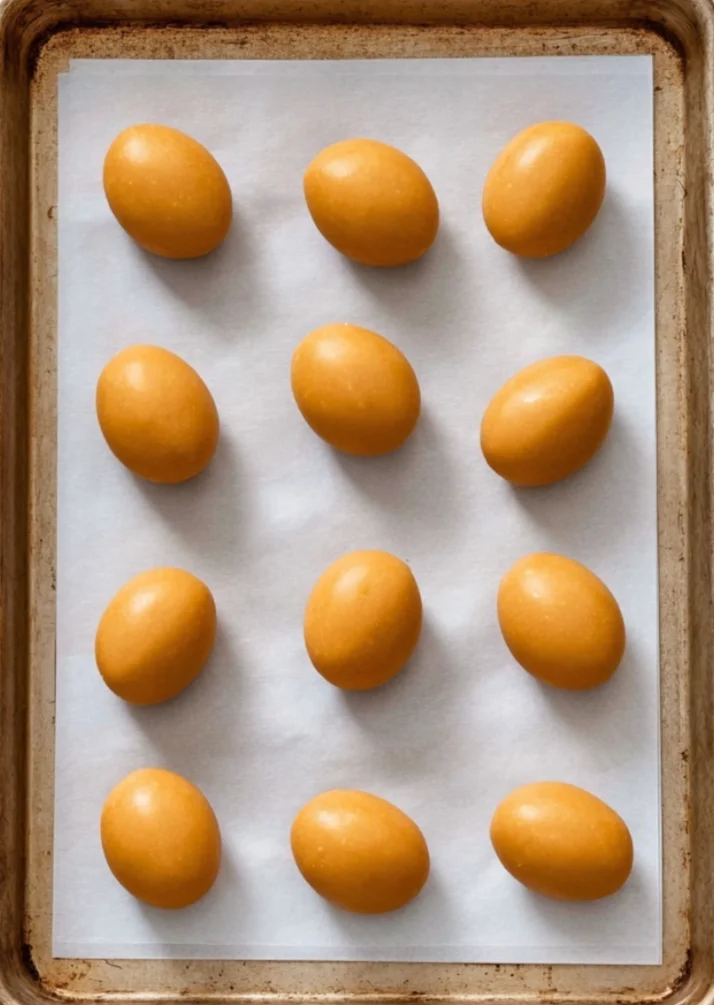
2. Shape the Eggs
Using a small cookie scoop, portion out the dough. Roll each portion into a smooth ball between your palms, then gently pinch one end to create an oblong egg shape. Place these on a parchment-lined baking sheet and freeze for at least 1-2 hours. Crucial Step: If the eggs aren’t frozen solid, they will melt or fall apart when you dip them in the warm chocolate.
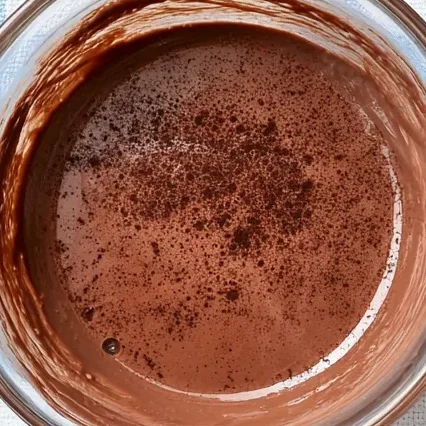
3. Melt the Coating
Set up a double boiler (a glass bowl over a pot of simmering water). Add your white chocolate wafers and coconut oil. Stir constantly until liquid-smooth. Once melted, whisk in your blue spirulina and matcha powder. Watch as the color transforms into that gorgeous spring teal!
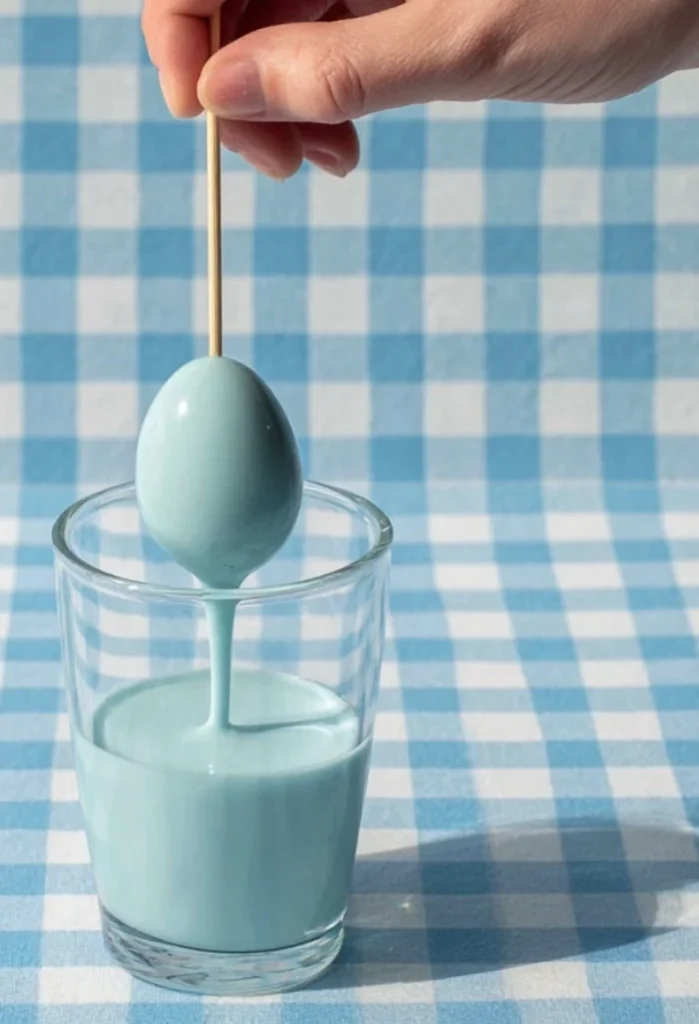
4. The Dipping Process
Pour your colored chocolate into a tall, narrow glass. This depth makes it much easier to submerge the eggs completely. Insert a toothpick into the bottom of a frozen egg, dip it quickly, and let the excess drip off. Place back on the parchment and use a tiny drop of chocolate to seal the toothpick hole.
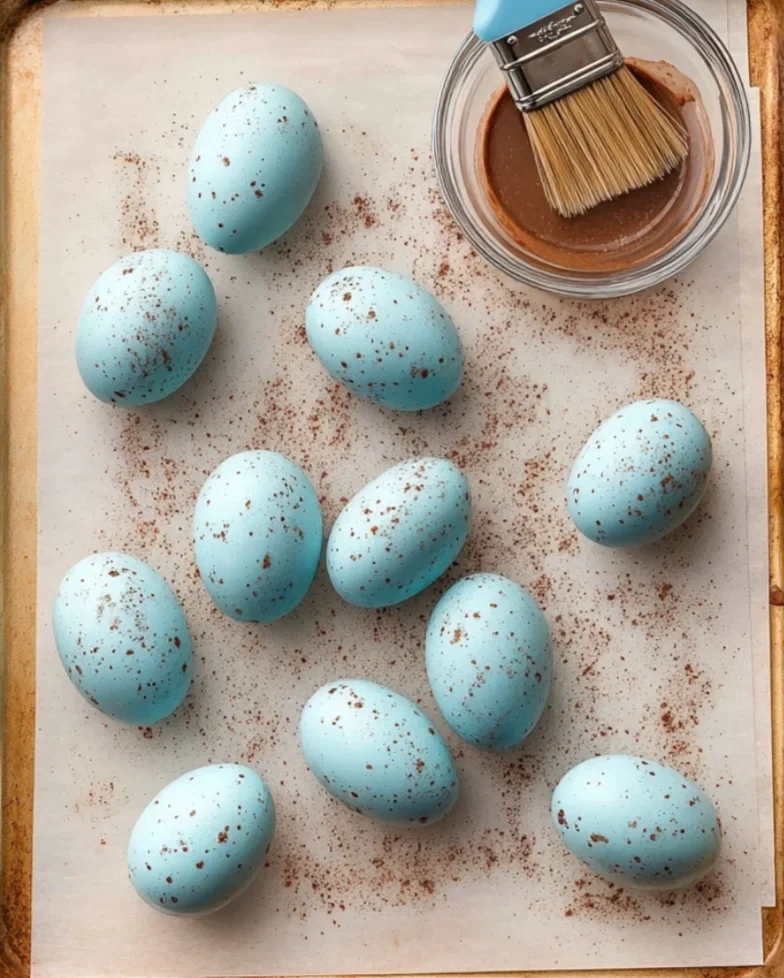
5. Add the Speckles
Mix your cocoa powder and water in a small bowl. It should be the consistency of thin paint. Dip a clean pastry brush or even a clean toothbrush into the mixture, and using your finger, flick the bristles to “spray” the eggs with tiny brown dots.
Expert Tips for Best Results
- The “Drip” Technique: When dipping, don’t just pull the egg straight up. Give it a gentle swirl and tap your wrist to help the excess chocolate fall back into the glass. This prevents a “puddle” from forming at the base of the egg.
- Temperature Control: If your melted chocolate starts to thicken as you work, pop it back over the double boiler for 30 seconds. Cold eggs will naturally cool the chocolate down over time.
- Natural Color Variations: If you want a more “blue” egg, omit the matcha. If you want a more “minty” egg, add a tiny bit more matcha. Nature isn’t uniform, and your eggs don’t have to be either!
Variations and Substitutions
- Nut-Free Option: You can substitute the peanut butter for sunflower seed butter (SunButter). The flavor will be slightly different but still delicious.
- Vegan Version: Most white chocolate melting wafers contain dairy. To make this vegan, use a vegan-friendly white chocolate bar chopped into small pieces.
- Keto-Friendly: Use a sugar-free sweetener and keto-approved white chocolate chips.
Storage and Freezing
These eggs are best stored in an airtight container in the refrigerator. Because they are made with natural peanut butter and no preservatives, they can soften at room temperature. They will stay fresh for up to 2 weeks in the fridge.
Freezing: You can freeze the finished eggs for up to 3 months! They are actually quite delicious eaten straight from the freezer for a chilly, fudge-like treat.
FAQ
Can I use regular food coloring?
Yes, but be careful! Standard water-based food coloring can cause chocolate to “seize” (turn into a grainy clump). If you aren’t using powders like spirulina, ensure you use oil-based candy coloring.
Why did my chocolate crack?
Usually, this happens if the temperature difference between the frozen egg and the hot chocolate is too extreme, or if the chocolate coating is too thin. Adding a little more coconut oil can help with flexibility.
Do these taste like spirulina or matcha?
Not at all! The amount used is so small that the sweetness of the white chocolate and the bold flavor of the peanut butter completely mask the earthy notes of the powders.
Happy Easter!
These Robin’s Egg Peanut Butter Eggs are more than just a recipe; they are a centerpiece. They prove that you don’t need artificial dyes to create something vibrant and beautiful. I can’t wait to see your creations—don’t forget to tag me on Instagram when you post your speckled beauties!
PrintRobin’s Egg Peanut Butter Eggs
These gorgeous Robin’s Egg Peanut Butter Eggs are the perfect aesthetic addition to your Easter basket. Made with a creamy, naturally sweetened peanut butter center and a beautiful “robins egg blue” shell colored with superfoods.
- Prep Time: 45 minutes
- Cook Time: 5 minutes
- Total Time: 3 hours
- Yield: 16 eggs
- Method: No-Bake
- Cuisine: American
Ingredients
2 teaspoons coconut oil
8 ounces white chocolate melting wafers
1/2 teaspoon blue spirulina
1/4 teaspoon matcha powder
1 teaspoon cocoa powder
1 tablespoon water
1/3 cup almond flour
1 1/4 cups smooth peanut butter
1/4 cup pure maple syrup
pinch of sea salt
1/2 teaspoon vanilla extract
1/4 cup powdered sugar
Instructions
1. Combine filling ingredients in a stand mixer until smooth; chill for 30 minutes.
2. Scoop and roll mixture into eggs. Freeze for 1-2 hours until firm.
3. Melt white chocolate and coconut oil in a double boiler.
4. Whisk in spirulina and matcha until smooth. Transfer to a narrow glass.
5. Dip frozen eggs using a toothpick; let excess chocolate drip off.
6. Mix cocoa powder and water. Flick onto eggs with a brush for speckles.
Notes
Use a tall, narrow glass for dipping to make the chocolate go further.
Ensure the eggs are fully frozen before dipping to prevent them from melting into the chocolate.
Store in the refrigerator for the best texture.