There is something deeply nostalgic about a “Yum Yum” dessert. Whether it’s the classic cherry version your grandmother used to bring to church socials or the pineapple variety served at every family reunion, these layered treats are the definition of comfort food. Today, I am sharing my absolute favorite variation: the Berry Yum Yum Dessert.

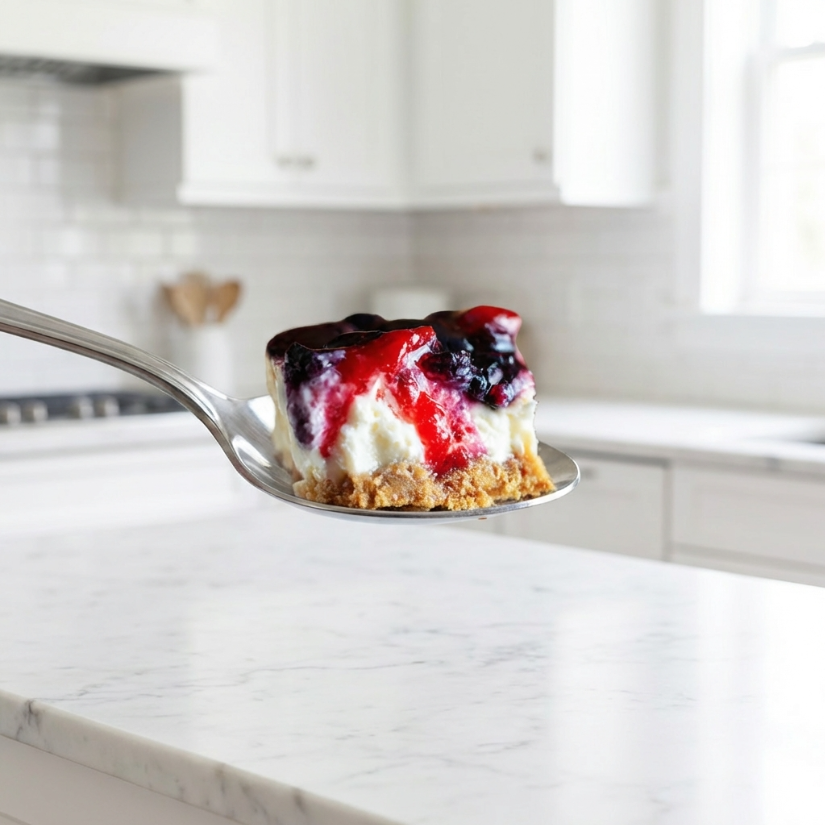
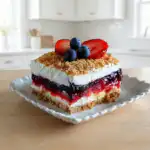
With its vibrant red strawberry layer, deep blue blueberry layer, and snowy white whipped cream cheese filling, this dessert isn’t just delicious—it’s a showstopper. It is the perfect patriotic treat for the 4th of July, Memorial Day, or any summer evening when you want a decadent dessert without turning on the oven.
The secret to a perfect Yum Yum is the balance of textures: the buttery, salty crunch of the graham cracker crust against the silky, cloud-like cream layers and the burst of fruit from the pie filling. Let’s dive into why this recipe is about to become your new go-to.
Why You’ll Love This Recipe
- No-Bake Magic: Keep your kitchen cool! This entire recipe is assembled without a single minute in the oven.
- Stunning Layers: The alternating colors look professional and impressive when sliced, making it a great centerpiece for potlucks.
- Make-Ahead Friendly: This dessert actually needs to be made the day before, which takes the stress out of hosting.
- Customizable: While we use strawberry and blueberry, the technique works with almost any fruit filling.
- Crowd-Pleaser: It’s light, creamy, and hits all the right notes for both kids and adults.
Ingredient Notes
To get that “premium” bakery-style finish, pay close attention to these key ingredients:
- Graham Cracker Crumbs: You can buy these pre-crushed or pulse whole sheets in a food processor. A fine crumb ensures the crust stays together.
- Unsalted Butter: This acts as the “glue” for your crust. We use unsalted to control the saltiness of the base.
- Cream Cheese: It is vital that your cream cheese is completely softened to room temperature. If it’s even slightly cold, you will end up with tiny lumps in your cream mixture.
- Whipping Cream: Look for “Heavy Whipping Cream” for the best stability. We whip this with granulated sugar to create a sturdy, homemade foam that holds up better than the tub stuff.
- Pie Fillings: I highly recommend “Premium” or “More Fruit” versions of strawberry and blueberry pie filling. They contain less “goo” and more actual whole berries, which provides a much better texture and flavor.
Step-by-Step Instructions
1. Prepare the Crust
In a medium bowl, combine your graham cracker crumbs and melted butter. Use a fork to toss them until every crumb looks like wet sand.
Pro Tip: Don’t forget to pull out those 3 tablespoons of crumbs and set them aside in a small pinch bowl! You’ll want those for the final decorative sprinkle.
Press the remaining mixture firmly into the bottom of a 9×13-inch pan. Use the bottom of a measuring cup to pack it down tightly—this prevents the crust from crumbling when you serve it.
2. The Cream Cheese Mixture
In a large bowl, beat the softened cream cheese with the confectioners’ sugar and half the vanilla. You want this to be “lump-free” and silky.
In a separate chilled bowl, whip the heavy cream, granulated sugar, and the rest of the vanilla until you see stiff peaks. “Stiff peaks” means when you lift the whisk, the cream stands straight up without drooping.
Gently fold the whipped cream into the cream cheese mixture using a rubber spatula. Do this by hand to keep the air in the mixture—this is what makes the dessert “fluffy.”
3. Assemble the Layers
This is the fun part!
- First Cream Layer: Spread 1/3 of your cream mixture over the crust.
- Strawberry Layer: Drop spoonfuls of strawberry filling over the cream. Don’t just dump it in the middle; “dollop” it around so it’s easier to spread without disturbing the cream underneath.
- Second Cream Layer: Carefully spread another 1/3 of the cream mixture over the berries.
- Blueberry Layer: Repeat the dolloping method with the blueberry filling.
- Final Cream Layer: Top with the last of the cream mixture and smooth it out.
- The Finish: Sprinkle those reserved crumbs over the top like confetti.
Expert Tips for Best Results
The Overnight Rule: I cannot emphasize this enough—chill this dessert overnight. While it’s tempting to dive in after 3 or 4 hours, the layers need time to “marry” and set. If you cut it too early, the fruit fillings will slide right out from between the cream layers. Patience is a delicious virtue!
The “Dollop” Method: When spreading cream over fruit filling (or vice-versa), never just pour and swipe. Place small spoonfuls all over the surface and then gently connect the dots with a small offset spatula. This keeps the layers distinct and beautiful.
Stabilizing the Cream: If you live in a very humid environment, you can add a tablespoon of instant vanilla pudding mix to the heavy cream while whipping. This acts as a stabilizer to keep the dessert firm even if it sits out on a picnic table for a bit.
Variations and Substitutions
- The “Shortcut” Version: If you are short on time or prefer the flavor, you can substitute 16 oz of thawed Cool Whip for the homemade whipped cream and granulated sugar.
- Different Fruits: Try raspberry pie filling and lemon curd for a “Zesty Berry” version, or stick to all-cherry for a classic Cherry Yum Yum.
- Crust Swap: Use crushed Golden Oreos or Nilla Wafers instead of graham crackers for a sweeter, more vanilla-forward base.
Storage and Freezing
To Store: Keep your Berry Yum Yum covered with plastic wrap or a tight-fitting lid in the refrigerator. It will stay fresh and delicious for up to 4-5 days. In fact, many people think it tastes even better on day two!
To Freeze: This dessert actually freezes surprisingly well. Wrap the pan tightly in plastic wrap and then foil. It can be frozen for up to 1 month. To serve, thaw it in the refrigerator for at least 6 hours. Note that the graham cracker crust may be slightly softer after freezing and thawing.
FAQ
Can I make this in a different sized pan?
You can half the recipe for an 8×8-inch pan, but the layers will be slightly thicker. For the full recipe, a 9×13-inch glass dish is best so you can see the beautiful layers from the side.
Why is my cream mixture runny?
This usually happens if the cream cheese wasn’t beaten enough before adding the whipped cream, or if the whipped cream didn’t reach stiff peaks. Make sure your cream is cold and your bowl is clean when whipping!
Is this the same as a “Lush” or “Lasagna” dessert?
Yes! Depending on where you live, these are often called “Berry Lush” or “Chocolate Lasagna.” The “Yum Yum” name is a traditional Southern/Midwestern term for this style of no-bake layered pudding dessert.
A Final Sweet Thought
The Berry Yum Yum Dessert is more than just a recipe; it’s a memory-maker. There is something about the ritual of layering the fruit and cream that feels like preparing a gift for your loved ones. Whether you’re celebrating a holiday or just celebrating a Friday night, this dish brings a little bit of magic to the table.
If you make this, be sure to snap a photo and tag me! I love seeing your beautiful layers. Happy (non) baking!
PrintBerry Yum Yum Dessert
A decadent and patriotic no-bake layered dessert perfect for summer gatherings, featuring layers of strawberry, blueberry, and homemade whipped cream cheese filling.
Ingredients
2 1/2 cups graham cracker crumbs
12 tbsp unsalted butter, melted
2 (8 oz) packages cream cheese, softened
1 cup confectioners’ sugar
4 cups heavy whipping cream
2 tsp vanilla extract, divided
6 tbsp granulated sugar
1 (21 oz) can strawberry pie filling
1 (21 oz) can blueberry pie filling
Instructions
1. In a bowl, combine graham cracker crumbs and melted butter. Blend with a fork until crumbs are moistened. Set aside 3 tablespoons of crumbs for the topping.
2. Press the remaining crumb mixture into the bottom of a 9×13-inch pan sprayed with non-stick spray.
3. With an electric mixer, cream together softened cream cheese, confectioners’ sugar, and 1 tsp vanilla until smooth.
4. In a separate bowl, whip the heavy cream, granulated sugar, and remaining 1 tsp vanilla until stiff peaks form.
5. Gently fold the whipped cream into the cream cheese mixture by hand until well combined.
6. Spread 1/3 of the cream mixture (about 3 cups) over the crust.
7. Drop strawberry pie filling by large spoonfuls over the cream layer and spread gently.
8. Top with another 1/3 of the cream mixture and spread evenly.
9. Drop blueberry pie filling by large spoonfuls over the second cream layer and spread gently.
10. Cover with the remaining 1/3 of the cream mixture and sprinkle with the reserved crumbs.
11. Cover and refrigerate overnight to allow layers to set properly.
Notes
Use premium pie fillings for more whole fruit.
Overnight chilling is mandatory to prevent layers from sliding when sliced.
You can substitute Cool Whip for the homemade whipped cream if desired.