Every Halloween, my family gathers around the kitchen table, eager to dive into our favorite spooky treats. These Halloween Spider Cupcakes have become a tradition, bringing a touch of whimsy and deliciousness to our celebrations. The kids love designing their own little cookie spiders, and we all enjoy the rich chocolatey flavor beneath the playful decorations. Each bite is a sweet reminder of the joyful, creative moments we spend together.
Why You’ll Love This Halloween Spider Cupcakes
- Perfect for Halloween parties with their spooky yet fun design.
- Rich chocolate flavor paired with creamy frosting makes them irresistible.
- Simple to decorate, even for little hands.
- Great for engaging kids and sparking creativity.
Ingredients You’ll Need
- Chocolate cupcakes: These are the base, providing a rich, moist treat.
- White frosting: Adds a sweet, creamy layer that complements the chocolate.
- Oreo cookies: Perfect for creating the spider bodies with their dark color.
- Black color gel: Essential for drawing the spider legs and web designs.
- Candy eyes: Adds a playful, spooky touch to the spider cupcakes.
- White candy melts: Used to attach the eyes securely to the cookies.
How to Make Halloween Spider Cupcakes Step by Step
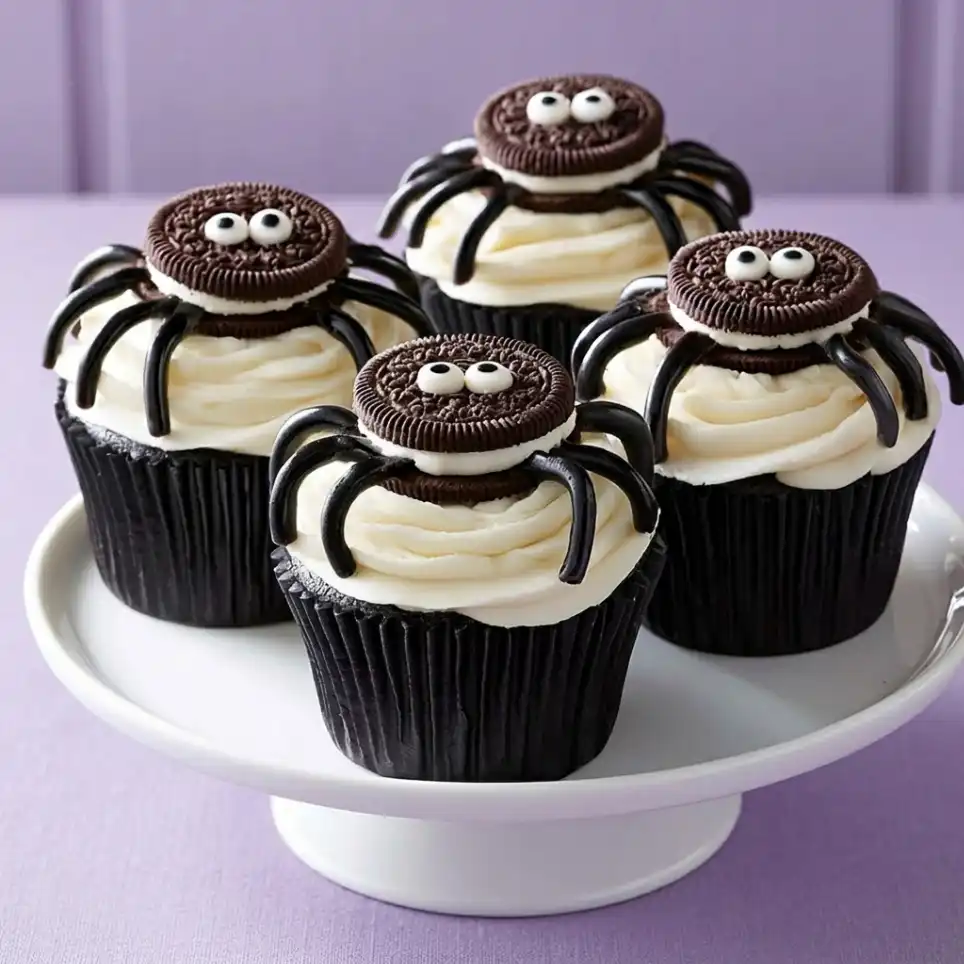
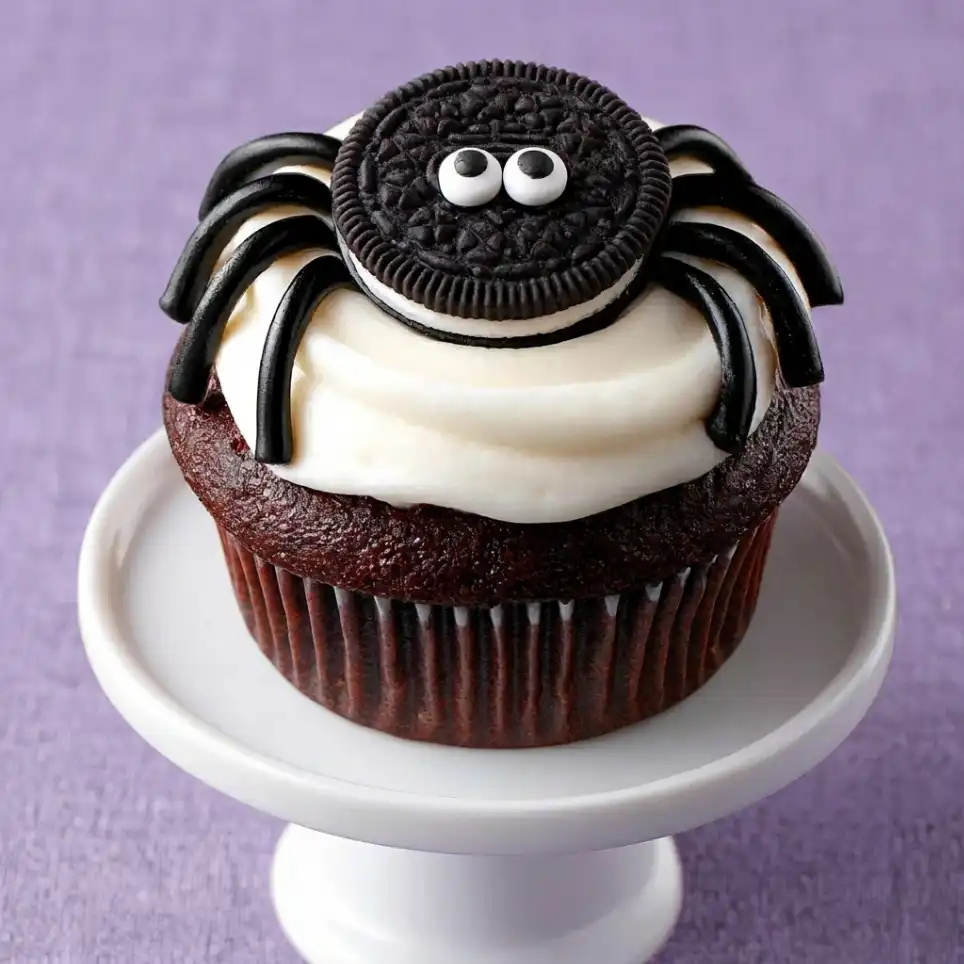
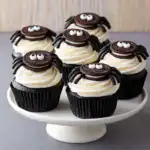
Start by frosting each cooled cupcake with the white frosting. This forms the smooth backdrop for your spooky designs. Next, place an Oreo cookie on top of twelve cupcakes. Use the black color gel to draw legs stretching out from each cookie, creating the spider effect. Don’t worry if your lines aren’t perfect — it adds to the spooky charm!
For the eyes, melt the white candy melts or chocolate chips in a sandwich bag in the microwave. Knead until smooth, snipping a small tip for precise piping. Secure the candy eyes onto the Oreo spiders with a dab of melted chocolate and let them harden. With the remaining cupcakes, draw intricate webs using the black gel — this is where the magic happens, letting you unleash your inner artist.
My Top Tips for Success
- I always let my cupcakes cool completely before frosting to avoid melting.
- In my experience, using homemade frosting gives a richer flavor.
- Trust me on this one: knead the chocolate well for a smooth piping experience.
- Encourage kids to get creative with their spider designs.
- For extra shine, use glossy black gel for the spider legs.
Common Mistakes to Avoid
- Frosting warm cupcakes: The frosting will melt. Always cool cupcakes first.
- Using sealed bags for melting chocolate: Can cause steam buildup. Leave bags open.
- Skipping the kneading step: Results in lumpy chocolate. Knead until smooth.
- Drawing legs too thin: They may break easily. Make them slightly thicker for durability.
- Not allowing eyes to set: They may slide off. Let them harden completely.
How to Store Halloween Spider Cupcakes
- Room temperature: Store loosely covered for up to 2 days.
- Refrigerator: Can be stored for up to a week.
- Freezer: Freeze for up to 3 months, tightly wrapped.
Frequently Asked Questions
Can I use store-bought frosting?
Yes, store-bought frosting works well. It’s a convenient option.
How do I create smooth lines with the gel?
Apply gentle pressure and keep steady hands. Practice makes perfect.
Can I make these cupcakes gluten-free?
Yes, use gluten-free cupcake mix and cookies. Double-check all labels.
What if I don’t have candy eyes?
You can substitute with small chocolate chips. They’ll still look spooky.
Can I make these ahead of time?
Yes, prepare and decorate them the day before. Store them properly.
These Halloween Spider Cupcakes are sure to become a highlight of your spooky celebrations. I hope they fill your kitchen with joy and creativity, just as they do mine. If you try them, I’d love to hear about your decorating adventures!
PrintHalloween Spider Cupcakes
Spooky and fun chocolate cupcakes with playful spider decorations, perfect for Halloween.
- Prep Time: 20
- Cook Time: 25
- Total Time: 45
- Yield: 24 servings
- Category: Dessert
- Method: Baking
- Cuisine: American
Ingredients
- 24 chocolate cupcakes baked and cooled
- 16 oz white frosting 16 oz tub or homemade
- 12 Oreo sandwich cookies
- black color gel
- 48 ¼ inch candy eyes
- 1 tablespoon white candy melts or white chocolate chips
Instructions
- Frost each cupcake with white frosting.
- Place 1 cookie on 12 cupcakes. Use black color gel to draw legs onto each cookie spider.
- To affix eyes onto spiders, place candy melts or white chocolate chips in a resealable sandwich bag but do not seal.
- Place into microwave and heat on 50% power for 30 seconds.
- Knead bag until chocolate is smooth and melted and if necessary, repeat microwaving and kneading until melted.
- Snip a very small tip in the bag and pipe chocolate onto the back of the candy eyes.
- Press eyes onto the cookies. Let stand to harden.
- With remaining cupcakes, draw a web onto the top.
- Start with six lines, intersecting in the center to make 6 triangle pie shapes.
- Place loops between the lines to create the web.
- Serve immediately or store loosely covered until ready to serve.
Notes
Ensure cupcakes are completely cool before decorating.
Use glossy black gel for spider legs for extra shine.
Let eyes set completely to avoid sliding.
Get creative with web designs.