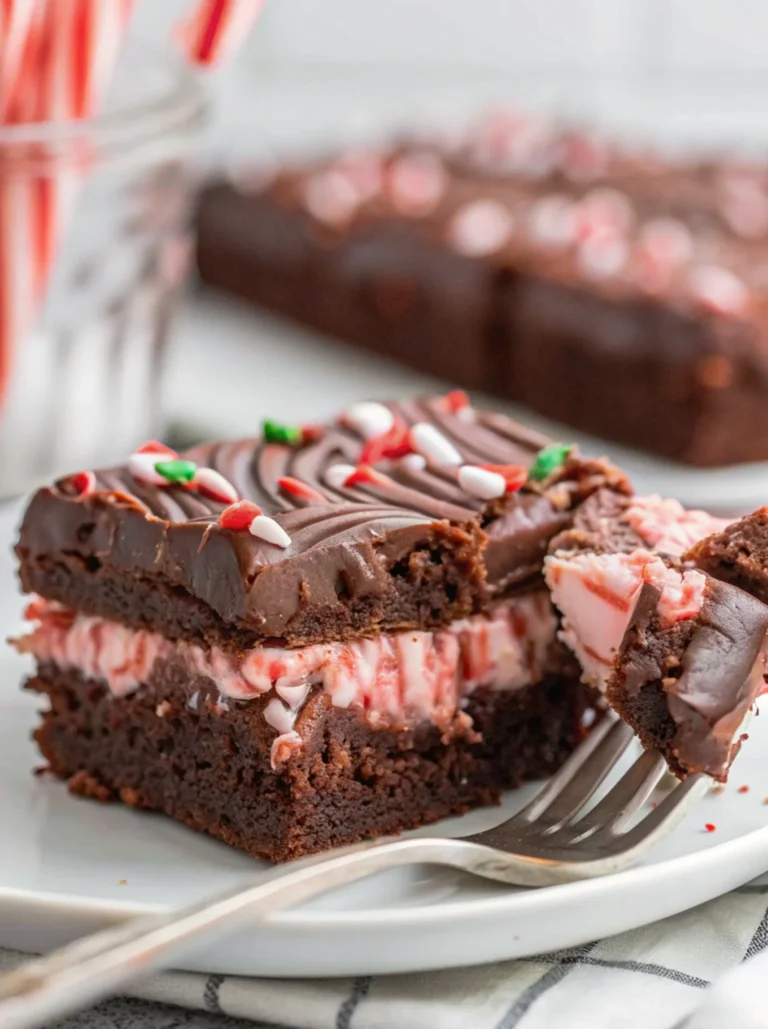
Every holiday season, I find myself reaching for all things peppermint and chocolate. There’s just something so wonderfully festive about that combination! These White Chocolate Dipped Peppermint Chocolate Cookies have become a true staple in my kitchen, bringing smiles and a little bit of magic to everyone who tries them. They’re rich, chewy, and that cool peppermint kick with creamy white chocolate is just divine. Seriously, they taste like a cozy winter evening in cookie form!

Why You’ll Love This White Chocolate Dipped Peppermint Chocolate Cookies
- These cookies are incredibly rich and fudgy, with that perfect balance of chocolate and refreshing peppermint.
- The white chocolate dip and peppermint sprinkle make them look so elegant and festive, perfect for gifting or holiday parties!
- They’re surprisingly easy to make, even for beginner bakers, with simple steps and ingredients.
- You can make the dough ahead of time, which is a lifesaver during busy times.
Ingredients You’ll Need
- All-purpose flour: Make sure to scoop and level your flour properly. This prevents your cookies from becoming dense or dry.
- Unsweetened cocoa powder: Use a good quality cocoa powder for the best chocolate flavor. Unsweetened is key here, as we’re adding our own sugar.
- Unsalted butter: Your butter should be softened, but still fairly firm. This helps with the creaming process and cookie texture.
- Granulated sugar and light brown sugar: The combination gives us both sweetness and that lovely chewy texture. Brown sugar adds moisture and depth!
- Peppermint extract: This is where the magic happens! Don’t confuse it with mint extract, which has a different flavor profile.
- White chocolate: Use good quality white chocolate for dipping. Chips, bars, or wafers will all work, just make sure it’s real white chocolate, not candy melts.
- Finely crushed peppermint bits: These add a lovely crunch and extra peppermint punch. King Leo is a great brand, but any candy cane bits will do!
How to Make White Chocolate Dipped Peppermint Chocolate Cookies Step by Step
First things first, let’s get our oven ready! Preheat it to 350 degrees and line your baking sheets with silicone liners or parchment paper. This will prevent sticking and make cleanup a breeze. In a medium bowl, whisk together your dry ingredients: the flour, cocoa powder, baking soda, and salt. Give it a good 20-second whisk to make sure everything is evenly distributed, then set it aside.
Now for the wet ingredients! In the bowl of your electric stand mixer, cream together the softened butter, granulated sugar, and brown sugar until they’re nicely combined and fluffy. This is where you’re incorporating air, which helps with the cookie’s texture. Next, beat in your eggs one at a time, making sure each one is fully incorporated before adding the next. Then, blend in the vanilla extract and that wonderful peppermint extract. This is where the aroma really starts to develop!
With your mixer on low speed, slowly add the dry flour mixture to the wet ingredients. Mix just until combined – be careful not to overmix, as this can lead to tough cookies. Once your dough is ready, scoop it out by rounded tablespoons, about 25 grams each, and gently shape them into balls. If your dough feels a little sticky, don’t worry, you can chill it for a bit, but mine usually isn’t. Space them about 2 inches apart on your prepared baking sheets and gently flatten each cookie slightly. Bake them one sheet at a time for about 8 minutes. They might look slightly under-baked in the center, but that’s exactly what we want for a chewy cookie!

My Top Tips for Success
- I always scoop and level my dry ingredients. It makes a huge difference in the final texture of your cookies.
- In my experience, using good quality cocoa powder and white chocolate really elevates the flavor.
- Don’t overbake! These cookies are meant to be soft and fudgy, so pulling them out when they look slightly underdone is key.
- Trust me on this one: let the cookies cool on the baking sheet for a few minutes then transfer to a wire rack to cool 5 minutes then transfer to an airtight container to fully cool. They’re delicate when hot!
- When melting white chocolate, low and slow is the way to go. You don’t want it to seize or burn.
- Chilling the dipped cookies helps the white chocolate set quickly, so you can enjoy them sooner!
Common Mistakes to Avoid
- Overmixing the dough: Overmixing develops the gluten in the flour, which can lead to tough, dry cookies instead of soft, chewy ones. Mix just until the ingredients are combined.
- Overbaking the cookies: If you bake these cookies until they look fully set and firm, they will be dry and crumbly. They should still look slightly underdone in the center when you pull them out of the oven.
- Not using softened butter: Butter that’s too cold won’t cream properly, leading to a dense dough. Butter that’s too warm will make your cookies spread too much. Aim for softened but still firm.
- Melting white chocolate too quickly: High heat can cause white chocolate to seize or burn, making it clumpy and unusable for dipping. Use 50% power in short increments, stirring frequently.
How to Store White Chocolate Dipped Peppermint Chocolate Cookies
- Room Temperature: Store cookies in an airtight container.
- Refrigerator: Store in an airtight container for up to 1 week. This is great if your kitchen is warm or you prefer a firmer cookie.
- Freezer (Dough): Wrap tightly in plastic wrap and then foil for up to 3 months. Thaw in the fridge overnight before baking.
- Freezer (Baked Cookies): Place cooled, undipped cookies in a single layer in an airtight container, separated by parchment paper, for up to 1 month. Thaw at room temperature before dipping.
Frequently Asked Questions
Can I use milk or dark chocolate instead of white chocolate for dipping?
Absolutely! While these are White Chocolate Dipped Peppermint Chocolate Cookies, you can definitely use milk or dark chocolate if you prefer. The flavor profile will change, but it will still be delicious.
What kind of cocoa powder should I use?
I recommend using unsweetened natural cocoa powder for this recipe. Dutch-processed cocoa will give a darker color and slightly different flavor, but natural cocoa powder works perfectly here.
My cookies spread too much, what went wrong?
Cookies usually spread too much if your butter was too soft, your oven temperature was too low, or you didn’t measure your flour correctly. Make sure your butter is softened but still firm, and check your oven’s calibration.
Can I make the dough ahead of time?
Yes, you can! You can prepare the dough, wrap it tightly in plastic wrap, and refrigerate it for up to 2-3 days. Let it come to room temperature slightly before scooping and baking.
I really hope these White Chocolate Dipped Peppermint Chocolate Cookies bring a little extra cheer and deliciousness to your day, just like they do for me. They’re such a perfect treat, whether for a holiday gathering or just a cozy evening in. If you whip up a batch, I’d absolutely love to hear how they turned out!
PrintWhite Chocolate Dipped Peppermint Chocolate Cookies

Rich, fudgy chocolate cookies infused with peppermint, dipped in creamy white chocolate, and sprinkled with crushed peppermint bits.
- Prep Time: 25
- Cook Time: 8
- Total Time: 60
- Yield: 36-40 cookies
- Category: Dessert
- Method: Baking
- Cuisine: American
Ingredients
- 1 2/3 cups (237g) all-purpose flour
- 1 cup (98g) unsweetened cocoa powder
- 1 tsp baking soda
- 1/2 tsp salt
- 1 cup (226g) unsalted butter, softened about halfway
- 1 1/4 cups (250g) granulated sugar
- 3/4 cup (160g) packed light brown sugar
- 2 large eggs
- 2 tsp vanilla extract
- 1 tsp peppermint extract
- 16 oz. white chocolate, broken or chopped
- 1/4 cup (approx) finely crushed peppermint bits
Instructions
- Preheat your oven to 350 degrees F (175 C).
- Line baking sheets with silicone liners or parchment paper.
- In a medium mixing bowl, whisk together the flour, cocoa powder, baking soda, and salt for 20 seconds.
- Set the dry mixture aside.
- In the bowl of an electric stand mixer fitted with the paddle attachment, cream together the softened butter, granulated sugar, and brown sugar until well combined.
- Mix in the eggs one at a time, ensuring each is fully incorporated.
- Blend in the vanilla extract and peppermint extract.
- With the mixer set on low speed, slowly add the flour mixture.
- Mix just until the flour mixture is combined into the wet ingredients.
- Scoop dough out by a rounded tablespoon (about 25 grams each).
- Shape the dough into balls.
- Space the dough balls on the cookie sheets 2-inches apart.
- Flatten cookies slightly with your hand or the bottom of a glass.
- Bake one sheet at a time in the preheated oven for about 8 minutes.
- Remove cookies from the oven when they appear slightly under-baked in the center.
- Let cookies cool on the baking sheet for several minutes.
- Transfer cookies to a wire rack to cool for 5 minutes.
- Transfer cookies to an airtight container to fully cool.
- Once cookies are completely cool, melt the white chocolate in a microwave-safe bowl.
- Heat white chocolate on 50% power in 30-second increments.
- Stir the white chocolate between intervals until it is melted and smooth.
- Dip half of each cooled cookie into the melted white chocolate.
- Transfer the dipped cookies to parchment paper.
- Sprinkle the dipped portion of each cookie with finely crushed peppermint bits.
- Chill the cookies to let the chocolate set, about 10 minutes.
- Store cookies in an airtight container.
Notes
Ensure your butter is softened but still firm for the best cookie texture.
Do not overmix the dough after adding the flour to keep cookies tender.
Bake cookies until slightly underdone for a fudgy, chewy center.
When melting white chocolate, use low heat and stir frequently to prevent seizing.