
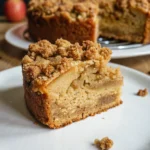
There’s something undeniably magical about the aroma of warm apples and cinnamon wafting from the oven, especially when paired with the promise of a buttery, golden crumb. Our Ultimate Apple Crumb Cake is more than just a dessert; it’s a hug in a slice, a comforting classic that transcends seasons but truly shines during crisp autumn days.
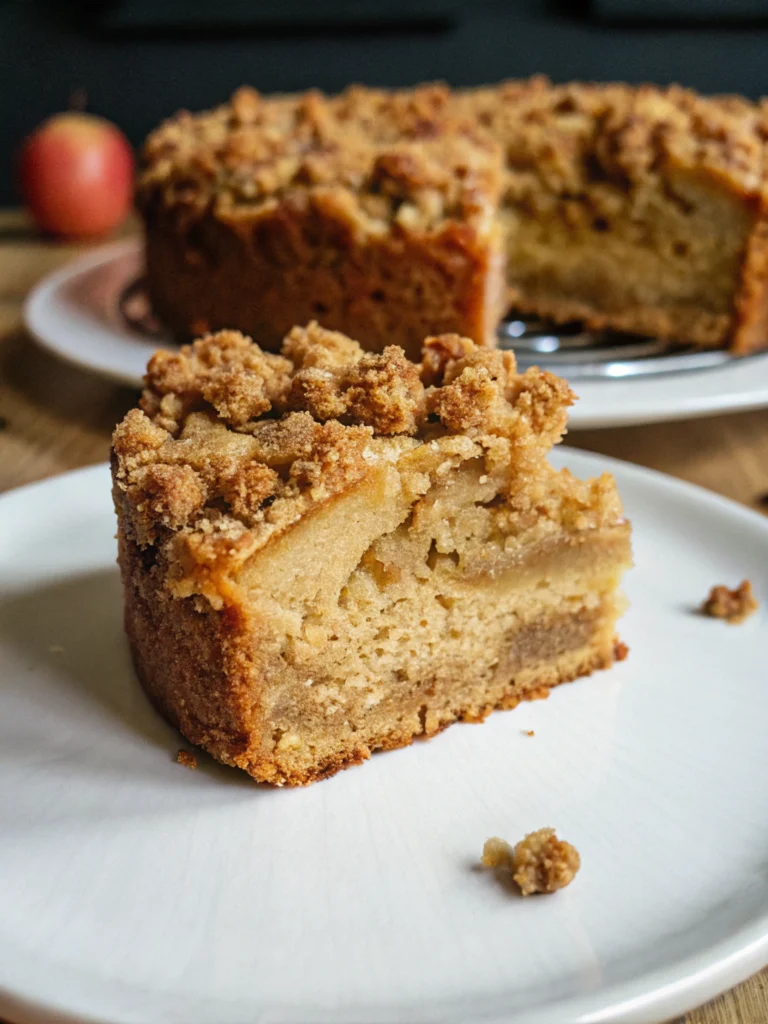
Imagine sinking your teeth into a perfectly moist, tender cake studded generously with soft, sweet-tart apple slices. Then, a glorious, chunky streusel topping provides that satisfying crunch and rich, buttery flavour that makes every bite an experience. And for an extra touch of indulgence? A delicate drizzle of vanilla glaze that melts effortlessly, adding just the right amount of sweetness.
This isn’t just any apple cake; this is the Apple Crumb Cake you’ll want to bake again and again. Whether you’re a seasoned baker or just starting your culinary journey, my comprehensive guide will walk you through every step, ensuring a show-stopping result that tastes as incredible as it looks. Get ready to impress your family and friends (or just treat yourself!) with this easy-to-follow, expertly crafted recipe.
Why You’ll Fall in Love with This Apple Crumb Cake
This isn’t merely a recipe; it’s an invitation to create a masterpiece. Here’s why this Apple Crumb Cake will earn a permanent spot in your recipe rotation:
- Irresistibly Moist: The secret lies in the layering of apples within the cake, which keeps the crumb incredibly tender and prevents any dry spots.
- Perfect Balance of Flavors: Sweet apples, warm cinnamon, rich brown sugar, and a hint of vanilla come together in harmonious symphony. The optional vanilla glaze adds a delicate finish without overpowering.
- The Ultimate Crumb Topping: Generous, crunchy, and utterly addictive, this streusel is the crowning glory, offering a delightful textural contrast to the soft cake.
- Surprisingly Simple: Despite its gourmet appearance, this cake is straightforward to make, making it accessible for bakers of all skill levels. My detailed instructions ensure success every time.
- Versatile for Any Occasion: While perfect for a fall gathering, it’s equally at home at a casual brunch, a holiday feast, or simply as a comforting weeknight treat with a cup of coffee.
I’ve baked countless apple cakes in my kitchen, experimenting with different apple varieties, spice blends, and topping ratios. This particular recipe has been refined over time to strike that perfect balance of flavour, texture, and ease. It’s the one I return to again and again, and I’m thrilled to share my tried-and-true method with you.
The Heart of the Cake: Understanding Your Apples
Choosing the right apples is paramount to the success and flavour profile of your Apple Crumb Cake. The beauty of this recipe is its flexibility, but understanding the characteristics of different apple varieties can elevate your cake from great to extraordinary.
For this recipe, I personally opted for Granny Smith apples. Their firm texture ensures they hold their shape beautifully during baking, preventing a mushy cake. More importantly, their distinctive tartness cuts through the richness of the cake and the sweetness of the crumb topping and glaze, creating a perfectly balanced flavour profile that isn’t overly sweet.
However, your preference matters most! If you lean towards a sweeter cake, consider these excellent alternatives:
- Pink Lady: Known for their crispness and sweet-tart flavour, they hold up well and add a lovely aromatic quality.
- Fuji: Sweet, juicy, and very crisp, Fujis retain their texture and flavour after baking.
- Gala: Mildly sweet with a floral aroma, Gala apples are tender and juicy, making them a popular choice for baking.
- Honeycrisp: Exceptionally crisp and sweet with a hint of tartness, these are fantastic for baking if you don’t mind their higher price point.
Expert Tip: Regardless of your choice, ensure your apples are peeled and thinly sliced, ideally about 1/8 to 1/4 inch thick. This ensures they soften evenly and meld seamlessly into the cake layers. A mandoline slicer can make this task quick and uniform, but a sharp knife and a steady hand work just as well!
Key Ingredients & Substitutions
Crafting this delectable Apple Crumb Cake relies on a few core ingredients. Here’s a closer look at what you’ll need and some expert notes on why they’re important, along with possible substitutions:
For the Apple Cake:
- Unsalted Butter (Room Temperature): Using unsalted butter allows you to control the salt content. Room temperature butter creams beautifully with sugar, creating a light, airy base for the cake.
- Substitution: Salted butter can be used; just reduce any added salt in the recipe by a pinch. Vegan butter sticks can be used for a dairy-free alternative.
- Brown Sugar: Adds moisture, a lovely caramel note, and tenderness to the cake.
- Substitution: Light brown sugar is preferred, but dark brown sugar works if you desire a deeper molasses flavour.
- Eggs: Provide structure, richness, and help bind the cake.
- Substitution: Flax eggs (1 tbsp ground flaxseed + 3 tbsp water per egg, let sit 5 mins) can be used for a vegan option, though the texture may vary slightly.
- Milk: Adds moisture and richness.
- Substitution: Any plant-based milk (almond, soy, oat) can be used. Buttermilk can also be substituted for a tangier cake.
- Golden Syrup: Contributes a beautiful golden color and a unique depth of sweetness.
- Substitution: Light corn syrup or honey can be used, but golden syrup’s distinct flavour is highly recommended.
- Vanilla Extract: Essential for enhancing all the other flavours. Use good quality vanilla!
- Substitution: Vanilla bean paste for more intense flavour, or omit if absolutely necessary (but why would you?).
- Self-Raising Flour: Contains leavening agents (baking powder and sometimes salt) already mixed in, ensuring a tender rise.
- Substitution: If you only have plain (all-purpose) flour, combine 225g plain flour with 2.5 teaspoons of baking powder and 1/4 teaspoon of salt.
- Cinnamon: The quintessential spice for apple desserts, adding warmth and aroma.
- Substitution: Nutmeg or a pinch of allspice can be added for a more complex spice profile.
For the Crumble Topping:
- Plain Flour: Forms the base of the crumble.
- Brown Sugar & White Granulated Sugar: The combination creates a perfect balance of deep caramel notes from the brown sugar and crispness from the white sugar.
- Unsalted Butter (Melted): Binds the dry ingredients together to form those delightful crumbs.
- Substitution: Vegan butter can be used here too.
For the Vanilla Glaze (Optional):
- Powdered Sugar (Icing Sugar): Creates a smooth, quick-setting glaze.
- Milk: Adjusts the consistency.
- Vanilla Extract: Adds flavour to the glaze.
Step-by-Step Guide to Perfection
Let’s break down the process of creating this incredible Apple Crumb Cake. Follow these detailed steps to ensure a flawless bake every time!
1. Preparing Your Pan and Oven
- Preheat: Get your oven ready by preheating it to 160°C (Fan). A consistently preheated oven is crucial for even baking.
- Grease and Line: This is a non-negotiable step for easy cake removal and a clean finish. Take your 9-inch round springform pan. Generously grease the bottom and sides with butter or baking spray. Then, cut a circle of parchment paper to fit the bottom of the pan and place it in. This prevents sticking and makes transferring the cake to a wire rack or serving platter effortless. Set aside.
2. Crafting the Fluffy Apple Cake Batter
- Cream Butter and Sugar: In a large mixing bowl, combine the room temperature unsalted butter and brown sugar. Using an electric mixer, beat them together on medium speed until the mixture becomes pale, light, and fluffy. This step incorporates air, which is vital for a tender cake. Scrape down the sides of the bowl as needed.
- Incorporate Wet Ingredients: Add the eggs one at a time, beating well after each addition. Then, drizzle in the golden syrup, vanilla extract, and milk. Beat on low speed until everything is just combined and appears pale and fluffy. Don’t worry if the mixture looks slightly curdled at this stage; it will come together with the dry ingredients.
- Fold in Dry Ingredients: Sift the self-raising flour and cinnamon directly into the wet mixture. Sifting prevents lumps and helps to aerate the flour. Now, using a rubber spatula, gently fold the mixture until it is just combined. This is a critical step: do not over-mix! Over-mixing develops gluten, which can lead to a tough, dry cake. Stop folding as soon as no streaks of flour are visible.
3. Layering for Ultimate Apple Distribution
- First Batter Layer: Pour approximately half of your prepared cake batter into the greased and lined springform pan. Use your spatula to gently spread it out into an even layer, ensuring it reaches the edges of the pan.
- First Apple Layer: Arrange half of your thinly sliced apple pieces over this first layer of batter. Try to distribute them as evenly as possible without overlapping too much, creating a single thin layer of apples.
- Second Batter Layer: Carefully spread the remaining cake batter over the apple slices. Take your time with this, gently smoothing it over to completely cover the apples. You might need to gently dollop it over and then spread.
- Final Apple Layer: Top the second cake batter layer with the remaining apple slices, arranging them nicely. This double layering ensures apples in every bite! Set the cake aside while you prepare the crumble.
4. The Irresistible Crumb Topping
- Combine Dry Crumble Ingredients: In a medium mixing bowl, whisk together the plain flour, both brown and white granulated sugars, and an optional extra pinch of cinnamon for more spice.
- Add Melted Butter: Pour the melted unsalted butter over the dry mixture.
- Form the Crumbs: Using a fork, stir the mixture vigorously. The butter will coat the dry ingredients, and as you stir, beautiful, coarse crumbs will begin to form. Continue until you have a varied texture of small and larger crumbs.
- Top the Cake: Evenly sprinkle the crumb mixture all over the apple cake, ensuring the apple layer is completely covered. Be generous!
5. Baking to Golden Perfection
- Bake: Carefully place the springform pan into your preheated oven. Bake for approximately 1 hour and 15 minutes.
- Check for Doneness: Every oven is different, so start checking your cake around the 1-hour mark. The cake is ready when a wooden skewer or toothpick inserted into the very center comes out clean. If it’s still wet, continue baking in 5-10 minute increments. The top should be golden brown and the crumble crisp.
- Cooling: Once baked, remove the cake from the oven. Allow it to cool in the pan for 30 minutes. This crucial cooling period allows the cake to set and prevents it from breaking when transferred. After 30 minutes, carefully release the springform pan sides and transfer the cake to a wire rack to cool completely. It’s important to cool fully before glazing to prevent the glaze from melting.
6. The Optional, But Recommended, Vanilla Glaze
- Whisk the Glaze: Once your cake has completely cooled (this is key!), prepare the glaze. In a small bowl, whisk together the powdered sugar, 2-3 teaspoons of milk, and 1/2 teaspoon of vanilla extract.
- Adjust Consistency: Start with 2 teaspoons of milk. If the mixture is too thick for your liking and you prefer a runnier texture, add the third teaspoon, a tiny bit at a time, until you reach your desired consistency.
- Drizzle and Serve: Evenly drizzle the vanilla glaze all over the cooled apple crumb cake. I often don’t use all of my glaze mixture, but you can use as much or as little as you like. Once glazed, slice the cake into as many pieces as you desire.
Enjoy your masterpiece!
Expert Tips & Tricks for the Best Apple Crumb Cake
Beyond the basic steps, these insights from my own baking experiences will help you achieve perfection and truly master this Apple Crumb Cake.
Apple Selection Mastery
As mentioned, apple choice is key. Beyond Granny Smith, Pink Lady, Fuji, and Gala, other great baking apples include Honeycrisp or Braeburn. Avoid very soft or watery apples like Red Delicious, as they can turn mushy and make your cake soggy. Thin, even slicing ensures they soften consistently and integrate beautifully into the cake. You can even toss them with a tiny bit of lemon juice to prevent browning if you’re prepping them ahead of time, though it’s usually not necessary if you bake soon after slicing.
The Art of Not Over-mixing
This is perhaps the most crucial tip for a tender cake. When you add the flour, switch from an electric mixer to a rubber spatula. Gently fold the flour mixture until just combined. Over-mixing develops gluten, which leads to a dense, tough, and dry cake. Think “barely combined” – a few small streaks of flour are better than an over-mixed batter. The residual heat from baking will take care of any tiny flour pockets.
Baking Time Nuances
Every oven has its quirks! My oven bakes this cake perfectly in 1 hour and 15 minutes at 160°C (Fan), but yours might differ. It’s always best to start checking your cake around the 1-hour mark. Look for a golden-brown top, a firm feel when gently pressed, and the clean skewer test. If the top is browning too quickly, you can loosely tent it with foil for the last 15-20 minutes of baking. Trust your senses and the skewer!
Ensuring an Easy Release
Greasing and lining your springform pan with parchment paper on the bottom is a game-changer. It not only makes removing the cake from the pan effortless but also simplifies transferring it to a wire rack for cooling or a serving platter. Don’t skip this step – it saves so much frustration!
Glaze Consistency Control
The vanilla glaze is optional but highly recommended for an extra touch of sweetness and visual appeal. When mixing it, always start with the minimum amount of milk (2 teaspoons). You can easily add more liquid to thin it out, but it’s much harder to thicken a runny glaze. Add additional milk drop by drop, stirring well after each addition, until you achieve your preferred drizzly consistency. For a bolder vanilla flavour, you can use a touch of vanilla bean paste instead of extract.
Serving Suggestions & Pairings
This Apple Crumb Cake is magnificent on its own, but here are a few ideas to elevate your serving experience:
- Warm with Ice Cream: A classic pairing! A scoop of vanilla bean ice cream melting over a warm slice of cake is pure bliss.
- Dollop of Cream: A generous dollop of freshly whipped cream or a spoonful of crème fraîche adds a touch of elegance and balances the sweetness.
- Caramel Drizzle: For the ultimate indulgence, a warm drizzle of homemade or store-bought caramel sauce is divine.
- With Your Favorite Hot Beverage: A slice of this cake pairs perfectly with a freshly brewed coffee, a comforting cup of tea, or a festive chai latte.
- Breakfast or Brunch: Don’t limit this to dessert! A slice of apple crumb cake with your morning coffee makes for a luxurious start to the day.
Storage & Freezing Instructions
To ensure your Apple Crumb Cake stays fresh and delicious, proper storage is key:
- Room Temperature: Store any leftover cake in an airtight container at room temperature for up to 3 days. If you’ve glazed the cake, the glaze might soften slightly, but the cake will remain moist.
- Refrigeration: While not strictly necessary for short-term storage, you can refrigerate the cake in an airtight container for up to 5 days. Be aware that refrigeration can sometimes slightly alter the texture, making the cake a bit denser. Allow it to come to room temperature before serving for the best flavour.
- Freezing (Ungaraged): For longer storage, you can freeze the unglazed cake. Once completely cooled, wrap individual slices or the entire cake (if uncut) tightly in plastic wrap, then an additional layer of aluminum foil. Freeze for up to 2-3 months.
- To Thaw: Transfer the frozen cake or slices to the refrigerator overnight, or thaw at room temperature for a few hours. Once thawed, you can warm it gently in the oven (if desired) and then apply the fresh vanilla glaze before serving.
Apple Crumb Cake FAQs
What kind of apples are best for Apple Crumb Cake?
You have the freedom to select any type of apple that suits your taste for this recipe. For a slightly tart flavour that balances the sweetness, Granny Smith apples are an excellent choice. If you prefer a sweeter note, alternatives like Pink Lady, Fuji, or Gala would work just as well. The key is to choose apples that hold their shape well during baking and offer a good balance of flavour and texture, ensuring they don’t turn to mush.
How do I prevent my Apple Crumb Cake from being dry or tough?
The secret to a moist and tender cake lies in preventing over-mixing, especially once the flour is added. Over-mixing develops gluten, which can lead to a tough, dry texture. Fold the flour into the wet ingredients gently with a rubber spatula until just combined, stopping as soon as no dry streaks remain. Also, ensure your butter is at room temperature for the creaming stage, as this creates a lighter, airier batter. Proper baking time is also crucial to avoid drying out the cake.
How do I know when my Apple Crumb Cake is fully baked?
Baking times can vary significantly between ovens. The best way to check for doneness is to insert a wooden skewer or toothpick into the very center of the cake. If it comes out clean (without any wet batter attached), your cake is ready. I recommend checking your cake around the 1-hour mark, even if the recipe suggests a longer time, and then continuing to bake in 5-10 minute increments until the skewer comes out clean. The top should also be golden brown and the crumble set.
Can I make this Apple Crumb Cake ahead of time?
Absolutely! This Apple Crumb Cake tastes wonderful the day it’s baked, but it also keeps beautifully for several days. If you plan to serve it glazed, it’s best to apply the glaze just before serving for the freshest look and texture. However, the cake is still delicious if glazed beforehand. For best results, store the unglazed cake tightly covered at room temperature.
How should I store leftover Apple Crumb Cake?
To keep your leftover Apple Crumb Cake fresh, store it in an airtight container at room temperature for up to 3 days. This prevents it from drying out and maintains its delicious flavour. If you live in a very warm climate or want to extend its freshness, you can store it in the refrigerator for up to 5 days, though the cake might become slightly denser. Always allow it to come to room temperature before serving for the best flavour and texture. If freezing, wrap it very tightly (unglazed) in plastic wrap and then foil for up to 2-3 months.
Conclusion: Bake Your Way to Bliss
This Ultimate Apple Crumb Cake is more than just a recipe; it’s an experience. From the comforting scent that fills your kitchen to the satisfying bite of tender cake and crunchy streusel, it’s a testament to the simple joy of homemade baking. I’ve shared all my expert tips and tricks, ensuring you have the confidence to create a truly spectacular dessert.
Whether you’re celebrating a special occasion, hosting friends, or simply craving a sweet escape, this Apple Crumb Cake delivers every time. So gather your ingredients, preheat your oven, and prepare to delight your senses.
Don’t wait – bake this incredible Apple Crumb Cake today and discover your new favorite fall (or any season!) dessert. And when you do, come back and let me know how it turned out! Happy baking!
PrintApple Crumb Cake Recipe
A delightful dessert that combines the sweetness of apples with a buttery crumb topping.
- Prep Time: 30
- Cook Time: 75
- Total Time: 105
- Yield: 16 Slices
- Category: Dessert
- Method: Baking
- Cuisine: American
Ingredients
250g Unsalted Butter (Room Temperature)
150g Brown Sugar
2 Eggs
120g Milk
2 Tbsp Golden Syrup
1 Tbsp Vanilla Extract
225g Self Raising Flour
5 Apples (Peeled and Thinly Sliced)
1 Tsp Cinnamon
125g Plain Flour
150g Brown Sugar
2 Tbsp White Granulated Sugar
85g Unsalted Butter (Melted)
65g Powdered Sugar
2–3 Tsp’s Milk
1/2 Tsp Vanilla Extract
Instructions
1. Preheat the oven to 160°C (Fan). Grease and line a 9-inch round springform pan. Set aside.
2. In a large mixing bowl, beat together the butter and sugar until pale and fluffy.
3. Add the eggs, golden syrup, vanilla and milk then beat on low speed until pale and fluffy.
4. Sift in the flour and cinnamon, then using a spatula fold the mixture until it is just combined (Don’t over-mix).
5. Pour half of the batter into the prepared pan and smooth over the top using a spatula to make it an even layer.
6. Add half of the apple slices to create a thin layer on top of the batter.
7. Spread the remaining cake batter over the apple slices, then using a spatula smooth over to completely cover them.
8. Top the cake batter with the remaining apple slices. Set aside.
9. In a medium mixing bowl, whisk together the flour, both sugars and cinnamon.
10. Pour the melted butter over, then using a fork stir the mixture until a crumb forms.
11. Evenly sprinkle the crumb all over the apple cake until you can’t see the layer of apples.
12. Bake for 1 hour and 15 minutes or until you can insert a wooden skewer and it comes out clean (This time may take longer or less; it depends on your oven. I recommend checking your cake at the 1-hour mark).
13. Allow to cool in the pan for 30 minutes, then transfer the cake to a wire rack to cool fully.
14. Once your cake is cooled. In a small bowl, whisk together the powdered sugar, milk and vanilla until it forms a nice glaze (Start with 2 tsp’s of milk, if the mixture is too thick for your liking add the third tsp).
15. Evenly drizzle the vanilla glaze all over the apple cake (I didn’t use all of my glaze mixture, but you can use as much as you like).
16. Slice the cake into as many pieces as you like.
17. Enjoy!
Notes
Apples: You have the freedom to select any type of apple that suits your taste for this recipe. In my case, I opted for Granny Smith due to its slightly tart flavour. Nonetheless, if you lean towards a sweeter note, alternatives like Pink Lady, Fuji, or Gala would work just as well.
Line the pan: Ensure that you grease and line the springform pan before adding the batter. This simple step not only facilitates easy removal of the cake but also simplifies the transfer process to a serving platter or wire rack by lining the bottom of the pan.
Don’t over-mix: Make sure to handle the batter with care after incorporating the flour to avoid over-mixing, as this can result in the cake becoming dry.
Cooking time: Every oven is different; I baked my cake for 1 hour and 15 minutes, but I highly recommend checking if your cake is ready around the 1-hour mark. You can do so by inserting a wooden skewer into the center of the cake, if it comes out clean then it is ready.
Vanilla glaze: This step is completely optional, so feel free to skip it if you don’t want the glaze. When making the glaze, begin with 2 tsp of milk. If you prefer a thicker consistency, you can stick with this amount. However, if you, like me, enjoy a slightly runnier texture, consider adding the third tsp for your glaze.


