
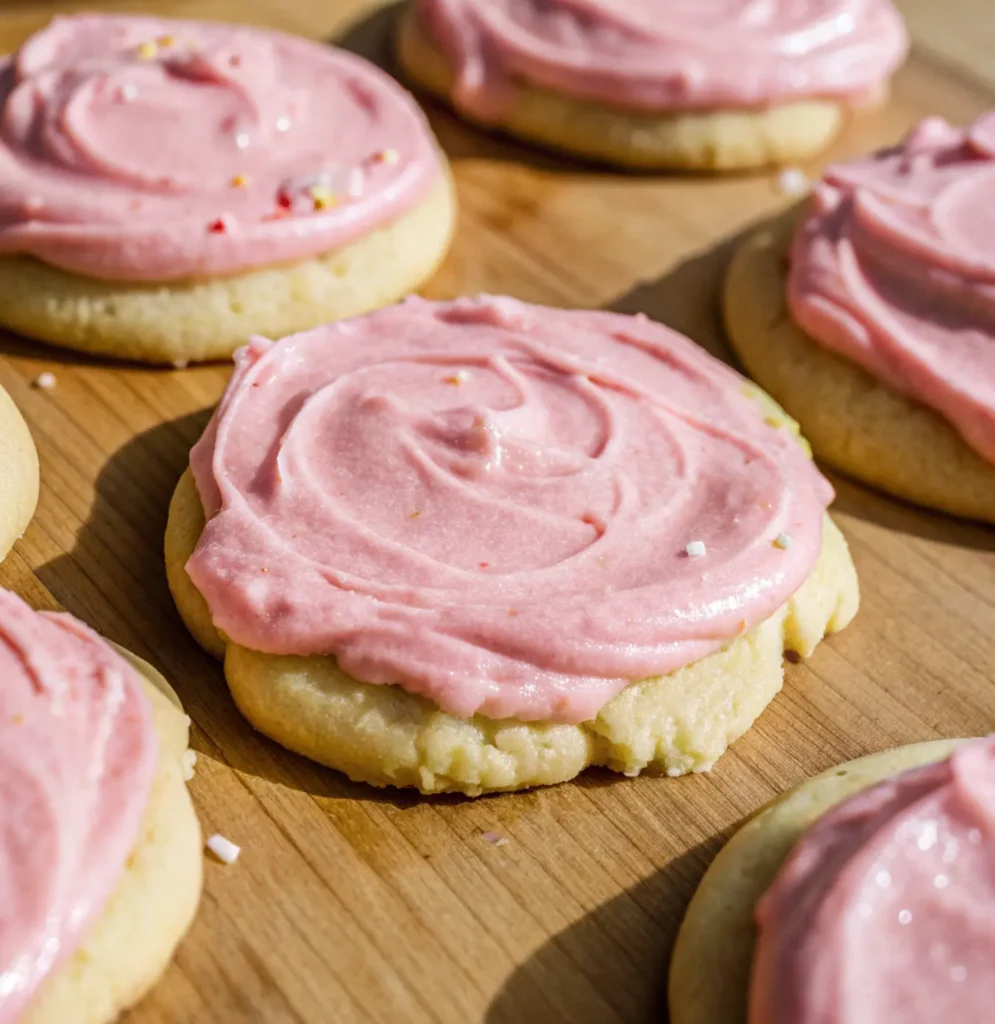
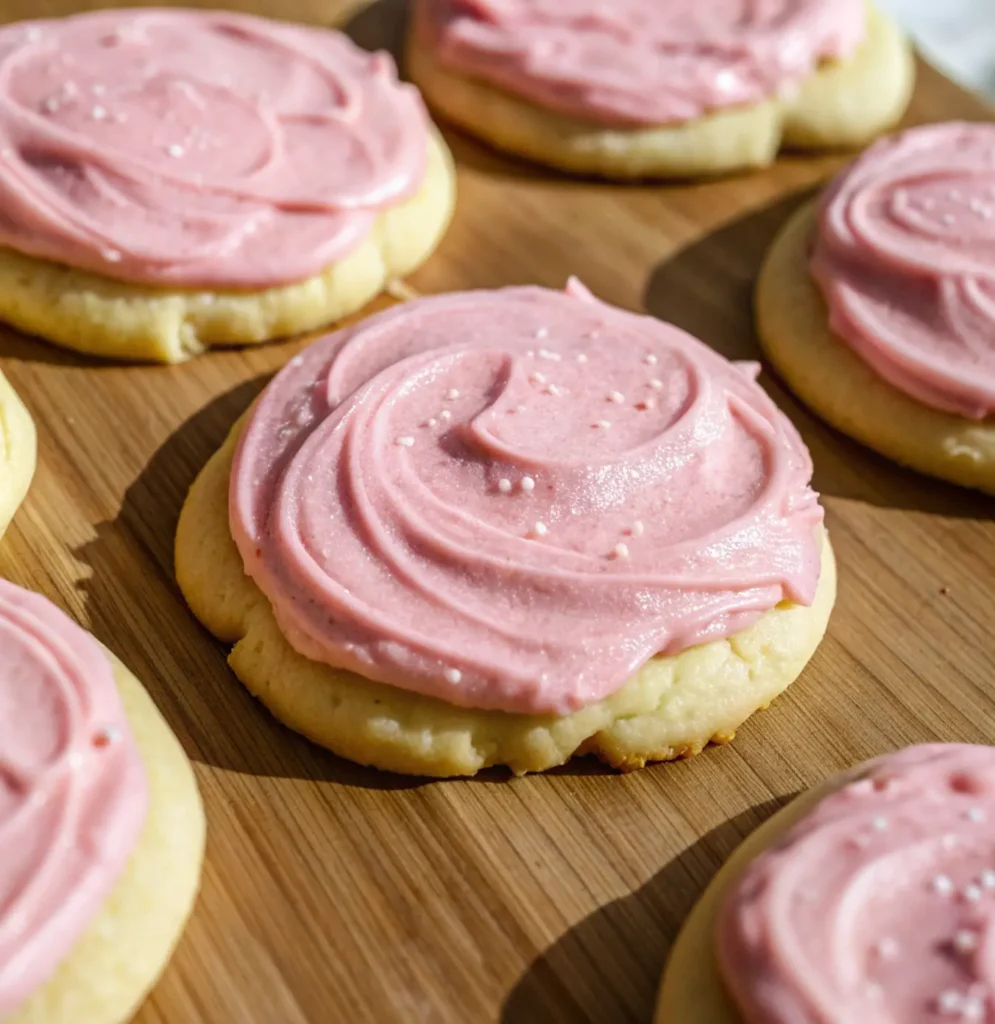
Welcome, sweet friends! If there’s one recipe that instantly transports me back to childhood joy and fills my kitchen with the aroma of pure comfort, it’s a classic sugar cookie. But not just any sugar cookie—we’re talking about my Irresistible Pink Sugar Cookies, a recipe I’ve lovingly developed and perfected over countless batches (seriously, I’ve tested this more than 9 times!) right here in my SweetCraft kitchen. These aren’t just pretty cookies; they’re melt-in-your-mouth soft, delightfully chewy, and topped with a creamy, dreamy pink frosting that’s simply divine.
For me, baking is more than just following instructions; it’s an act of love, a way to connect, and a source of immense comfort. These pink sugar cookies embody all of that. They’re a favorite for family gatherings, holiday platters, birthday parties, or simply a Tuesday afternoon pick-me-up. There’s something universally appealing about a perfectly soft, subtly almond-vanilla flavored cookie, especially when it comes in such a cheerful hue!
Whether you’re a seasoned baker or just starting your culinary journey, I promise this recipe for soft pink sugar cookies is approachable and incredibly rewarding. I’ll walk you through every step, sharing all my personal tips and tricks gleaned from those many testing rounds. Get ready to bake a batch of pure happiness that will have everyone asking for your secret!
Why You’ll Fall in Love with Sophie’s Pink Sugar Cookies
This isn’t just another cookie recipe; it’s a labor of love designed for ultimate satisfaction. Here’s why these frosted pink sugar cookies will become your new go-to:
- Melt-in-Your-Mouth Softness: My secret blend of butter and oil creates an unbelievably tender crumb that stays soft for days.
- Perfect Balance of Flavor: The combination of vanilla and almond extract adds a sophisticated depth that elevates the classic sugar cookie.
- Irresistibly Creamy Pink Frosting: Not too sweet, perfectly smooth, and beautifully colored – it’s the ideal complement to the soft cookie base.
- Ideal for Any Occasion: From festive holidays to everyday treats, these cheerful cookies brighten any table.
- Tested & Approved (9+ Times!): You’re getting a thoroughly vetted recipe from my kitchen to yours, ensuring consistent, delicious results every time.
- An Accessible Comfort Food: While they look impressive, the process is straightforward, making them a joy for home cooks of all skill levels.
Sophie’s Secret to the Best Pink Sugar Cookies
After countless batches, I’ve pinpointed a few key elements that make these homemade pink sugar cookies stand out. It’s not just about the ingredients, but how you handle them.
Firstly, the combination of unsalted butter and vegetable oil in the cookie dough is a game-changer. Butter provides that rich, classic flavor and tenderness, while the oil contributes to the incredible chewiness and helps keep the cookies soft for longer. This was one of my biggest breakthroughs during testing – pure butter cookies can sometimes be too crisp, but adding oil gives them that perfect pillowy texture we’re aiming for.
Secondly, don’t skimp on the vanilla and almond extracts. While vanilla is a given in most cookies, a touch of almond extract adds a subtle, sophisticated undertone that truly elevates the flavor profile without being overpowering. It’s a trick I learned early on that makes people say, “What is that amazing flavor?”
Finally, and perhaps most crucially for any sugar cookie, is not overbaking. This is paramount for maintaining that desired soft and chewy texture. I’ll share exactly what to look for, but essentially, you want them to be just barely set at the edges with centers that still look slightly soft. They will continue to cook as they cool on the hot baking sheet, so pulling them out a minute early is always better than a minute too late. This balance, for me, took many rounds of trial and error, but it’s a lesson worth learning for perfect cookies every time!
Essential Ingredients: What You’ll Need and Why They Matter
Quality ingredients are the foundation of any great recipe, and these classic sugar cookies are no exception. Here’s a breakdown of what you’ll need and why each component plays a vital role in achieving cookie perfection.
For the Cookies:
- Unsalted Butter (Softened): My preferred choice. Using unsalted butter allows you to control the salt content precisely. Softened butter (not melted!) is crucial for properly creaming with the sugar, creating air pockets that lead to a light, tender cookie. If it’s too cold, it won’t cream well; if it’s melted, your cookies will spread excessively.
- Vegetable Oil: This is my secret weapon for ultimate chewiness and long-lasting softness. Vegetable oil (or canola oil) is 100% fat, contributing to moisture and preventing the cookies from drying out quickly.
- Granulated White Sugar: Provides sweetness and contributes to the cookie’s texture. When creamed with butter and oil, it helps aerate the dough.
- Egg (Room Temperature): A binder that adds richness and helps with structure. A room temperature egg emulsifies better with the fat, resulting in a smoother, more uniform dough.
- Vanilla Extract: Essential for that comforting, familiar sugar cookie flavor. Use a good quality pure vanilla extract for the best taste.
- Almond Extract: The secret ingredient! A small amount of almond extract enhances the vanilla and gives these cookies a unique, bakery-quality depth of flavor. It’s subtle but makes a huge difference.
- Plain Flour: The primary structural component. I use plain all-purpose flour. Be careful not to overmix, as too much gluten development can lead to tough cookies.
- Salt: Balances the sweetness and enhances all the other flavors. Don’t skip it!
- Baking Powder: Our leavening agent. It helps the cookies rise slightly and contributes to their soft texture. Ensure your baking powder is fresh for optimal results.
For the Pink Frosting:
- Unsalted Butter (Softened): Again, softened unsalted butter is key for a smooth, creamy buttercream frosting.
- Powdered Sugar (Confectioners’ Sugar): This superfine sugar dissolves easily, creating a silky-smooth frosting texture. Sifting it is important to prevent lumps.
- Vanilla Extract: Adds flavor to the frosting, complementing the cookie.
- Heavy Cream: Thins out the frosting to a spreadable consistency while adding richness. You can adjust the amount slightly to achieve your desired thickness. Milk can also be used, but cream provides a richer taste and texture.
- Pink Food Colouring (Gel Recommended): To achieve that vibrant, lovely pink hue! Gel food coloring is concentrated, so you only need a tiny bit to get a strong color without thinning your frosting.
Step-by-Step Instructions: Baking Sophie’s Perfect Pink Sugar Cookies
Follow these detailed steps, along with my expert tips, to ensure your pink sugar cookies turn out perfectly every time.
1. Prepare Your Workspace and Oven
- Preheat the oven: Set your oven to 175°C (350°F). Accurate oven temperature is crucial for even baking, so a good oven thermometer can be a wise investment.
- Line baking trays: Grab 1-2 baking trays and line them with parchment paper. This prevents sticking and makes cleanup a breeze. Set them aside for when your dough is ready.
2. Cream the Wet Ingredients
- In a large mixing bowl, combine the 110g softened unsalted butter, 55g vegetable oil, and 100g granulated white sugar.
- Using a handheld beater (or a stand mixer with the paddle attachment), beat the mixture on medium speed for 2-3 minutes until it becomes light, fluffy, and pale in color. This process incorporates air, which contributes to the cookies’ texture.
- Sophie’s Tip: Don’t rush this step! Proper creaming is vital for the final texture of your cookies. Scrape down the sides of the bowl once or twice to ensure everything is evenly mixed.
3. Add Egg and Extracts
- Crack in the 1 room temperature egg.
- Add the 1 1/2 tsp vanilla extract and 1/2 tsp almond extract.
- Continue beating until all ingredients are well combined and the mixture is smooth. Again, a quick scrape down of the bowl helps.
4. Gently Fold in Dry Ingredients
- In a separate medium bowl, whisk together the 300g plain flour, 1/4 tsp salt, and 1 tsp baking powder. Whisking ensures they are evenly distributed.
- Gradually add the dry ingredient mixture to the wet mixture.
- Using a spatula (not the beater!), gently fold the dry ingredients into the wet until just combined. Stop mixing as soon as you no longer see streaks of flour.
- Sophie’s Tip: Overmixing develops the gluten in the flour, leading to tough, chewy cookies (and not the good kind of chewy!). Mix until it just comes together.
5. Portion and Shape the Cookies
- Scoop 11 equal-sized cookie balls onto your prepared baking trays, ensuring they are evenly spaced. I usually use a 2-tablespoon cookie scoop for consistency.
- Gently flatten each cookie slightly with your hands. This helps them bake more uniformly and creates a nice surface for frosting.
- Sophie’s Tip: If your dough feels too sticky or soft (especially in a warm kitchen), you can chill the scooped cookie balls on the tray for 15-20 minutes before flattening and baking. This can help prevent excessive spreading, though this recipe is quite stable.
6. Bake to Perfection
- Place the baking trays in your preheated oven.
- Bake for 9-10 minutes.
- Look for the edges to be just barely turning a very light golden brown. The centers may still appear slightly soft or underbaked – this is exactly what you want for a super soft cookie!
- Sophie’s Tip: Every oven is different. Pay close attention the first time you bake them. If they look golden all over, they’ve likely been overbaked. Underbaking slightly is key to softness.
7. Cool Completely
- Remove the baking trays from the oven.
- Allow the cookies to cool on the trays for about 5 minutes. This gives them time to firm up a bit without breaking.
- Carefully transfer the cookies to a wire rack to cool completely. This is a non-negotiable step before frosting!
- Sophie’s Tip: Frosting warm cookies is a recipe for a melted, messy disaster. Patience is a virtue here!
Crafting the Dreamy Pink Frosting
While your cookies are cooling, let’s make that beautiful pink frosting!
8. Beat the Butter for Frosting
- In a large mixing bowl, take the 110g softened unsalted butter (for frosting).
- Beat it with your handheld beater (or stand mixer) until it’s smooth and creamy, about 1-2 minutes. This ensures a lump-free base.
9. Incorporate Powdered Sugar (First Half)
- Sift half of the 330g powdered sugar into the bowl with the butter. Sifting prevents lumps and gives you a much smoother frosting.
- Beat on low speed until the sugar is incorporated, then increase to medium and beat until smooth.
10. Add Remaining Ingredients
- Sift the other half of the powdered sugar into the bowl, along with the 1 tsp vanilla extract.
- Start by adding 1 tablespoon of heavy cream. Beat on low until combined.
- Gradually add the remaining 2 tablespoons of heavy cream, one at a time, beating after each addition. Adjust the amount of cream to reach your desired consistency.
- Sophie’s Tip: If your frosting is too thick, add a tiny bit more cream (1/2 teaspoon at a time). If it’s too thin, you can beat in a spoonful or two more powdered sugar. It should be thick enough to hold its shape but spreadable.
11. Achieve Your Perfect Pink Hue
- Now for the fun part! Slowly add pink food coloring, a drop or two at a time (especially if using gel coloring), beating after each addition.
- Continue adding until you achieve your desired shade of pink. Remember, you can always add more, but you can’t take it away!
12. Frost and Enjoy!
- Once your cookies are completely cool, use a small offset spatula or a butter knife to evenly spread the pink frosting onto each cookie.
- If you’re feeling fancy, add some sprinkles or other edible decorations immediately after frosting while the icing is still wet.
- Let the frosting set slightly, then dive in and enjoy your irresistible pink sugar cookies!
Variations & Customizations: Get Creative with Your Pink Sugar Cookies!
One of the joys of baking is the ability to personalize your creations. While this classic recipe is perfect as is, here are some ideas to add your own twist to these soft sugar cookies:
- Seasonal Colors: Instead of pink, adjust the food coloring for different holidays! Use red and green for Christmas, pastels for Easter, orange and black for Halloween, or blue for baby showers.
- Extract Adventures: Swap out or add different extracts for unique flavor profiles.
- Lemon Zest/Extract: A bright, zesty twist is lovely. Add 1 tsp lemon zest to the cookie dough or swap 1/2 tsp of the almond extract for lemon extract.
- Peppermint Extract: For a festive holiday treat, particularly good with red or green frosting. Use sparingly, as peppermint can be strong.
- Orange Extract: A subtle, citrusy sweetness that pairs beautifully with vanilla.
- Sprinkle Extravaganza: My family loves loading these up with sprinkles! Use nonpareils, jimmies, sanding sugar, or even edible glitter for extra sparkle.
- Glaze, Not Frosting: For a slightly lighter option, you could opt for a simple glaze instead of buttercream. Combine powdered sugar with a little milk or lemon juice until pourable.
- Stuffed Sugar Cookies: Get adventurous! Once scooped, flatten the cookie dough, place a small chocolate kiss or caramel in the center, and wrap the dough around it before flattening slightly and baking.
- Gluten-Free Option: While I haven’t specifically tested a gluten-free version of this particular recipe, generally, you can substitute the plain flour with a 1:1 gluten-free baking flour blend that contains xanthan gum. Results may vary slightly.
Storage & Make-Ahead Tips for Your Pink Sugar Cookies
Part of being an expert home baker is knowing how to manage your time and keep your creations fresh. These family-favorite cookies are great for making ahead!
Storing Baked, Unfrosted Cookies:
- Allow cookies to cool completely.
- Store them in an airtight container at room temperature for up to 3-4 days.
- For longer storage, freeze unfrosted cookies in an airtight freezer-safe container for up to 3 months. Thaw at room temperature before frosting.
Storing Frosted Cookies:
- Once frosted, these cookies are best enjoyed within 2-3 days.
- Store them in a single layer in an airtight container at room temperature. If stacking, place parchment paper between layers to prevent the frosting from sticking.
- For longer storage (up to 1 week), you can refrigerate frosted cookies. Bring them back to room temperature before serving for the best texture.
Make-Ahead Dough (Unbaked):
- Refrigerate: Prepare the dough as instructed, then cover the bowl tightly with plastic wrap or transfer to an airtight container. Refrigerate for up to 3 days. When ready to bake, let the dough sit at room temperature for about 15-20 minutes to soften slightly before scooping and baking.
- Freeze: Form the dough into balls as if you were going to bake them, then place them on a parchment-lined baking sheet and freeze until solid (about 1-2 hours). Once frozen, transfer the dough balls to a freezer-safe zip-top bag or container. Freeze for up to 3 months.
- To Bake from Frozen: You can bake frozen cookie dough balls directly from the freezer. Add an extra 2-4 minutes to the baking time.
Common Questions & Troubleshooting Your Sugar Cookies
Even with a perfectly tested recipe like this one, baking can sometimes present challenges. Here are some common questions and troubleshooting tips I’ve gathered over my many years (and 9+ rounds of testing!) in the kitchen.
Why are my cookies spreading too much?
- Butter Temperature: Your butter might be too soft or even slightly melted. Butter should be cool to the touch but pliable. If it’s too warm, chill your dough balls for 15-20 minutes before baking.
- Too Little Flour: Ensure you’re measuring your flour accurately. Scooping directly from the bag can pack too much flour into your measuring cup; instead, spoon flour into the cup and level it off.
- Oven Temperature: An oven that isn’t hot enough can cause cookies to spread before they set. Use an oven thermometer to verify your oven’s accuracy.
Why are my cookies hard or dry?
- Overbaking: This is the most common culprit! Remember, pull them when the edges are just barely golden and the centers look slightly soft. They’ll continue cooking on the hot tray.
- Overmixing the Dough: Too much mixing after adding flour develops gluten, which leads to a tougher cookie. Mix until just combined.
- Too Much Flour: Again, accurate measurement is key.
My frosting is too thick/thin. How do I fix it?
- Too Thick: Gradually add more heavy cream (or milk) 1/2 teaspoon at a time, beating after each addition, until you reach your desired consistency.
- Too Thin: Gradually beat in more sifted powdered sugar, 1 tablespoon at a time, until the frosting thickens up.
Do I have to use almond extract?
- No, you don’t have to, but I highly recommend it for that extra layer of flavor! If you have a nut allergy or simply dislike almond, you can omit it and use an extra 1/2 tsp of vanilla extract instead. The cookies will still be delicious.
Can I use a stand mixer for this recipe?
- Absolutely! A stand mixer with the paddle attachment is excellent for creaming the butter, oil, and sugar, as well as making the frosting. Just remember to use a spatula to scrape down the sides of the bowl frequently and avoid overmixing the dough once the flour is added.
Embrace the Joy of Baking These Pink Sugar Cookies!
There’s a special kind of magic that happens when you bake from scratch, especially when it’s a batch of these beautiful pink sugar cookies. From the delightful aroma filling your kitchen to the happy smiles on the faces of those who taste them, it’s an experience that nourishes the soul.
This recipe, meticulously tested and perfected by me (Sophie!) for SweetCraft Recipes, is designed to bring you consistent success and immense baking joy. It’s a celebration of comfort food, family tradition, and the simple pleasure of a homemade treat.
So, gather your ingredients, put on your apron, and let’s get baking! I can’t wait for you to experience the melt-in-your-mouth goodness of my Irresistible Pink Sugar Cookies. Don’t forget to share your creations with us on social media using #SweetCraftRecipes and let me know how they turn out in the comments below! Happy baking, sweet friends!
PrintPink Sugar Cookies

Soft, melt-in-your-mouth pink sugar cookies made with a blend of butter and oil for the perfect tender, chewy texture. Frosted with a creamy pink vanilla buttercream that’s smooth, dreamy, and absolutely irresistible.
- Prep Time: 20 minutes
- Cook Time: 10 minutes
- Total Time: 30 minutes
- Yield: 11 cookies
- Category: Cookies
- Cuisine: American
Ingredients
**For the Cookies**
110g unsalted butter, softened
55g vegetable oil
100g granulated white sugar
1 large egg, room temperature
1 1/2 tsp vanilla extract
1/2 tsp almond extract
300g all-purpose flour
1 tsp baking powder
1/4 tsp salt
**Pink Frosting**
110g unsalted butter, softened
330g powdered sugar, sifted
1 tsp vanilla extract
3 tbsp heavy cream (plus more as needed)
Pink gel food coloring
Instructions
**Prepare**
Preheat oven to 350°F (175°C). Line baking trays with parchment paper.
**Cream the Wet Ingredients**
Beat softened butter, vegetable oil, and sugar for 2–3 minutes until pale and fluffy.
**Add Egg & Extracts**
Mix in the egg, vanilla extract, and almond extract until smooth.
**Combine Dry Ingredients**
Whisk flour, baking powder, and salt. Add to the wet mixture and fold gently until just combined.
**Shape the Cookies**
Scoop 11 dough balls (about 2 tbsp each), place on trays, and gently flatten.
**Bake**
Bake 9–10 minutes until edges are barely set and centers look slightly soft. Cool 5 minutes on tray, then move to a rack to cool completely.
**Make the Frosting**
Beat softened butter until creamy. Add half the powdered sugar and mix. Add vanilla and 1 tbsp cream. Mix in remaining sugar and cream until smooth. Tint pink with gel food coloring.
**Frost**
Spread frosting on cooled cookies and enjoy!
Notes
• Do NOT overbake—slightly soft centers keep these cookies tender and chewy.
• Chill dough balls 15–20 minutes if your kitchen is warm.
• Add more cream for softer frosting or more powdered sugar for thicker.
• Almond extract is optional but adds a bakery-style flavor.
• Unfrosted cookies freeze beautifully for up to 3 months.


