There’s just something magical about making bread from scratch, isn’t there? For years, I was intimidated by sourdough, thinking it was only for expert bakers. But then I discovered the joy of baking a really good, simple loaf that’s perfect for sandwiches, toast, or just tearing off a piece with butter.
This Sourdough Sandwich Bread recipe changed everything for me. It’s become a comforting ritual in my kitchen, filling the house with the most incredible aroma. Now, I can’t imagine a week without a fresh loaf cooling on my counter!
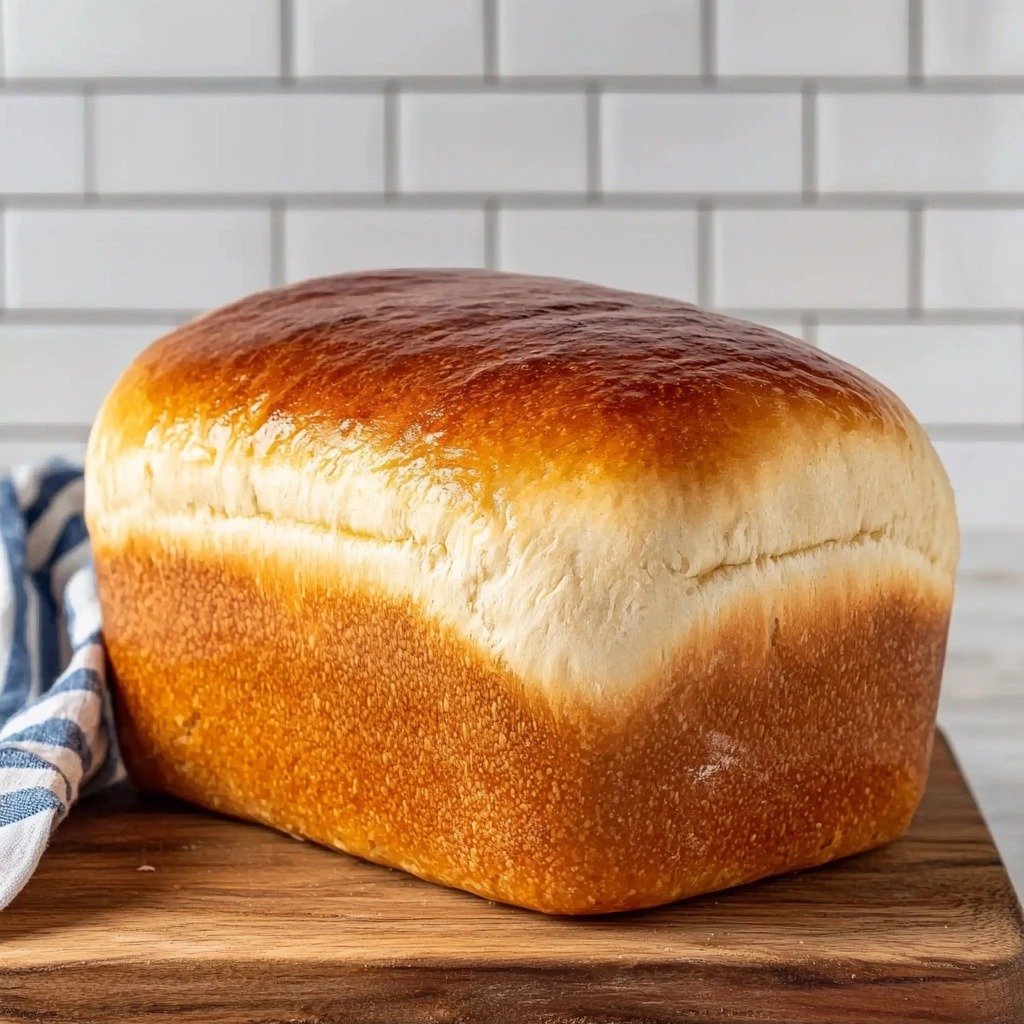
Why You’ll Love This Sourdough Sandwich Bread
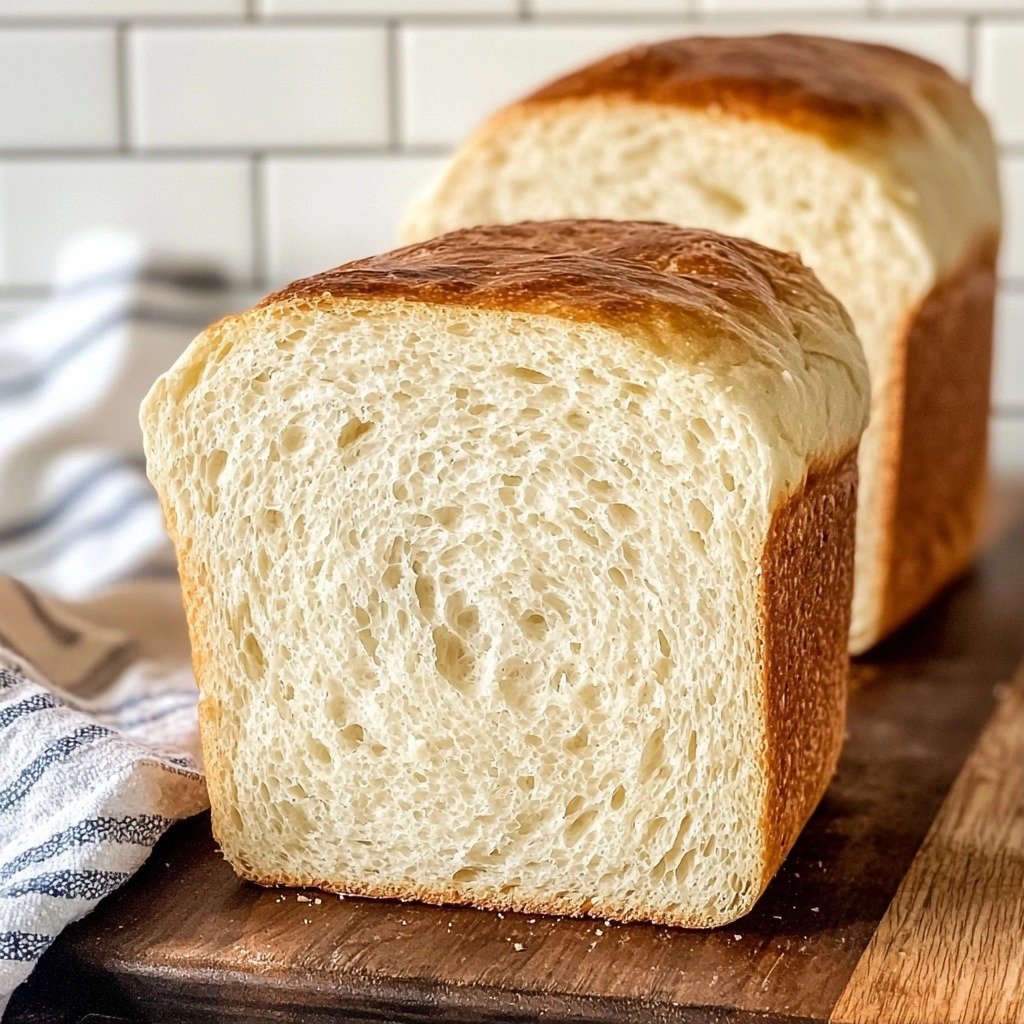
- It’s got the perfect soft, tender crumb that holds up beautifully to all your favorite sandwich fillings.
- The subtle tangy flavor from the sourdough starter adds so much character without being overpowering.
- It’s surprisingly easy to make, even if you’re new to sourdough baking.
- You’ll get that amazing homemade bread smell filling your kitchen – pure bliss!
Ingredients You’ll Need
- Sourdough Starter: This is the heart of your bread! Make sure it’s active and fed 12-24 hours before you start, meaning it’s bubbly and ripe. There’s no substitute for an active starter in this recipe.
- Warm Water: Aim for water that feels like a baby bottle – around 95º to 100ºF. This warmth helps wake up your starter and yeast.
- Granulated Sugar: A little sweetness helps feed the starter and gives the bread a lovely flavor and tender crumb. You can swap this for an equal amount of honey if you prefer.
- Bread Flour: This flour has a higher protein content, which gives your bread a fantastic structure and chewiness. All-purpose flour can also be used if that’s what you have on hand.
- Extra-Virgin Olive Oil: Adds richness, moisture, and helps keep the bread soft. Feel free to use your favorite neutral cooking oil here.
- Fine Salt: Essential for flavor! Don’t skip it; it balances the sweetness and fermentation.
How to Make Sourdough Sandwich Bread Step by Step
First things first, grab a nice big bowl. You’ll add your active sourdough starter, warm water, and sugar to it. Give it a good stir until that sugar completely dissolves – this is where the magic begins as your starter gets a little boost! Then, mix in your flour, olive oil, and salt. You’ll see it come together into a thick, shaggy dough. Don’t worry if it looks a little messy; that’s totally normal!
Now, it’s time to get your hands in there! Wet your hands a little (or flour them) and finish mixing the dough by hand. You want to bring most of that flour into the dough, but don’t stress if there’s still a bit on the sides. Cover your bowl with a clean, damp kitchen towel and let it rest for 30 to 45 minutes. This ‘autolyse’ step allows the flour to fully hydrate and makes the dough easier to work with.
After its rest, you’ll do a series of stretches and folds. Gently pull the dough up and stretch it about 4 inches, then fold it down into the center. Turn the bowl a quarter turn and repeat until you’ve gone all the way around. This builds strength in your dough! Pop it back in the bowl, cover it again (a damp towel or plastic wrap works), and let it rise at room temperature for 4 to 12 hours. This long, slow fermentation is what gives sourdough its incredible flavor and texture.
In the morning, your dough should be beautifully risen. Lightly flour your countertop and gently turn out the dough. Stretch it into a rectangle and use your fingers to gently dimple the surface. This helps release any trapped air. Now, roll the dough up into a log shape. Give it a quick 10-minute rest, covered, to relax. Spray your loaf pan, then gently pull the log towards you on the counter to tighten it slightly before placing it seam-side down in the pan. Cover it up and let it rise for another 1-2 hours, until it’s nearly doubled. To check if it’s ready, gently press the corner edge about half an inch; if the indentation stays, it’s good to go!
Preheat your oven to 375ºF. If you want a golden, shiny crust, you can brush the top with an egg wash before baking. Bake your loaf in the center of the oven for about 40 minutes, until it’s beautifully golden brown. Once it’s out, let it cool for 10 minutes in the pan, then carefully tilt it out onto a cooling rack. This is the hardest part – you MUST wait at least 1 hour before slicing into it! This allows the internal structure to set, preventing a gummy texture.
My Top Tips for Success
- I always make sure my sourdough starter is super active. It should be bubbly and smell slightly sweet and tangy, not overly sour.
- In my experience, using a kitchen scale for ingredients, especially flour and water, gives the most consistent results.
- Trust me on this one: don’t rush the rising times. Sourdough takes patience, and those long rises are where the flavor develops.
- When doing the stretch and folds, be gentle! You want to build strength, not tear the gluten.
- Don’t skip the final cooling step. It’s tough, but cutting into warm bread can make it gummy.
- If your kitchen is cold, find a warm spot for your dough to rise, like near a sunny window or in a turned-off oven with the light on.
Common Mistakes to Avoid
- Using an inactive starter: If your starter isn’t bubbly and active, your bread won’t rise properly. Make sure it’s fed and lively before you begin.
- Over-flouring your counter: Too much flour on your workspace can make the dough dry and tough. Use just enough to prevent sticking.
- Not letting the dough rise enough: If your dough hasn’t doubled or doesn’t pass the “poke test,” it needs more time. Under-proofed bread will be dense.
- Cutting the bread too soon: Slicing into hot bread can ruin its texture and make it gummy. Always wait at least an hour for it to cool.
- Baking at the wrong temperature: An oven that’s too hot can burn the crust before the inside is cooked, and one that’s too cool can result in a pale, dense loaf. Use an oven thermometer if you’re unsure.
How to Store Sourdough Sandwich Bread
- Room Temperature: Store in a bread box or a paper bag for 2-3 days. This helps keep the crust crisp.
- Plastic Bag: For a softer crust and to extend freshness, store in a sealed plastic bag at room temperature for up to 4-5 days.
- Freezing: For longer storage, slice the cooled loaf and freeze slices in an airtight bag or container for up to 3 months. Toast directly from frozen.
Frequently Asked Questions
What if my dough isn’t rising?
The most common reason is an inactive sourdough starter or a cold environment. Ensure your starter is very active before beginning, and find a warm spot for your dough to rise.
Can I use whole wheat flour?
This recipe is designed for bread flour or all-purpose flour. Substituting with whole wheat flour will change the hydration needs and texture significantly, so it’s best to stick to the specified flours for this recipe.
How do I know my sourdough starter is ready?
Your starter is ready when it’s bubbly, has doubled or tripled in size after feeding, and passes the float test (a small piece floats in water). It should smell pleasantly yeasty and tangy.
Why is my bread gummy inside?
Gummy bread is often a sign of cutting into the loaf before it has fully cooled. The internal structure needs time to set after baking, so patience is key!
Can I make this recipe without a stand mixer?
Absolutely! This recipe is designed to be mixed by hand. You’ll start with a dough whisk or wooden spoon, then finish mixing and kneading by hand.
I really hope this Sourdough Sandwich Bread brings as much joy and deliciousness to your kitchen as it does to mine. There’s nothing quite like a slice of homemade bread! If you try this recipe, please let me know how it turns out – I’d love to hear about your baking adventures!
PrintSourdough Sandwich Bread

A wonderfully soft and tangy sourdough bread, perfect for sandwiches or toast, made with an active sourdough starter.
- Prep Time: 20
- Cook Time: 40
- Total Time: 780
- Yield: 1 loaf (12 slices)
- Category: Baking
- Method: Baking
- Cuisine: American
Ingredients
- ⅓ cup sourdough starter (65 grams) fed 12-24 hours prior
- 1⅓ cups warm water, filtered (300 grams) 95º to 100º F
- ¼ cup granulated sugar (56 grams)
- 4 cups bread flour (500 grams)
- 1½ tablespoons extra-virgin olive oil (20 grams)
- 2 teaspoons fine salt (9 grams)
Instructions
- Place the active sourdough starter into a large bowl.
- Pour the warm water into the bowl with the starter.
- Add the granulated sugar to the bowl.
- Stir the starter, warm water, and sugar together until the sugar is dissolved.
- Add the bread flour to the bowl.
- Pour the extra-virgin olive oil into the bowl.
- Add the fine salt to the bowl.
- Stir the mixture with a dough whisk or wooden spoon until a thick, shaggy dough forms.
- Wet your hands (or flour them) and finish mixing the dough by hand until most of the flour has been absorbed.
- Cover the bowl with a clean, damp kitchen towel.
- Let the dough rest for 30 to 45 minutes.
- Gently coax the dough from the bowl.
- Stretch the dough about 4 inches.
- Push the stretched dough down the middle.
- Turn the dough 1/4 turn.
- Repeat the stretching and turning process until you have completed a full circle.
- Return the dough to the bowl.
- Cover the bowl with a damp towel or plastic wrap.
- Let the dough rise at room temperature or in a warm area for 4 to 12 hours to ferment.
- In the morning, lightly flour your countertop.
- Remove the dough from the bowl onto the floured countertop.
- Gently stretch the dough into a rectangle shape.
- Use your fingers to dimple the dough to release air.
- Roll up the dough into a log shape.
- Cover the dough log and let it rest for 10 minutes.
- Spray a loaf pan with cooking spray.
- Gently pull the dough log towards you along the countertop for 5-8 inches to tighten it.
- Place the tightened dough log into the prepared loaf pan, seam side down.
- Cover the loaf pan.
- Let the dough rise in the pan for 1 to 2 hours, until it is about double in size.
- To check if it's ready, press the corner edge of the dough in 1/2 inch; if the indentation remains, it's ready to bake.
- Preheat your oven to 375ºF.
- If desired, brush the top of the loaf with an egg wash.
- Bake the loaf in the center of the oven for 40 minutes.
- The top of the loaf should be golden in color.
- Remove the loaf from the oven.
- After 10 minutes, carefully tilt the pan to remove the bread.
- Place the bread on a cooling rack.
- Wait at least 1 hour before slicing the bread to prevent it from deflating.
Notes
Ensure your sourdough starter is active and bubbly for the best rise.
Use a kitchen scale for precise measurements, especially for flour and water.
Don’t rush the rising times; patience is key for flavor development.
Always allow the bread to cool completely for at least one hour before slicing to prevent a gummy texture.