If you’re looking for a show-stopping, no-bake dessert that’s as fun to make as it is to eat, these Red, White & Blue Oreo Balls are your answer. Perfect for Memorial Day, the 4th of July, or any celebration that calls for a pop of color, these little bites combine the classic, creamy texture of Oreo truffles with a festive candy coating. The best part? They require just a handful of simple ingredients and come together in a few easy steps.
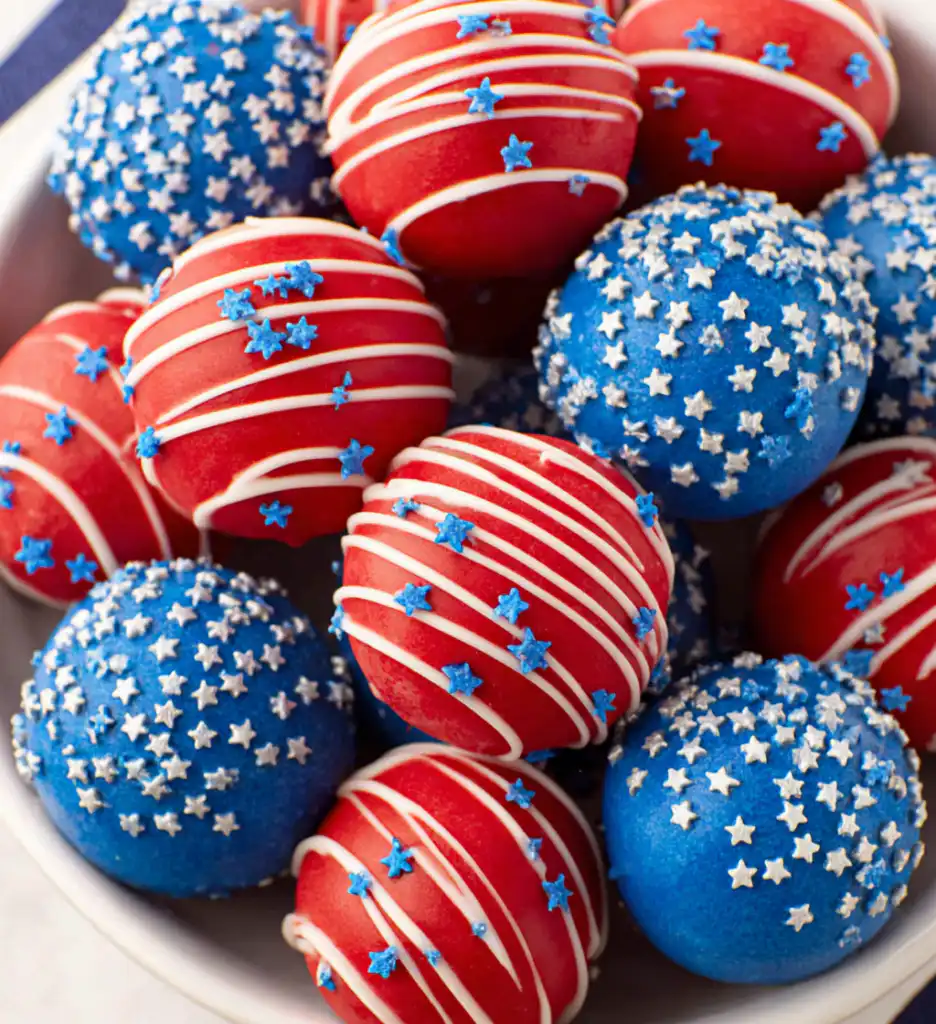
Imagine biting into a smooth, chilled Oreo and cream cheese center, enveloped in a crisp shell of blue or red candy melts, finished with star confetti or a drizzle of white chocolate. They are rich, decadent, and utterly addictive. Whether you are hosting a backyard barbecue or bringing a dish to pass, these patriotic Oreo balls are guaranteed to be the first thing to disappear from the dessert table. Let’s dive into how to make these irresistible, crowd-pleasing treats.
Ingredient Notes
- Oreo Cookies: Use a full 1 lb package (about 36 cookies). Do not remove the cream filling; it helps bind the truffle mixture. For best results, use classic Oreos, not Double Stuf.
- Cream Cheese: Make sure your 8 ounces of cream cheese are fully softened to room temperature. This ensures a smooth, lump-free mixture when combined with the Oreo crumbs.
- Candy Melts: You will need 12 ounces each of blue and red candy melts. These are specifically designed for dipping and set with a hard, shiny finish. White melting wafers are used for the decorative drizzle.
- Sprinkles: White star confetti sprinkles add the perfect patriotic touch. Feel free to substitute with red, white, and blue jimmies or sanding sugar.
Step-by-Step Tips for Perfect Oreo Balls
- Crush the Oreos Finely: For the best texture, pulse the cookies in a food processor until they become fine crumbs. If using a Ziploc bag, ensure no large chunks remain, as they can make the balls crumbly.
- Chill the Mixture: After rolling the balls, a 2-hour chill in the refrigerator is ideal. If you are short on time, a 15-20 minute freeze works well, but do not skip this step—it prevents the balls from falling apart when dipped.
- Melt Candy Melts Gently: Use a double boiler or microwave on low power (50%) in 30-second intervals, stirring well each time. Overheating can cause the candy to seize and become thick and lumpy.
- Tap Off Excess Coating: When dipping, lift the ball with a fork and gently tap the fork on the edge of the bowl. This removes excess coating and prevents a thick, uneven shell.
- Work in Batches: Keep one tray of balls in the refrigerator while you dip the other. This keeps them cold and firm, making the dipping process much easier and cleaner.
Frequently Asked Questions (FAQ)
1. Can I use a different type of cookie?
Yes, you can substitute Oreos with other chocolate sandwich cookies, like generic brands or even gluten-free versions. Golden Oreos also work well for a different flavor profile, but the texture and sweetness may vary slightly.
2. How should I store these Oreo balls?
Store the finished Oreo balls in an airtight container in the refrigerator for up to 1 week. They can also be frozen for up to 3 months. Place them in a single layer in a freezer-safe bag or container, separating layers with parchment paper.
3. My candy melts are too thick. What should I do?
If your candy melts become too thick for dipping, stir in 1 teaspoon of vegetable shortening or coconut oil (not butter or milk) to thin the mixture. Reheat gently for 10-15 seconds and stir until smooth. Do not add water, as it will cause the candy to seize.
Conclusion
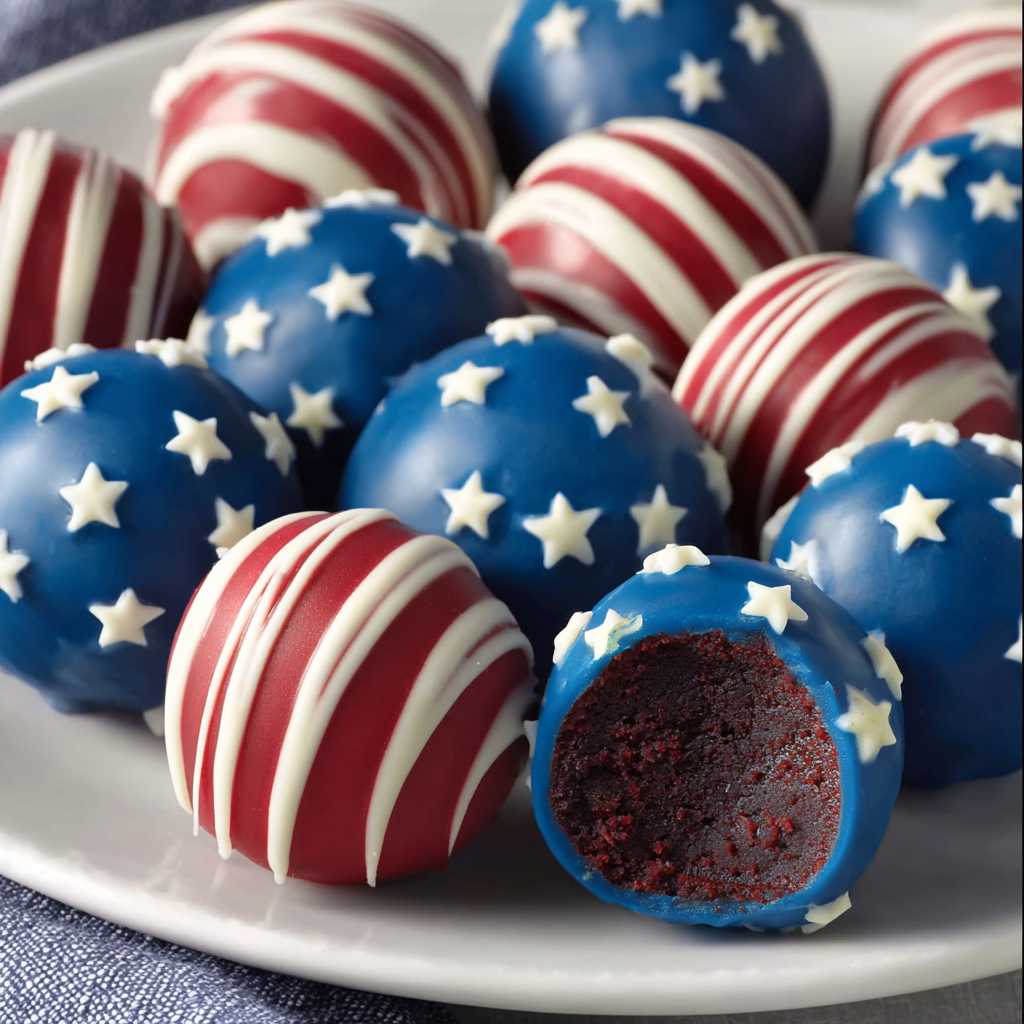
These Red, White & Blue Oreo Balls are more than just a dessert; they are a celebration on a plate. With their creamy, decadent center and crisp, colorful shell, they are the perfect no-bake treat for any patriotic holiday or summer gathering. The recipe is incredibly forgiving and easy to customize with your favorite sprinkles or chocolate colors. Whether you make them for a party or just a fun weekend project, these little bites are sure to bring smiles all around. So, gather your ingredients, put on some music, and enjoy the simple joy of creating something beautiful and delicious. Happy snacking!
PrintRed, White & Blue Oreo Balls
Festive no-bake Oreo truffles dipped in red and blue candy melts, decorated with star sprinkles and white chocolate drizzle. Perfect for patriotic celebrations.
- Prep Time: 20 minutes
- Cook Time: 10 minutes
- Total Time: 2 hours 30 minutes (includes chilling)
- Yield: 30-36 balls
- Category: Dessert
- Cuisine: American
Ingredients
- 1 lb Oreo Cookies (about 36 cookies)
- 8 ounces cream cheese, softened
- 12 ounces blue candy melts
- 12 ounces red candy melts
- ⅓ cup white melting wafers
- White star confetti sprinkles for topping
Instructions
- Line two baking trays with parchment paper. Pulse Oreo cookies in a food processor into fine crumbs. (Or crush in a Ziploc bag with a rolling pin.)
- In a large bowl, beat softened cream cheese with a hand mixer on high until smooth. Add Oreo crumbs and mix on medium until well combined.
- Use a small cookie scoop to form evenly sized balls. Roll each ball in your palms to smooth. Place on prepared baking sheets.
- Refrigerate balls for 2 hours (or freeze for 15-20 minutes if short on time).
- Remove one tray from refrigerator. In a double boiler (or microwave on low), melt blue candy melts, stirring every 30 seconds until smooth.
- Using a fork, dip each ball completely into the melted blue coating. Tap fork to remove excess. Place back on tray and immediately sprinkle with white star confetti. Return to refrigerator to set.
- Remove second tray from refrigerator. In a clean double boiler, melt red candy melts until smooth. Dip each ball in the red coating, tap off excess, and place back on tray.
- In a small piping bag, microwave white melting wafers in 30-second increments, massaging the bag at each interval until melted. Snip the tip and drizzle white lines over the red Oreo balls.
- Return all balls to the refrigerator to set for 10 minutes. Keep refrigerated until ready to serve.