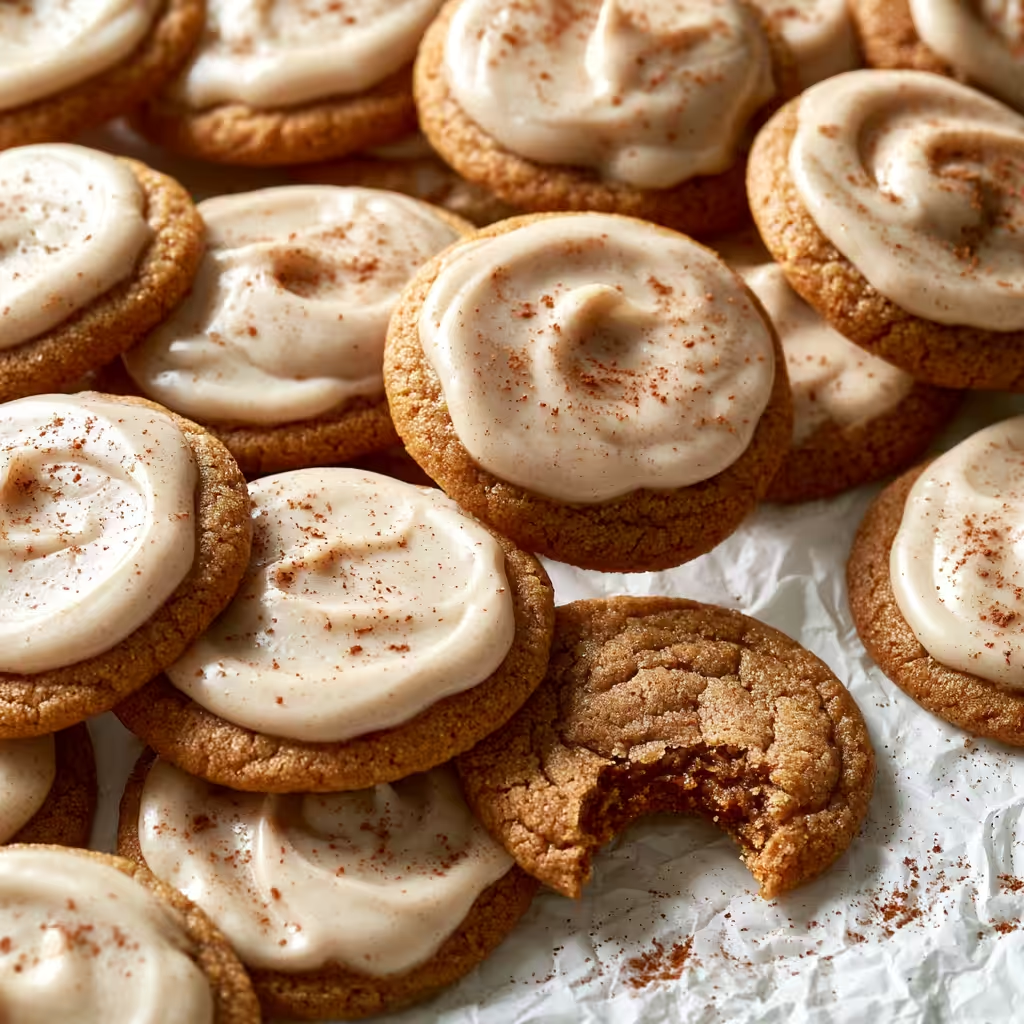
There’s just something so comforting about a warm, sweet treat that reminds you of childhood. For me, it’s often the simple, nostalgic flavors that hit just right. Lately, I’ve been absolutely obsessed with these Brown Sugar “Pop-Tart” Cookies. They have that perfect balance of a soft, chewy cookie with a gooey, spiced brown sugar center, all topped with a sweet glaze. It’s like a little hug in cookie form, and I just know you’re going to adore them as much as I do!
Why You’ll Love These Brown Sugar “Pop-Tart” Cookies
- They’re incredibly soft and chewy, with that perfect melt-in-your-mouth texture.
- The warm, spiced brown sugar filling is pure comfort and tastes just like your favorite breakfast pastry.
- They look impressive but are surprisingly simple to make, even for beginner bakers.
- Perfect for cozy afternoons, dessert platters, or a sweet treat with your morning coffee!
Ingredients You’ll Need
- Gluten-Free 1:1 Flour: This recipe uses a gluten-free blend, but you can absolutely substitute regular all-purpose flour if that’s what you have on hand. Just measure it the same way!
- Coconut Oil: Make sure it’s regular, solid coconut oil at room temperature, not the liquid kind. It adds a lovely richness and chewiness to the cookies.
- Dark Brown Sugar: This is key for that deep, molasses-y flavor in both the cookie dough and the filling. Don’t swap it for light brown sugar if you want that classic taste!
- Almond Milk: Used in the icing glaze, but feel free to use whole milk if that’s what you prefer or have on hand.
How to Make Brown Sugar “Pop-Tart” Cookies Step by Step
First things first, let’s get our dough ready! You’ll start by whisking together your dry ingredients – flour, baking soda, baking powder, cinnamon, and salt – in one bowl. Set that aside for a moment. Then, in your stand mixer, you’ll cream together the softened butter, room temperature coconut oil, a touch of maple syrup, and that lovely dark brown sugar until it’s light and fluffy. This usually takes about 2-3 minutes, and it’s where all that wonderful flavor really starts to develop.
Next, you’ll add in your vanilla extract, a large egg, and an extra egg yolk. The extra yolk makes these cookies wonderfully tender and chewy, trust me! Once that’s all combined, gradually add your dry ingredients into the wet mixture, mixing on low speed until everything just comes together. Don’t overmix here; we want tender cookies! Cover your dough and set it aside while we whip up the filling.
For the cinnamon filling, it’s super simple: just mix dark brown sugar, softened butter, and ground cinnamon in a small bowl until it’s perfectly smooth. Now for the fun part – assembly! You’ll scoop out tablespoon-sized portions of dough onto a parchment-lined sheet pan. Then, place about ½ teaspoon of the cinnamon filling right in the center of each dough ball. Top each one with another scoop of dough, making a little cookie sandwich. Gently press them down with your fingers to flatten them slightly. Don’t worry if a little filling peeks out; it all bakes into deliciousness! Pop that tray into the freezer for at least an hour, or even overnight. This chilling step is crucial for preventing spread and getting those perfectly thick cookies.
When you’re ready to bake, preheat your oven to 350°F (175°C) and line two baking sheets with fresh parchment paper. Arrange your chilled cookie sandwiches on the trays, leaving plenty of space between them. Bake for about 12-14 minutes, rotating the trays halfway through for even baking. When they come out, give the sheet pan a little bang on the counter; this helps them flatten out beautifully. Let them cool completely on a wire rack before icing. While they cool, whisk together your powdered sugar, cinnamon, salt, and almond milk for the glaze until it’s smooth. Drizzle about 2 teaspoons of icing over each cooled cookie, spreading it with a spoon and leaving a small border. Let the icing set, and then enjoy your amazing Brown Sugar “Pop-Tart” Cookies!
My Top Tips for Success
- Don’t skip the chilling step! I always chill my cookie dough for at least an hour, or even overnight. It helps the cookies keep their shape and prevents them from spreading too much.
- Measure your flour correctly. In my experience, spooning the flour into the measuring cup and then leveling it off gives the most accurate results. Too much flour can make cookies dry.
- Room temperature ingredients are key. Trust me on this one! Softened butter and room temperature eggs cream together much better, creating a smoother dough and a better cookie texture.
- Don’t overbake! These cookies are best when they’re still slightly soft in the middle. They’ll continue to set up as they cool on the baking sheet.
- Bang the pan! Giving the hot baking sheet a gentle bang on the counter right after pulling it from the oven helps deflate them slightly and creates those lovely crinkly edges.
Common Mistakes to Avoid
- Overmixing the dough: Once you add the dry ingredients, mix only until just combined. Overmixing develops gluten, which can lead to tough cookies instead of tender ones.
- Not chilling the dough enough: If your dough isn’t thoroughly chilled, your cookies will spread too much in the oven, resulting in flat, crispy cookies instead of thick, chewy ones.
- Baking on a warm baking sheet: Always use a cool baking sheet for each batch of cookies. If you place dough on a warm sheet, the butter will start melting before it even goes into the oven, causing excessive spreading.
- Overfilling the cookies: While tempting, too much filling can cause it to ooze out excessively during baking. Stick to about ½ teaspoon per cookie.
How to Store Brown Sugar “Pop-Tart” Cookies
- At Room Temperature: Store cooled, iced cookies in an airtight container at room temperature for up to 3-4 days. For best results, place parchment paper between layers of cookies to prevent sticking.
- In the Freezer (Baked): Once completely cooled, place iced cookies in a single layer on a baking sheet and freeze until firm. Transfer to a freezer-safe airtight container or bag for up to 2-3 months. Thaw at room temperature.
- In the Freezer (Dough): You can freeze the assembled, unbaked cookie dough sandwiches for up to 3 months. Place them on a baking sheet and freeze until solid, then transfer to a freezer-safe bag. Bake from frozen, adding a few extra minutes to the baking time.
Frequently Asked Questions
Can I use regular all-purpose flour instead of gluten-free?
Yes, absolutely! The recipe calls for gluten-free 1:1 flour, but you can swap it out cup-for-cup with regular all-purpose flour without any other changes. The cookies will still turn out wonderfully delicious.
Do I have to use coconut oil?
The coconut oil adds a lovely chewiness and richness. While you could try substituting with all butter, the texture might be slightly different. For the best results, I recommend sticking to the coconut oil.
My icing is too thick/thin. How do I fix it?
If your icing is too thick, add a tiny bit more almond milk (1/2 teaspoon at a time) until it reaches your desired consistency. If it’s too thin, whisk in a little more powdered sugar, a tablespoon at a time, until it thickens up.
Can I make these ahead of time?
Yes, these cookies are great for making ahead! You can prepare the cookie dough sandwiches and freeze them unbaked, or bake them, cool them, and freeze the finished cookies. Just thaw at room temperature when you’re ready to enjoy.
I truly hope these Brown Sugar “Pop-Tart” Cookies bring a little extra warmth and sweetness to your day. They’re such a fun and comforting bake! If you give them a try, please let me know how they turn out in the comments below. Happy baking, friends!
PrintBrown Sugar “Pop-Tart” Cookies
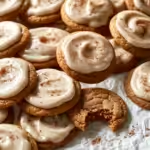
Soft, chewy cookies filled with a gooey brown sugar cinnamon center and topped with a sweet glaze, just like your favorite breakfast pastry.
- Prep Time: 30
- Cook Time: 14
- Total Time: 104
- Yield: 20 cookies
- Category: Dessert
- Method: Baking
- Cuisine: American
- Diet: Vegetarian
Ingredients
- 2 ½ cups gluten free 1:1 flour sub All Purpose flour if needed
- ¾ teaspoons baking soda
- 1 teaspoon baking powder
- ½ teaspoon ground cinnamon
- ¾ teaspoon kosher salt
- 1 ½ sticks unsalted butter softened
- ¼ cup coconut oil room temperature (regular coconut oil, not liquid)
- 1 tablespoon maple syrup
- 1 ½ cups dark brown sugar
- 2 teaspoons vanilla extract
- 1 large egg plus 1 egg yolk room temperature
- ¼ cup dark brown sugar
- 2 tablespoons unsalted butter softened
- 1 tablespoon ground cinnamon
- 1 ½ cups powdered sugar
- ½ teaspoon kosher salt
- ½ teaspoon ground cinnamon
- 3 tablespoons almond milk or sub whole milk
Instructions
- Line a sheet pan with parchment paper. Set it aside.
- In a medium mixing bowl, whisk together the flour, baking soda, baking powder, cinnamon, and salt. Set this dry mixture aside.
- In the bowl of a stand mixer fitted with the paddle attachment, add the softened butter, room temperature coconut oil, maple syrup, and 1 ½ cups dark brown sugar.
- Mix on medium speed until the mixture is pale tan and fluffy, about 2-3 minutes.
- Add in the vanilla extract, large egg, and egg yolk to the wet mixture. Mix until everything is just combined.
- Slowly add the dry ingredients into the wet ingredients in increments, mixing on low speed until just combined. Do not overmix.
- Remove the paddle attachment, cover the bowl with clingwrap, and set the dough aside.
- In a small bowl, combine ¼ cup dark brown sugar, 2 tablespoons softened butter, and 1 tablespoon ground cinnamon.
- Mix these ingredients together until completely combined and smooth.
- Using a cookie scoop, scoop out 20 tablespoon-sized portions of cookie dough onto the prepared sheet pan.
- Top each dough ball with a small, ½ teaspoon amount of the cinnamon filling in the middle of the ball.
- With the remaining cookie dough, scoop another 20 portions directly atop the existing cookies, creating a sandwich.
- Using your fingers, gently press down atop each cookie to flatten it slightly.
- Transfer the baking sheet to the freezer and chill for at least one hour, or preferably overnight.
- Preheat your oven to 350℉ (175°C).
- Line two baking sheets with fresh parchment paper.
- Divide your chilled dough between each tray, leaving ample space between them. You may need to bake in batches.
- Transfer the baking sheets to the preheated oven and bake for 12-14 minutes, rotating the trays halfway through baking.
- Remove the cookies from the oven.
- Immediately bang each sheet pan firmly on the counter to flatten the cookies slightly. This helps create crinkly edges.
- Transfer the baked cookies to a wire rack to cool completely. Repeat with any remaining cookie dough.
- While the cookies are cooling, prepare the icing glaze.
- In a medium mixing bowl, add the powdered sugar, ½ teaspoon cinnamon, ½ teaspoon kosher salt, and almond milk.
- Whisk all icing ingredients together until smooth and totally combined.
- Once the cookies are entirely cool, add about 2 teaspoons of icing to the top of each cookie.
- Use a spoon to gently smooth the icing out, leaving about a 1-centimeter border around the edges.
- Allow the icing to set before storing the cookies.
Notes
Ensure your butter and coconut oil are softened to room temperature for the best creamy dough texture.
Do not skip the chilling step; it’s crucial for preventing cookie spread and achieving thick, chewy cookies.
Bang the hot baking sheet on the counter right after baking to get those perfectly flat, crinkled tops.
Measure flour by spooning it into the measuring cup and leveling it off for accuracy.