There’s just something magical about a warm cinnamon roll, isn’t there? That cozy smell, the sweet, spiced swirl, the creamy frosting… it’s pure comfort. I love baking them, but sometimes I crave that flavor in a delicate, bite-sized form. That’s exactly how these Cinnamon Roll Macarons were born! They bring all those beloved flavors into an elegant little cookie, and trust me, they’re a showstopper.
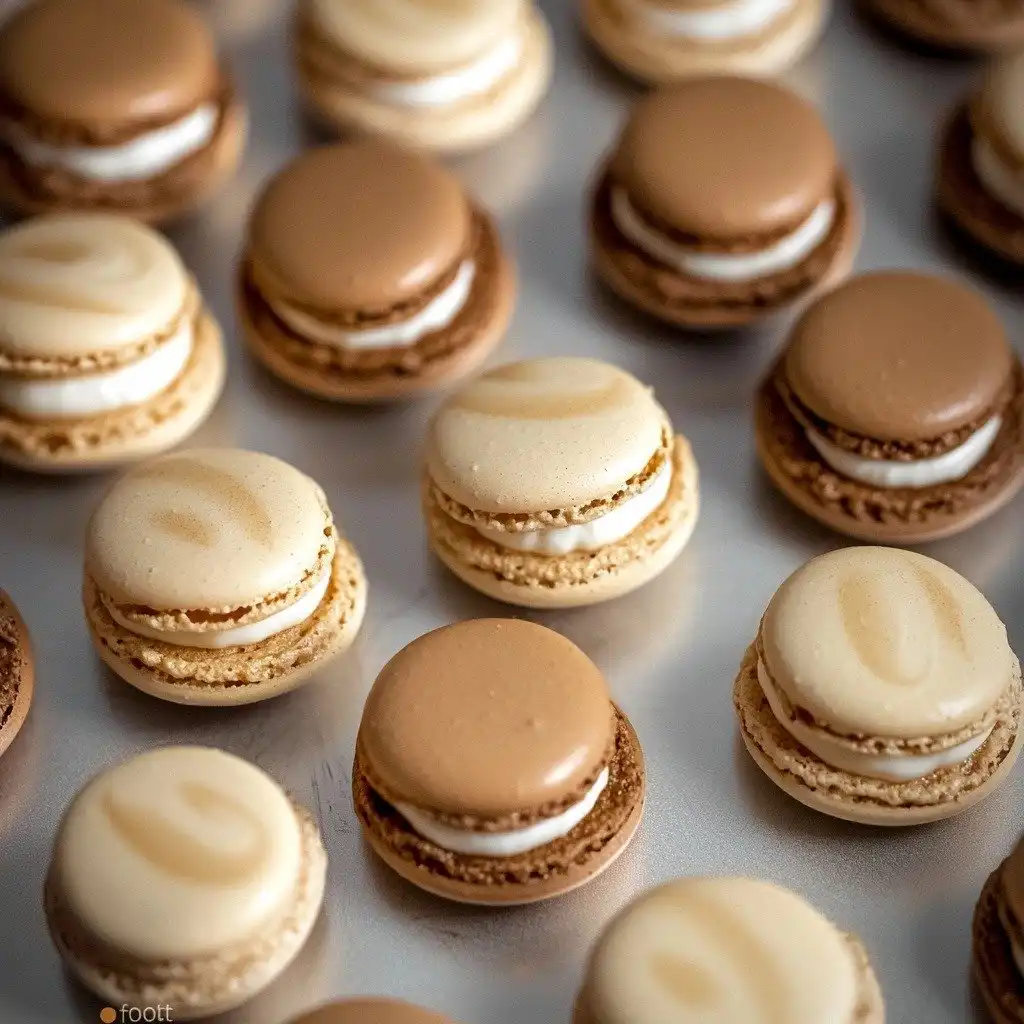
Why You’ll Love This Cinnamon Roll Macarons
- They taste exactly like a cinnamon roll in macaron form – pure bliss!
- The swirls are so impressive, but totally doable even for beginners.
- They’re perfect for impressing friends, holiday gatherings, or just a fancy treat for yourself.
- The texture is that perfect crisp shell with a chewy, soft interior.
Ingredients You’ll Need
- Egg White Powder: This helps stabilize your meringue, making it extra strong and reliable. If you don’t have it, you can omit it, but your meringue might be a little less forgiving.
- Cocoa Powder: This is just for color to give the macaron shells a warm, tan hue, like a real cinnamon roll. It’s totally optional!
- Brown Food Coloring: Again, this is for a visual effect to create that lovely swirled look. Gel food coloring works best for macarons.
- Cream Cheese: Make sure it’s softened to room temperature so it creams smoothly with the butter.
- Unsalted Butter: Softened butter is key for a fluffy frosting. If you only have salted, you can use it but omit any added salt in the frosting.
How to Make Cinnamon Roll Macarons Step by Step
First things first, get everything measured out and ready. This is called “mise en place” and it makes a huge difference in macaron baking! You’ll prepare your piping bags and line your baking sheets with parchment paper or silicone mats. Then, you’ll sift together your dry ingredients – the powdered sugar, almond flour, a touch of cocoa powder, and cinnamon. This step is super important for smooth shells!
Next comes the meringue, which is the heart of any macaron. You’ll gently whisk sugar and egg white powder (if using) with egg whites over a water bath until the sugar is completely dissolved and frothy. Don’t let the bowl touch the simmering water! Then, transfer that warm mixture to your stand mixer. This is where the magic happens! You’ll whip it from low speed, gradually increasing to high, until you have stiff, glossy peaks. This means when you lift the whisk, the meringue stands straight up.
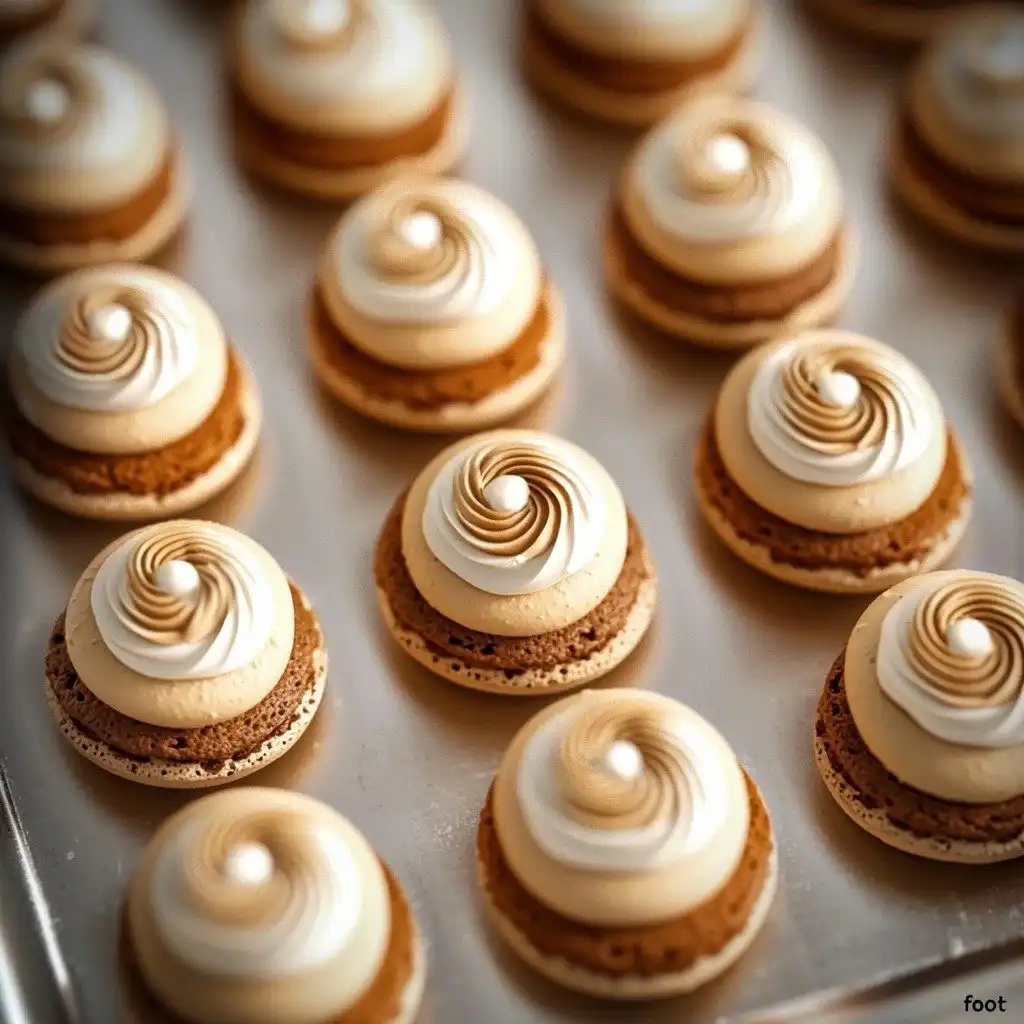
Now for the macaronage, which can feel a little intimidating but don’t worry! You’ll pour your sifted dry ingredients into the meringue and gently fold it with a spatula. If you’re doing the two-tone swirl like I do for these Cinnamon Roll Macarons, you’ll fold just until the dry ingredients disappear. Then, divide your batter, add brown food coloring to one portion, and continue folding each until it reaches the perfect “lava” consistency. You want it to flow slowly and continuously off your spatula, forming a figure eight without breaking. This takes practice, so test it often! Once ready, fill your piping bags, snip the ends, place them into a larger bag with a round tip, and pipe those beautiful swirled circles onto your prepared baking sheets. Give the trays a good bang on the counter to release air bubbles, pop any remaining ones with a toothpick, and let them rest until they form a skin – about 20-40 minutes. Then, bake them one tray at a time at 300°F for about 15-20 minutes, rotating halfway through. They’re done when they have “feet” and don’t jiggle!
My Top Tips for Success
- I always recommend using a kitchen scale for macaron ingredients. Accuracy is key!
- In my experience, aging egg whites (separating them a day or two before and letting them sit in the fridge) can help create a more stable meringue.
- Trust me on this one: don’t overmix or undermix your macaron batter. The “figure eight” test is your best friend!
- Allowing the piped shells to rest until they form a skin is crucial for developing “feet.” Don’t skip it!
- Bake one tray at a time for more consistent results. Oven temperatures can vary, so keep an eye on them.
- Let the macarons cool completely on the baking sheet before attempting to remove them. Warm macarons are fragile!
Common Mistakes to Avoid
- Overmixing the batter: This leads to runny batter, flat shells, and no feet. Stop folding as soon as your batter flows like slow lava in a figure eight.
- Undermixing the batter: This results in stiff batter, lumpy shells, and hollows. Keep folding gently until it reaches that perfect flowing consistency.
- Not letting shells rest enough: If the shells are sticky when you touch them, they’re not ready for the oven. This causes cracked shells and no feet.
- Oven too hot or too cold: Too hot can cause browning or hollows, too cold can prevent feet from forming. Invest in an oven thermometer!
- Using liquid food coloring: This can add too much moisture to your batter. Always use gel or powdered food coloring for macarons.
How to Store Cinnamon Roll Macarons
- Fridge: Store in an airtight container for 4 to 5 days.
- Freezer: Place in an airtight container, separated by parchment paper, for 1 to 2 months. Thaw in the fridge before enjoying.
Frequently Asked Questions
What kind of almond flour should I use?
Use blanched, super-fine almond flour. Coarse almond flour will give you lumpy shells.
Can I make these without cocoa powder?
Absolutely! The cocoa powder is just for color. Your shells will be a lighter, more traditional macaron color.
Why are my macarons hollow?
Hollow macarons can be caused by over-whipped meringue, undermixed macaronage, or an oven that’s too hot. Adjust your technique and oven temperature next time!
How do I know when the macaron shells are baked through?
They should have distinct “feet” and not wiggle or feel jiggly when you gently try to move them on the parchment paper. They will also be slightly darker in color.
Do I really need to let them mature overnight?
Yes, it’s highly recommended! Maturing allows the filling to soften the shells slightly, creating that perfect chewy-soft texture that macarons are famous for.
I hope these Cinnamon Roll Macarons bring a little bit of that cozy, sweet magic into your kitchen! They’re such a delightful treat, and I promise the effort is worth it. If you give them a try, I’d absolutely love to hear how they turned out for you!
PrintCinnamon Roll Macarons
Delicate French macarons infused with the cozy, spiced flavor of cinnamon rolls and filled with a luscious cream cheese frosting.
- Prep Time: 60
- Cook Time: 20
- Total Time: 80
- Yield: 24-30 macarons (48-60 shells)
- Category: Dessert
- Method: Baking
- Cuisine: French
Ingredients
- For the Macaron Shells:
- 150 g powdered sugar
- 150 g almond flour
- 10 g cocoa powder (optional)
- 5 g ground cinnamon
- 150 g granulated sugar
- 5 g egg white powder (optional)
- 150 g egg whites (aged, room temperature)
- Brown food coloring (gel or powdered)
- For the Cinnamon Cream Cheese Frosting:
- 113 g (1/2 cup) cream cheese, softened
- 57 g (1/4 cup) unsalted butter, softened
- 240 g (2 cups) powdered sugar, sifted
- 2 tsp ground cinnamon
- 1 tsp vanilla extract
Instructions
- Prepare your equipment: Have all ingredients measured. Fit a large piping bag with a 1/4-inch round tip. Set aside two additional piping bags without the ends cut.
- Line two baking sheets with parchment paper or silicone mats.
- Sift together the powdered sugar, almond flour, cocoa powder (if using), and cinnamon. Set aside.
- Combine granulated sugar and egg white powder (if using) in a heatproof bowl.
- Add egg whites to the sugar mixture in the bowl.
- Place the bowl over a pan of barely simmering water, ensuring the bowl's bottom does not touch the water.
- Whisk the egg white mixture constantly until frothy and the sugar is completely dissolved (test by rubbing a small amount between your fingers – no grittiness should remain).
- Transfer the warm egg white mixture to the bowl of a stand mixer.
- Whisk on low speed for 30 seconds, then gradually increase to medium speed.
- Continue whisking on medium for 1-2 minutes until the mixture is white and fluffy.
- Increase speed to high (or medium-high) and whisk for several minutes until stiff, glossy peaks form. The meringue should stand straight up when the whisk is lifted.
- Pour the sifted dry ingredients into the stiff meringue.
- Gently fold the dry ingredients into the meringue using a spatula, forming a letter J motion, until just combined and no dry streaks remain.
- Divide the batter into two separate bowls: approximately 2/3 for white batter and 1/3 for brown batter.
- Cover the brown batter bowl while working with the white batter.
- Continue gently folding the white batter until it reaches the proper macaron consistency (flows slowly and continuously off the spatula, forming a figure 8 without breaking).
- Transfer the white batter to one of the prepared piping bags without a cut end. Secure the top with a tie and set aside.
- Uncover the brown batter. Add brown food coloring.
- Continue gently folding the brown batter until it reaches the proper macaron consistency.
- Transfer the brown batter to the second prepared piping bag without a cut end. Secure the top with a tie.
- Snip the ends of both the white and brown batter piping bags.
- Place the large piping bag (fitted with the round tip) into a cup to hold it open.
- Carefully insert both the white and brown batter piping bags into the large piping bag.
- Position the piping bag over the center of your macaron template circles.
- Apply gentle, even pressure to pipe the batter, making a circular motion to create a swirl. Aim for shells about 1.25 inches in diameter.
- Once all shells are piped, firmly bang the baking trays against the counter 2-3 times to release air bubbles.
- Use a toothpick to pop any remaining air bubbles on the surface of the shells.
- Let the piped macaron shells rest at room temperature for 20-40 minutes (or longer in humid conditions) until a dry skin forms. They are ready when you can gently touch a shell without it sticking to your finger.
- Preheat your oven to 300°F (150°C).
- Bake one tray at a time for 15 to 20 minutes.
- Rotate the tray halfway through baking (after about 5 minutes).
- Macarons are done when they have developed "feet" and do not jiggle when gently moved.
- Remove from oven and let cool completely on the baking sheet before handling.
- For the Cinnamon Cream Cheese Frosting:
- Sift powdered sugar with cinnamon. Set aside.
- Cream softened cream cheese and butter together in an electric mixer for about 2 minutes until light and fluffy.
- With the mixer off, add the sifted powdered sugar and cinnamon mixture to the bowl.
- Turn the mixer on low speed to incorporate the dry ingredients.
- Once no dry streaks remain, increase mixer speed to medium-high and beat for 1 minute until fluffy.
- Add vanilla extract and mix until just combined.
- Keep the frosting covered until ready to use.
- To Assemble:
- Place the cooled frosting into a piping bag fitted with your tip of choice (a round tip works well).
- Pipe a dollop of frosting onto the flat side of one macaron shell.
- Top with another macaron shell to form a sandwich.
- Allow the assembled macarons to mature in an airtight container in the refrigerator overnight before serving for best texture.
Notes
Always use a kitchen scale for precise measurements in macaron baking.
Macarons need to cool completely on the tray before removal to prevent breakage.
For best results, allow macarons to mature overnight in the fridge after filling.
Gel food coloring is essential; liquid coloring adds too much moisture.