There’s something so incredibly comforting about the smell of baking bread filling your home. For me, it brings back memories of lazy weekend mornings and cozy gatherings. This Easy (NO KNEAD) Overnight Focaccia has become one of my absolute favorite recipes because it lets me have that amazing bread experience without all the fuss. It’s the kind of recipe that makes you feel like a baking superstar, even if you’re just starting out.
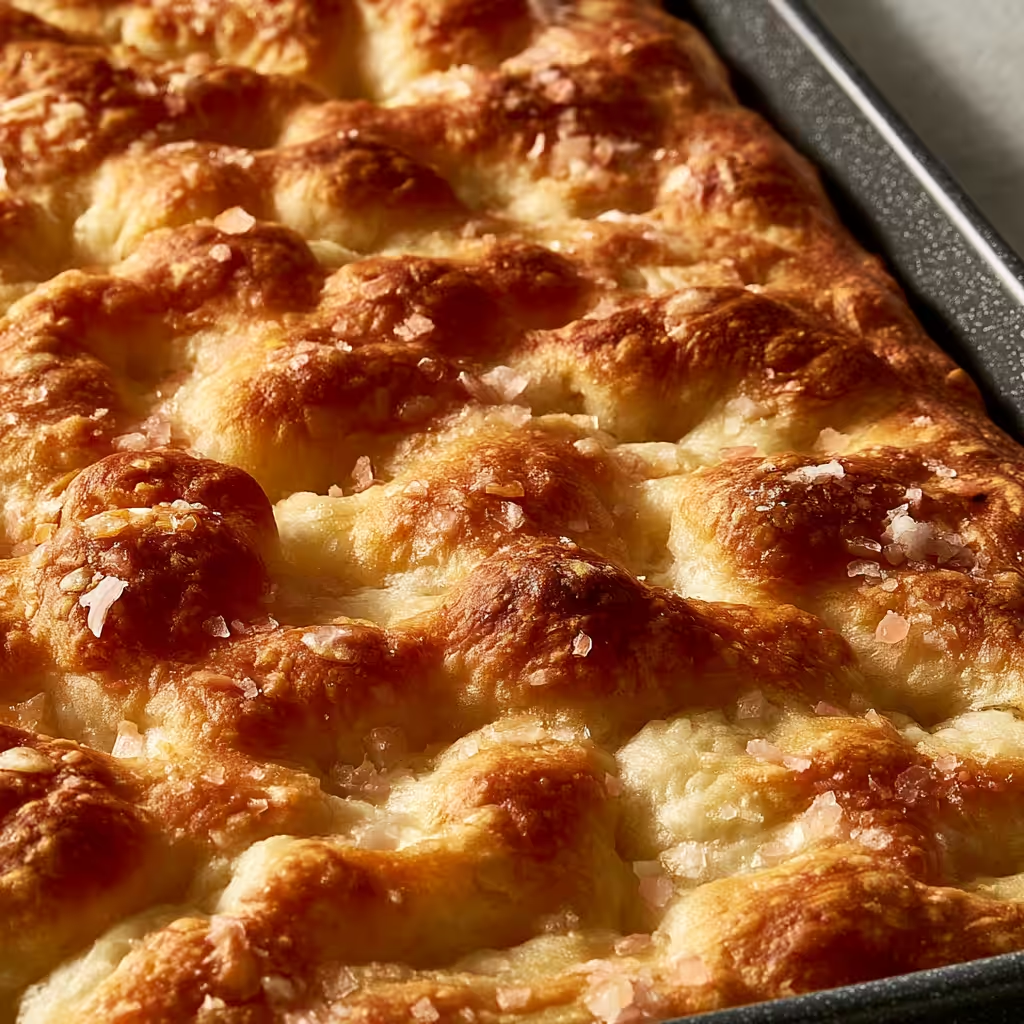
Why You’ll Love This Easy (NO KNEAD) Overnight Focaccia
- Seriously simple: No fancy kneading, no complicated steps. Just mix, rest, and bake!
- Incredible texture: It’s perfectly airy on the inside with a beautifully crisp, golden crust.
- Amazing flavor: The long, slow rise develops such a deep, delicious flavor that’s just irresistible.
- Perfect for anything: Great as a side with dinner, for dipping in olive oil, or even as a base for sandwiches.
Ingredients You’ll Need
- Warm Water: This helps activate the yeast. Make sure it’s warm to the touch, but not hot enough to kill the yeast.
- Sugar: Just a tiny bit! This is food for your yeast, helping it wake up and get bubbly. Any granulated sugar works perfectly.
- Instant Dried Yeast: This is the magic ingredient that makes your bread rise. Instant yeast is great because you don’t need to proof it separately; just add it right in.
- High Grade Flour: This type of flour has a higher protein content, which is ideal for bread. It gives your focaccia that lovely chewy texture. All-purpose flour can work, but high grade is best.
- Olive Oil: Don’t skimp here! It adds so much flavor and helps create that wonderful crispy crust. Use good quality extra virgin olive oil.
How to Make Easy (NO KNEAD) Overnight Focaccia Step by Step
First things first, grab a big bowl. Pour in your warm water and stir in the sugar. Then, sprinkle your instant yeast right over the top. Let it sit for about 5 to 10 minutes – you’ll see it start to get foamy, which means your yeast is active and happy!
Give it a quick whisk, then add your salt and high grade flour. Now, with a spoon or fork, mix everything together until all the flour is incorporated. Don’t worry if it looks super sticky and shaggy; that’s exactly how it should be! Cover your bowl with a tea towel and let it rest for 10-15 minutes. This little rest allows the flour to hydrate.
After its short rest, it’s time for the olive oil. Drizzle a generous amount over the dough. This is where the magic happens! Coat your fingertips with oil and gently fold the dough in on itself until the oil is just incorporated. It won’t take long. Then, shape the dough into a ball by tucking the bottom under. If it’s still very sticky, a little extra oil on your hands and the dough helps. Cover the bowl tightly with glad wrap and pop it into the fridge overnight. Make sure it’s sealed well to prevent a crust from forming!
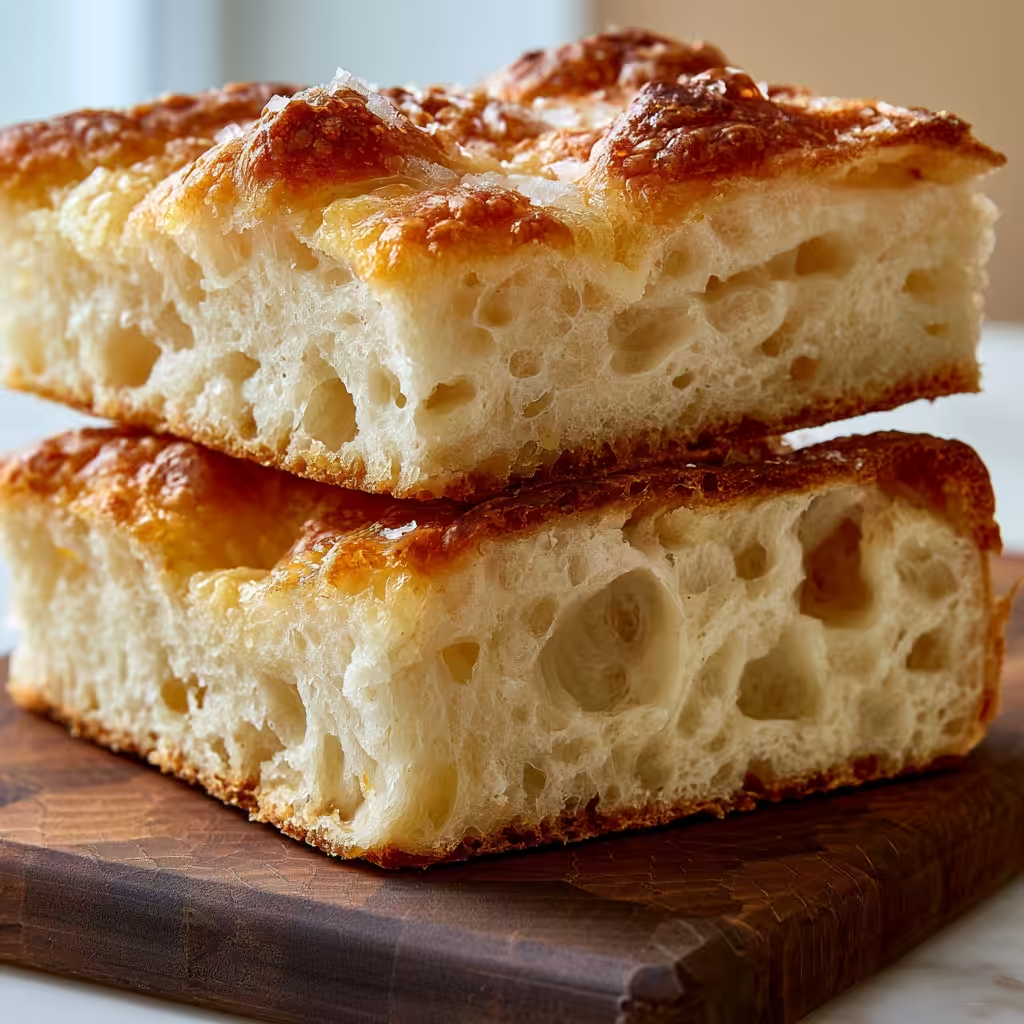
My Top Tips for Success
- Trust the process: This dough is meant to be sticky! Don’t be tempted to add more flour than the recipe calls for.
- Don’t rush the rise: The overnight chill is crucial for developing flavor and texture. In my experience, patience pays off.
- Oil your hands: When handling the sticky dough, I always coat my fingertips with olive oil. It makes it so much easier to manage!
- Dimple deeply: When you dimple the dough, really press your fingers down. This creates those lovely pockets for oil and extra crispiness.
- Warm spot for proofing: After taking it out of the fridge, find a nice warm spot for your dough to proof. This helps it come to room temperature and double in size beautifully.
Common Mistakes to Avoid
- Using water that’s too hot or too cold: If the water is too hot, it can kill the yeast. Too cold, and the yeast won’t activate properly. Aim for warm to the touch, around 100-110°F (38-43°C).
- Not covering the dough tightly in the fridge: If there are gaps in your plastic wrap, the dough can dry out and form a crust. Make sure it’s sealed well!
- Not letting it come to room temperature and double in size: Skipping this step will result in a denser focaccia. Give it the full hour (or more!) in a warm spot until it looks visibly puffy and doubled.
- Not dimpling deeply enough: Shallow dimples won’t create those characteristic focaccia pockets. Press firmly with oiled fingers.
How to Store Easy (NO KNEAD) Overnight Focaccia
- Room Temperature: Up to 2 days in an airtight container or wrapped in foil.
- Refrigerator: Not recommended, as it can dry out.
- Freezer: Up to 1 month. Wrap cooled focaccia tightly in plastic wrap, then foil. Reheat from frozen in a 350°F (175°C) oven until warmed through and crisp.
Frequently Asked Questions
What kind of olive oil should I use?
Use a good quality extra virgin olive oil for the best flavor. It really makes a difference in the final taste and texture of your focaccia.
Can I add toppings to my focaccia?
Absolutely! After dimpling and before baking, you can add rosemary, sliced cherry tomatoes, olives, or caramelized onions. Just press them gently into the dough.
My dough isn’t rising; what went wrong?
This usually means your yeast wasn’t active. Check your water temperature (too hot or too cold can kill it) or if your yeast is expired. Make sure it gets bubbly after sitting in the warm water and sugar.
Why is my focaccia dense?
A dense focaccia often means it didn’t proof long enough or wasn’t in a warm enough spot to double in size. The overnight rise in the fridge builds flavor, but the final proof at room temperature is key for texture.
Can I make this focaccia without an overnight rise?
While technically possible, the overnight rise is crucial for developing the deep, complex flavor and amazing texture of this focaccia. I highly recommend sticking to the overnight method for the best results.
I truly hope you give this Easy (NO KNEAD) Overnight Focaccia a try in your kitchen! It’s such a rewarding bake, and honestly, the smell alone is worth it. If you make it, please let me know how it turns out – I’d love to hear from you!
PrintEasy (NO KNEAD) Overnight Focaccia
This incredibly simple, no-knead focaccia bakes up with a wonderfully crisp crust and a soft, airy interior, thanks to an easy overnight rise.
- Prep Time: 15
- Cook Time: 25
- Total Time: 720
- Yield: 8 servings
- Category: Bread
- Method: Baking
- Cuisine: Italian
- Diet: Vegetarian
Ingredients
- 400 g warm water
- 1 tsp sugar
- 4 g instant dried yeast
- 1 tsp salt
- 500 g high grade flour
- A generous glug of olive oil (1-2 tbsp) + extra for drizzling into the tray
- sprinkle of sea salt (optional)
Instructions
- Pour the warm water into a large bowl.
- Stir in the sugar until dissolved.
- Sprinkle the instant dried yeast over the water.
- Let the mixture sit for 5-10 minutes to ferment until foamy.
- Whisk the yeast mixture briefly.
- Add the salt and high grade flour to the bowl.
- Mix with a spoon or fork until all the flour is incorporated and the dough is very sticky.
- Cover the bowl with a tea towel.
- Rest the dough for 10-15 minutes.
- Drizzle a generous glug of olive oil over the dough.
- Coat your fingertips with olive oil.
- Fold the dough in on itself until the oil is just incorporated (about 1-2 minutes).
- Shape the dough into a ball by tucking the bottom under.
- Place the dough back into the bowl (drizzle hands and dough with extra oil if super sticky).
- Cover the bowl tightly with plastic wrap.
- Place the covered bowl into the fridge overnight.
- Generously grease your baking tray or dish with olive oil the following day.
- Shape the dough back into a ball by tucking the bottom of the dough in on itself.
- Pop the dough into the prepared tray.
- Toss the dough in the oil to fully coat it.
- Firmly press the dough into the shape of the tray (don't worry if it doesn't reach the edges).
- Cover the tray tightly with plastic wrap.
- Leave the dough in a warm place for 1 hour or until it reaches room temperature and has doubled in size.
- Preheat your oven to 220°C (425°F).
- Once the dough has proofed, drizzle it generously with olive oil again.
- Dab your fingertips into the oil to grease them.
- Press firmly into the dough to create dimples.
- Use a knife or bench scraper to cut down the edges of the dough.
- Sprinkle with sea salt, if desired.
- Bake for 25 minutes or until golden and crispy.
- Allow to cool for 5-10 minutes in the tray.
- Transfer to a wire rack to cool completely.
- Slice and enjoy.
Notes
Ensure your water is warm, not hot, to activate the yeast properly.
Use a good quality olive oil for the best flavor.
Cover the dough tightly with plastic wrap in the fridge to prevent a crust from forming.
Don’t skip the final proofing step; it’s essential for a light, airy texture.