Christmas is my absolute favorite time of year, and nothing says festive to me quite like a sweet treat that’s also super easy to make. I’ve always loved finding simple ways to bring holiday cheer into the kitchen, especially when life gets a little hectic. That’s why these Salted Peanut Butter No Bake Christmas Trees have become such a beloved tradition in my home! They’re perfectly sweet, salty, and so much fun to decorate with the little ones.
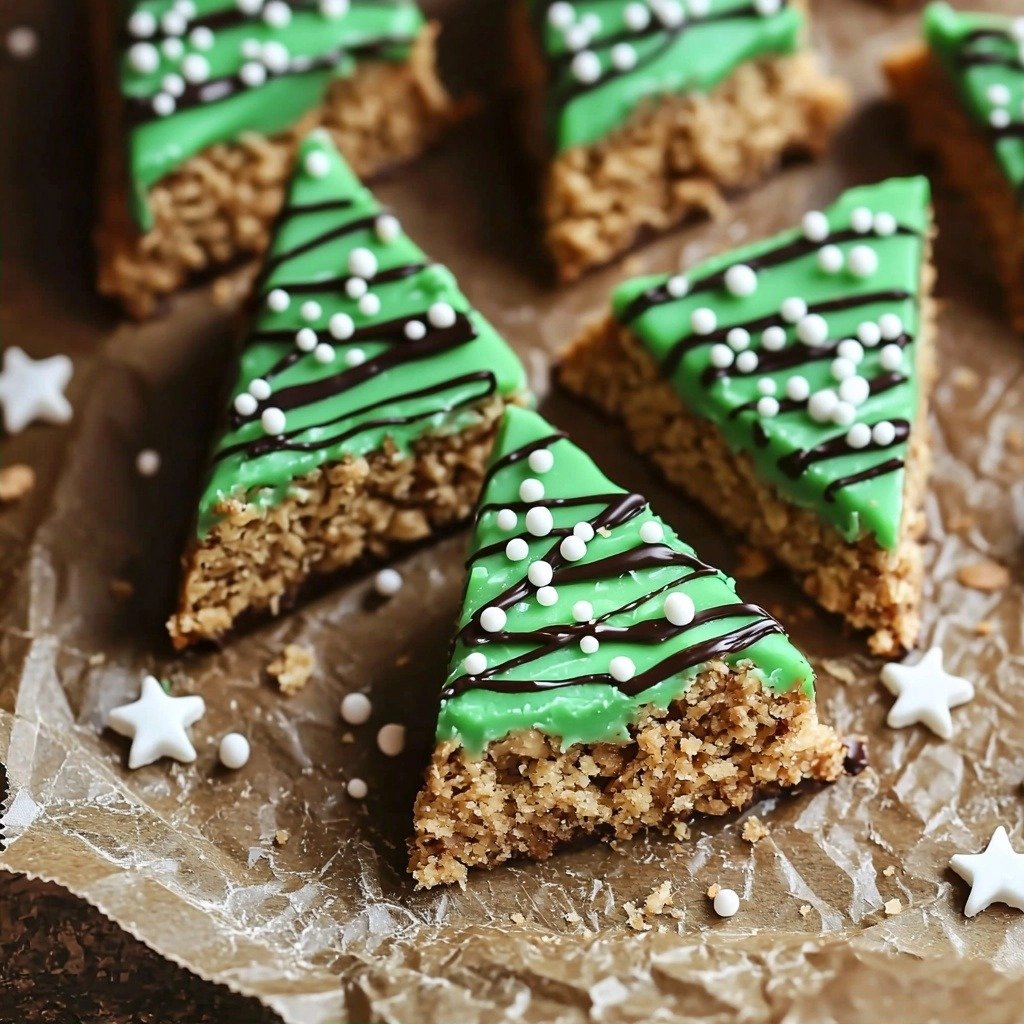
Why You’ll Love This Salted Peanut Butter No Bake Christmas Trees
- They’re no-bake! No oven needed, which is perfect for busy holiday schedules.
- The combination of sweet peanut butter, crunchy cereal, and salty pretzels is absolutely addictive.
- They’re incredibly easy to whip up, even for beginner bakers.
- You can get creative with decorations, making them a fun activity for the whole family.
Ingredients You’ll Need
- Light Brown Sugar: This adds a lovely caramel-like sweetness and helps bind everything together. Don’t swap it for white sugar!
- Karo Light Corn Syrup: Essential for that chewy, no-bake texture. It acts as a binder and keeps everything moist.
- Creamy Peanut Butter: The star of the show! Make sure it’s creamy, not natural or crunchy, for the best consistency.
- Crushed Pretzels: These add a fantastic salty crunch. If you’re gluten-free, look for gluten-free pretzels.
- Quick Oats: They absorb moisture and add a bit of chewiness. Don’t use old-fashioned oats here, quick oats are key.
- Crispy Rice Cereal: Think Rice Krispies! This gives the trees that iconic crisp texture.
- Semisweet Chocolate Chips: Regular or vegan chips work perfectly for the chocolate topping.
- Powdered Sugar: For the green icing. It dissolves smoothly for a perfect glaze.
- Milk: Just a little bit to thin the icing. Regular or your favorite plant-based milk is fine.
- Green Gel Food Coloring: Gel coloring gives a vibrant color without thinning the icing too much.
How to Make Salted Peanut Butter No Bake Christmas Trees Step by Step
First things first, grab a really big bowl and toss in your crushed pretzels, quick oats, and crispy rice cereal. Give them a quick stir to combine. This is your dry base, and it’s super important to have it ready for the next step!
Next, in a saucepan over medium heat, you’ll combine the corn syrup and brown sugar. Stir this constantly until it starts to bubble. Let it bubble for about 30 seconds – this helps dissolve the sugar and gets the mixture nice and hot. Then, immediately take it off the heat and stir in your creamy peanut butter until it’s completely smooth and melted into the syrup mixture. This is where the magic happens and everything starts coming together!
Now, pour that warm, peanut buttery syrup over your cereal mixture in the big bowl. Stir it really well until everything is evenly coated. Don’t worry if it seems a little sticky, that’s exactly what we want! Press this mixture firmly into an 8×8 inch baking dish that’s been greased and lined with parchment paper. Make sure the paper hangs over the edges – it makes removal so much easier later. Press it into all the corners to create a nice, even base.
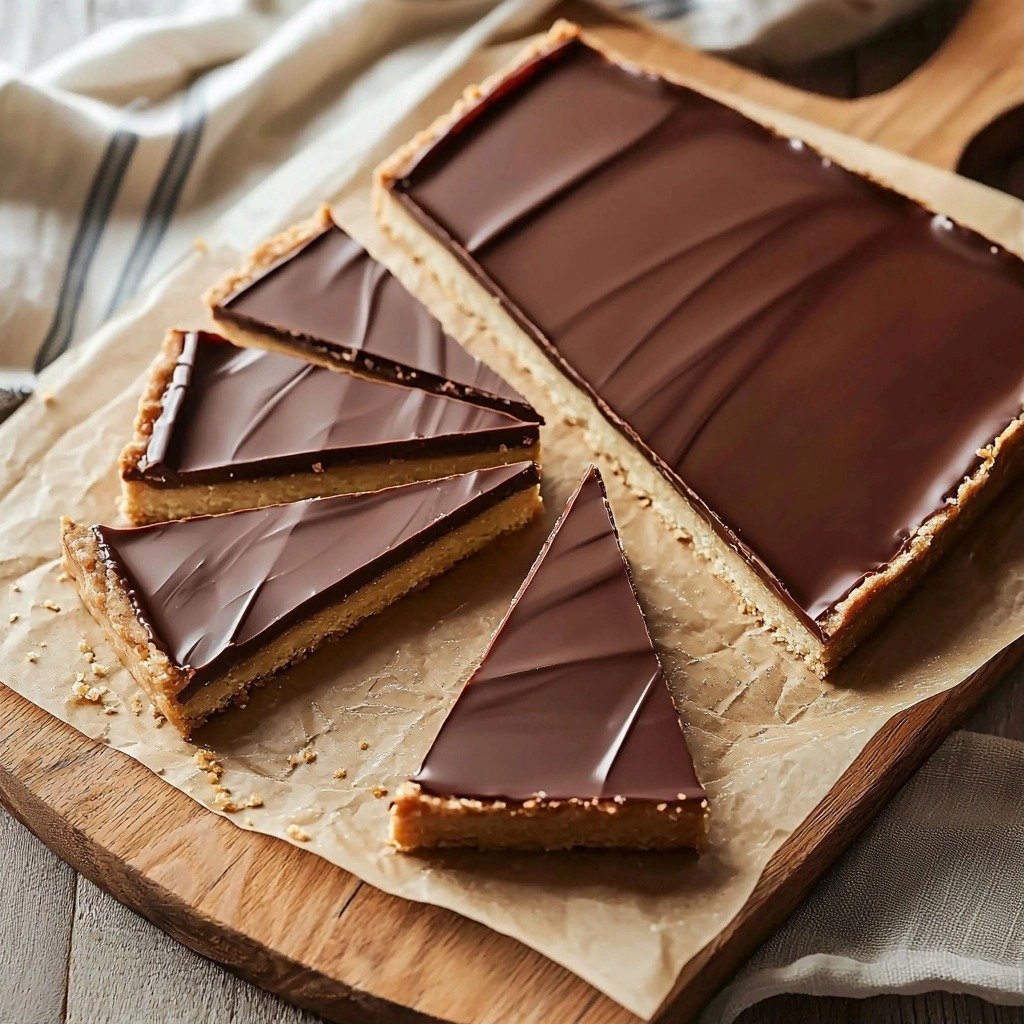
For the chocolate topping, combine your chocolate chips and peanut butter in a heat-safe bowl. Microwave for 30 seconds, stir, then microwave for another 15-30 seconds until it’s smooth and glossy. Pour this over your peanut butter layer and spread it out evenly. Give the pan a gentle shake and tap to make sure it’s perfectly smooth. Pop it into the fridge for 30 minutes to an hour to set, or the freezer for 20-30 minutes if you’re in a hurry!
My Top Tips for Success
- I always make sure to really press the peanut butter mixture into the pan – this ensures your trees hold their shape when sliced.
- Don’t skip the parchment paper overhang! Trust me on this one, it makes lifting the set bars out of the pan a breeze.
- When microwaving the chocolate topping, stir halfway through. This prevents burning and helps it melt smoothly.
- In my experience, chilling for the full hour in the fridge gives the neatest slices, but the freezer is great if you’re short on time.
- For the icing, add milk slowly, a teaspoon at a time, until you get that perfect “glue-like” consistency. It’s much easier to add more liquid than to fix overly thin icing!
- Have your sprinkles ready before you pipe the icing – once the icing is on, it sets pretty quickly.
Common Mistakes to Avoid
- Not pressing the base firmly enough: If the peanut butter base isn’t compacted well, your trees might crumble when you try to slice them. Make sure to really press it down into the pan.
- Overheating the corn syrup and sugar: Boiling for too long can make the mixture too hard, resulting in a tough bar. Stick to just 30 seconds of bubbling.
- Not stirring the chocolate topping enough: This can lead to burnt chocolate or a lumpy topping. Stir well between microwave intervals.
- Adding too much milk to the icing at once: This will make your icing too runny, and it won’t hold its shape when piped. Add milk in small increments.
- Trying to slice before fully set: If the bars aren’t firm, they’ll be gooey and messy to cut. Be patient and let them chill completely.
How to Store Salted Peanut Butter No Bake Christmas Trees
- Room Temperature: Up to 3 days in an airtight container.
- Refrigerator: Up to 1 week in an airtight container.
- Freezer: Up to 1 month in an airtight container. Thaw at room temperature before serving.
Frequently Asked Questions
Are these trees gluten-free?
Yes, they can be! Just make sure to use certified gluten-free pretzels and oats.
Can I use natural peanut butter?
I don’t recommend it for this recipe. Natural peanut butter tends to be too oily and can make the bars greasy and less firm.
What if my chocolate topping is too thick?
If it’s too thick to spread, microwave it for another 5-10 seconds and stir well. A tiny bit of coconut oil can also help thin it out.
How do I get clean slices?
Make sure the bars are fully chilled and set. Use a large, sharp knife and clean it between each slice for the neatest cuts.
Can I use different colored icing?
Absolutely! Feel free to use any gel food coloring you like to match your holiday theme.
I hope these Salted Peanut Butter No Bake Christmas Trees bring a little extra sparkle and a lot of deliciousness to your holiday season! They’re truly a joy to make and even more fun to eat. If you whip up a batch, I’d love to hear how they turn out!
PrintSalted Peanut Butter No Bake Christmas Trees

Festive and fun, these no-bake peanut butter treats combine salty pretzels, crispy cereal, and a smooth chocolate topping, perfect for holiday celebrations.
- Prep Time: 20
- Cook Time: 5
- Total Time: 85
- Yield: 10 trees
- Category: Dessert
- Method: No-Bake
- Cuisine: American
- Diet: Vegetarian
Ingredients
- 1/2 cup (100g) light brown sugar, packed
- 1/2 cup (170g) Karo Light Corn Syrup
- 3/4 cup (190g) creamy peanut butter
- 1/2 cup (60g) crushed pretzels
- 1 cup (100g) quick oats
- 2 cups (55g) crispy rice cereal
- 3/4 cup (130g) semisweet chocolate chips
- 1/2 cup (125g) creamy peanut butter
- 1 cup (120g) powdered sugar
- 1 1/2 tbsp milk
- 1-2 drops green gel food coloring
- Sprinkles of choice
Instructions
- Combine pretzels, oats, and cereal in a large bowl.
- Mix corn syrup and brown sugar in a saucepan over medium heat.
- Stir continuously until the mixture starts to bubble.
- Allow it to bubble for 30 seconds.
- Remove the saucepan from heat.
- Add 3/4 cup creamy peanut butter to the saucepan.
- Stir until the peanut butter is fully melted and smooth.
- Pour the peanut butter mixture into the bowl with the cereal mixture.
- Stir well to coat all dry ingredients evenly.
- Grease and line an 8×8 inch baking dish with parchment paper, leaving an overhang.
- Press the mixture firmly and evenly into the prepared dish.
- Combine chocolate chips and 1/2 cup creamy peanut butter in a heat-safe bowl.
- Microwave for 30 seconds.
- Stir the chocolate mixture.
- Microwave for another 15-30 seconds until smooth.
- Pour the chocolate topping over the peanut butter layer.
- Spread the topping evenly.
- Shake and tap the pan gently to even out the topping.
- Place the pan into the refrigerator for 30 minutes to 1 hour to set.
- Alternatively, freeze for 20 to 30 minutes to speed setting.
- Once set, remove the bars from the pan using the parchment paper overhang.
- Run a knife along any unlined sides if needed to loosen.
- Make a cut right down the middle of the square to create two rectangles.
- Slice each rectangle into 5 triangles to form trees.
- Mix powdered sugar and 1 1/2 tbsp milk in a small bowl to make icing.
- Add green gel food coloring and mix until combined.
- Add 1 tsp of milk at a time if the icing is too thick, until it resembles glue consistency.
- Transfer the icing to a piping bag fitted with a small round tip, or a ziplock bag with a snipped corner.
- Pipe zig-zag lines onto each Christmas tree.
- Top immediately with sprinkles of your choice.
- Enjoy your Salted Peanut Butter No Bake Christmas Trees!
Notes
Ensure you press the peanut butter base very firmly into the pan for best slicing results.
For gluten-free trees, use certified gluten-free pretzels and quick oats.
Clean your knife between each cut for the neatest tree shapes.
Store trees in an airtight container at room temperature for up to 3 days, or in the refrigerator for up to a week.