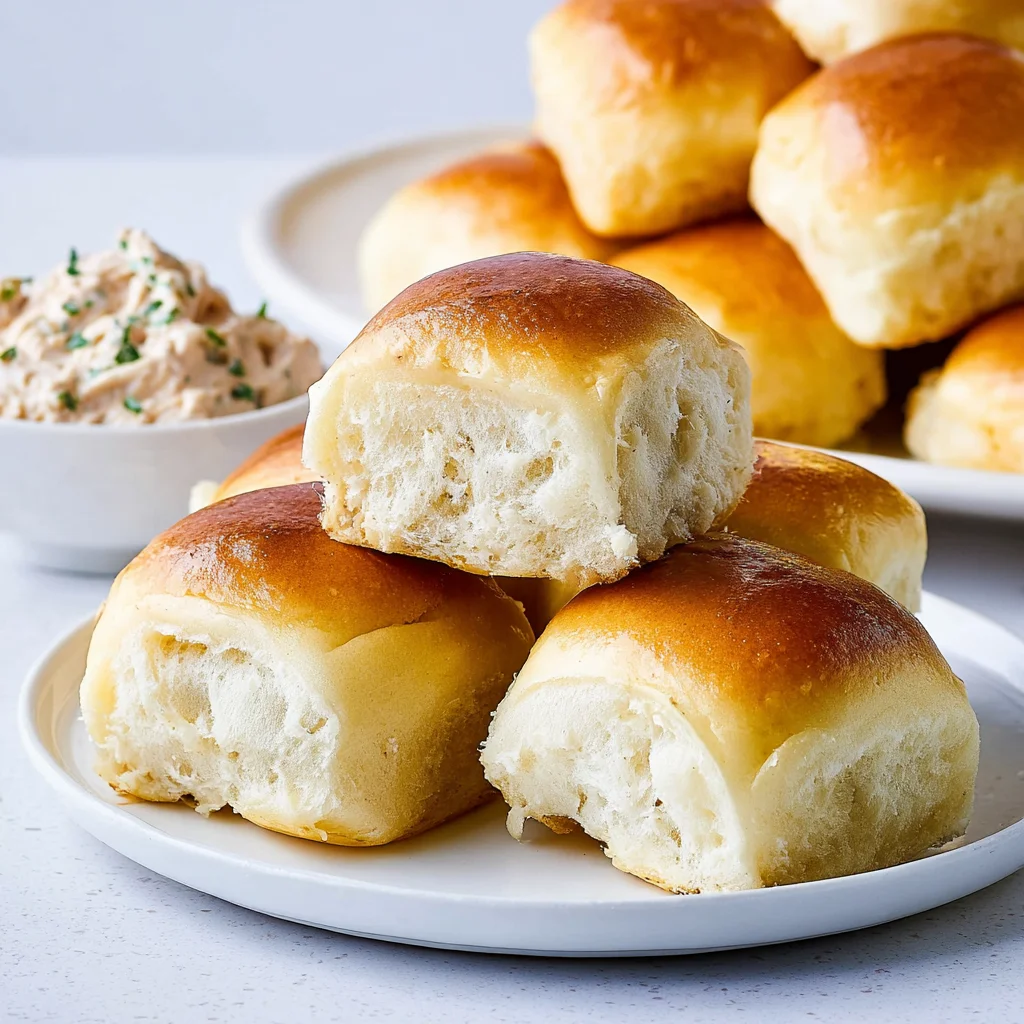
There is something almost magical about the smell of fresh bread wafting through the house. It’s a scent that signals comfort, family, and a meal made with love. Whether it’s a standard Sunday roast or a massive Thanksgiving spread, a basket of Soft Homemade Dinner Rolls is always the first thing to disappear from the table.
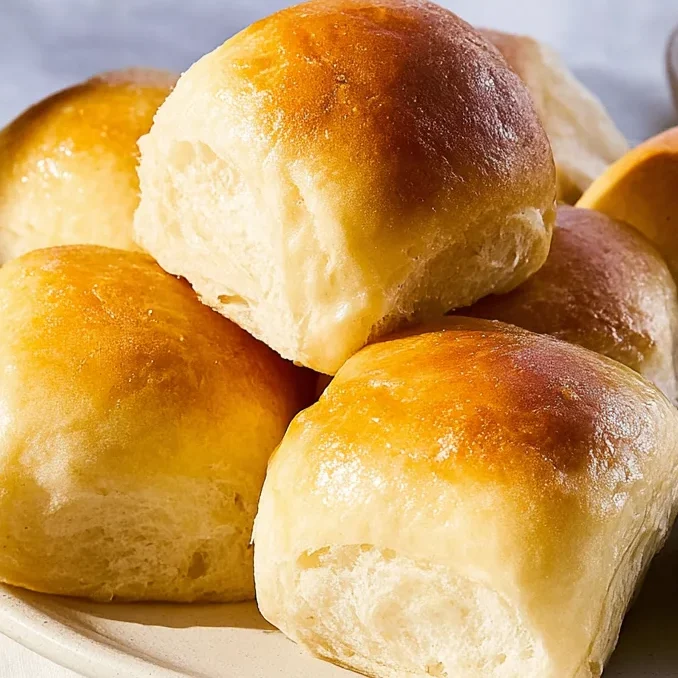
If you’ve ever been intimidated by yeast, this is the recipe that will change your mind. We are skipping the complex artisan techniques and going back to basics: a simple, enriched dough that yields the softest, fluffiest rolls you’ve ever tasted. These are the kind of rolls that pull apart in delicate layers and practically melt in your mouth when brushed with that final touch of melted butter.
Why You’ll Love This Recipe
- Pillowy Soft Texture: Thanks to the addition of milk, butter, and an egg, these rolls have an enriched crumb that stays soft for days.
- Beginner Friendly: This recipe is designed for those who might be nervous about working with yeast. I’ll walk you through every step.
- Make-Ahead Magic: You can prep these ahead of time, making them the ultimate stress-free side dish for the holidays.
- Versatile: Use them for sliders, dinner sides, or even a base for sweet rolls.
Ingredient Notes
To get that classic “bakery style” finish, the quality and temperature of your ingredients matter.
- Active Dry Yeast: This recipe uses one standard packet. Make sure it hasn’t expired! If your yeast doesn’t foam up in the milk, stop there and get fresh yeast—otherwise, your rolls won’t rise.
- Warm Milk: Aim for 105-110°F. If it’s too hot, you’ll kill the yeast. If it’s too cold, the yeast won’t wake up. Think “warm baby bath water.”
- Unsalted Butter: Using unsalted butter allows you to control the salt content. Make sure your butter for the dough is at room temperature so it incorporates smoothly.
- All-Purpose Flour: While you can use bread flour for a chewier roll, all-purpose flour keeps these rolls light and tender.
- Sugar: A little sugar feeds the yeast and helps the rolls brown beautifully in the oven.
Step-by-Step Instructions
1. Proof the Yeast
Start by warming your milk. Add the sugar and sprinkle the yeast over the top. Give it a gentle stir and let it sit for about 5 minutes. You’re looking for a “bloom”—a frothy, foamy layer on top. This tells you the yeast is alive and ready to work.
2. Mix the Dough
In your mixer (or a large bowl), combine the foamy yeast mixture with the softened butter, egg, salt, and the first 2 cups of flour. Beat this until it’s a smooth, thick batter.
3. Add Flour and Knead
Gradually add the remaining flour. You want the dough to form a ball that clears the sides of the bowl. It should be tacky (meaning it sticks slightly if you press a finger into it but doesn’t leave dough on your finger) but not sticky. Knead for 2-3 minutes on medium-high speed.
4. The First Rise
Place the dough in a lightly greased bowl. Cover it with a clean dish towel. This is where patience comes in! Let it sit in a warm, draft-free spot for 45-60 minutes until it has doubled in size.
5. Shape the Rolls
Punch the dough down gently to release air bubbles. Roll it out into a rectangle about 1/2 inch thick. I like to cut mine into 24-30 even squares or rounds. Transfer them to a baking sheet lined with parchment or a silicone mat.
6. The Second Rise & Bake
Cover the shaped rolls and let them rise again for another 45-60 minutes. This second rise is crucial for that “airy” texture. Bake at 350°F for 12-15 minutes until the tops are a beautiful golden brown.
Expert Tips for Best Results
- The Windowpane Test: To see if you’ve kneaded enough, take a small piece of dough and stretch it out. If it stretches thin enough to see light through it without tearing, the gluten is perfectly developed.
- Don’t Over-Flour: It is tempting to keep adding flour when the dough feels tacky, but too much flour leads to heavy, dense rolls. Trust the process!
- Oven Proofing: If your house is cold (especially in winter), turn your oven on for 60 seconds, then turn it OFF. Place your dough inside with the door closed. The residual heat creates a perfect proofing environment.
Variations and Substitutions
- Honey Butter Rolls: Swap the granulated sugar for honey and brush the finished rolls with a mixture of melted butter and honey.
- Garlic Herb Rolls: Add 1 teaspoon of garlic powder to the dough and brush the finished rolls with garlic butter and fresh parsley.
- Whole Wheat: You can swap up to 50% of the all-purpose flour for whole wheat flour, though the rolls will be slightly denser.
Storage and Freezing
To Store: Keep leftover rolls in an airtight bag at room temperature for up to 3 days. To revive that “just baked” feel, pop them in the microwave for 10 seconds.
To Freeze (Baked): Allow rolls to cool completely. Wrap them tightly in foil and place in a freezer bag. They will stay fresh for up to 3 months. Thaw at room temperature and reheat in a 300°F oven for 5-10 minutes.
To Freeze (Unbaked): After shaping the rolls, place the baking sheet in the freezer until the rolls are frozen solid. Transfer to a bag. When ready to bake, let them thaw and rise on a baking sheet for 4-6 hours before baking as directed.
FAQ
Why didn’t my dough rise?
The most common culprit is the yeast. If it’s expired or the milk was too hot, the yeast won’t activate. Also, check your room temperature; cold rooms significantly slow down the rising process.
It’s been an hour and my dough hasn’t doubled—what now?
Don’t panic! Yeast works on its own schedule. If your kitchen is cool, it might take 90 minutes or even 2 hours. Just wait until it has visibly doubled before moving to the next step.
Can I make these by hand?
Absolutely. If you don’t have a stand mixer, you can mix with a wooden spoon and knead the dough by hand on a floured surface for about 8-10 minutes.
The Perfect Finish
Once you pull these rolls out of the oven, don’t forget the most important step: the butter brush. While they are still piping hot, take those 3 tablespoons of melted butter and generously coat the tops. It soaks into the crust, making it incredibly soft and giving the rolls a professional, glossy sheen.
Serve these warm, and watch them disappear! Whether you’re making them for a holiday feast or just a cozy Tuesday night, these soft homemade dinner rolls are guaranteed to be a hit.
PrintHomemade Dinner Rolls

These soft homemade dinner rolls are the definition of comfort food. With a pillowy texture and a rich, buttery finish, they are the perfect accompaniment to any meal.
Ingredients
1 packet active dry yeast
1 1/4 cups warm milk (105–110 degrees F)
1/3 cup granulated sugar
1/4 cup unsalted butter, room temperature
1 large egg, room temperature
1 teaspoon kosher salt
3 1/2 – 4 cups all-purpose flour
3 Tablespoons unsalted butter, melted (for topping)
Instructions
1. In a small bowl, combine warm milk and sugar. Sprinkle yeast over the top and let sit for 5 minutes until foamy.
2. In a large mixing bowl or stand mixer, combine the yeast mixture with the 1/4 cup room temperature butter, egg, salt, and 2 cups of flour. Beat on medium speed until smooth.
3. Gradually add the remaining flour 1/2 cup at a time until a soft ball of dough forms. Increase mixer speed to medium-high and beat for 2-3 minutes. The dough should be tacky to the touch but not stick to your fingers.
4. Place the dough in a lightly greased bowl, cover with a clean towel, and let rise in a warm spot until doubled in size (about 45-60 minutes).
5. Gentle punch the dough down and turn onto a lightly floured surface. Let it rest for a few minutes while you prepare your baking sheets.
6. Roll the dough into a 12×8 inch rectangle, about 1/2 inch thick. Cut into 24-30 even pieces.
7. Place the rolls on prepared baking sheets. Cover and let rise again for 45-60 minutes until nearly doubled.
8. Preheat oven to 350°F. Bake for 12-15 minutes until golden brown. Brush immediately with melted butter.
Notes
Ensure your milk is not hotter than 110°F or it will kill the yeast. If your house is cold, let the dough rise in an oven that is turned OFF with the light on.