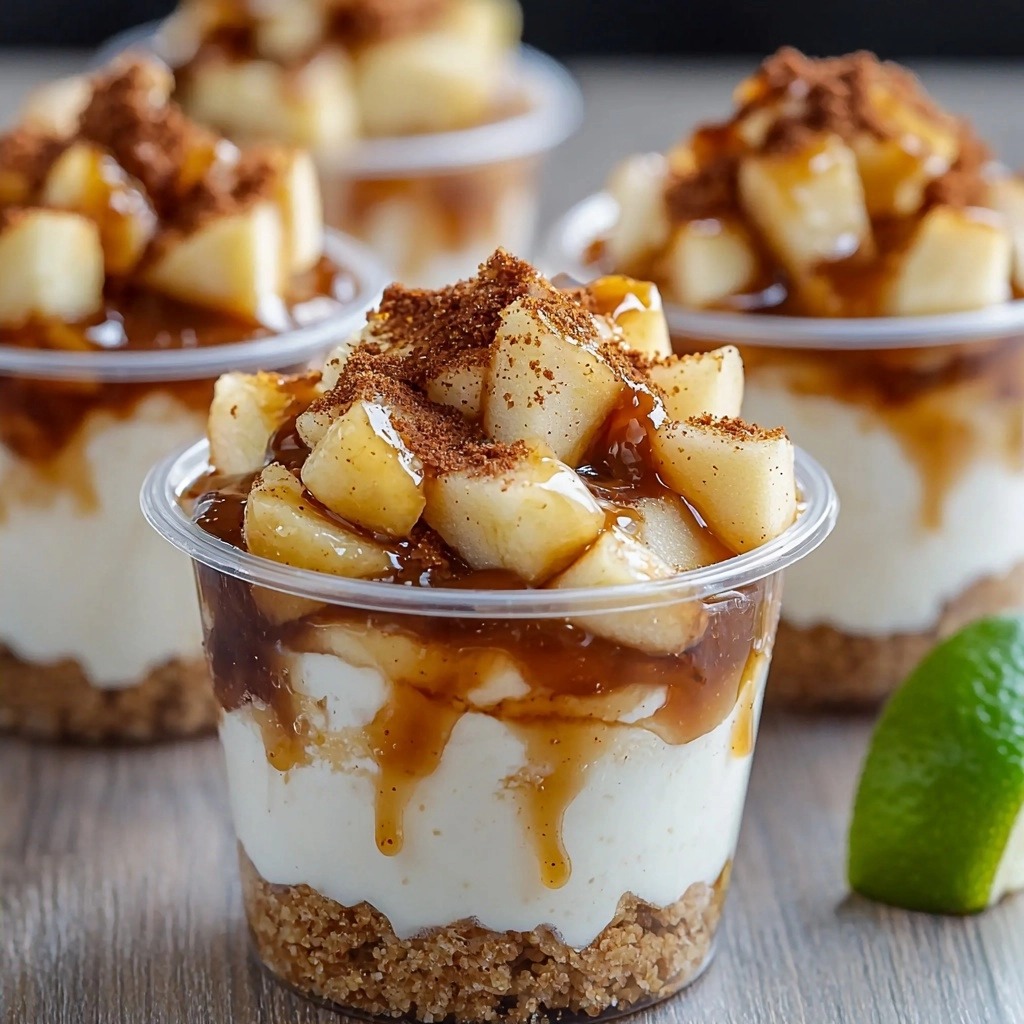
There’s just something about autumn that makes me crave all things apple and caramel. Maybe it’s the cozy feeling of crisp air or the memories of apple picking with my family. Whatever it is, these Caramel Apple Dessert Cups capture that perfect fall flavor in every single bite. They’re individual, easy to make, and seriously delicious, making them my go-to for potlucks, holidays, or just a sweet treat at home.
Why You’ll Love These Caramel Apple Dessert Cups
- They combine the best of apple pie and creamy caramel dessert in one adorable cup!
- Individual portions mean no slicing, no mess, and perfect for sharing (or not!).
- The creamy mousse, tender apples, and crunchy crust create an amazing texture party.
- They’re surprisingly simple to put together, even for beginner bakers.
Ingredients You’ll Need
- Apples: I love using a mix of sweet and tart apples like Honeycrisp or Granny Smith for the best flavor in the cinnamon apple filling. You’ll peel and chop them!
- Vanilla Wafer Crumbs: These form the crunchy base. You can buy them pre-crushed or crush your own vanilla wafers in a food processor.
- Instant Vanilla Pudding Mix: This is our secret weapon for that perfectly creamy, stable caramel mousse. Make sure it’s instant, not cook-and-serve!
- Salted Caramel Sauce: You can absolutely use your favorite store-bought caramel, or if you’re feeling fancy, a homemade version works beautifully. The “salted” part really makes the flavor pop!
- Heavy Cream: This gets whipped into the pudding mixture to create that light, airy, and rich caramel mousse. Don’t substitute with milk or half-and-half here.
How to Make Caramel Apple Dessert Cups Step by Step
First things first, let’s get those delicious cinnamon apples going. Grab a medium saucepan and toss in your peeled and chopped apples, brown sugar, and cinnamon. Give it a good stir to coat everything. Cook this over medium heat, stirring occasionally, until those apples are super soft and the liquid starts to thicken up nicely. This usually takes about 10-15 minutes. Once they’re done, set them aside to cool completely. This is where all that warm, cozy apple flavor develops!
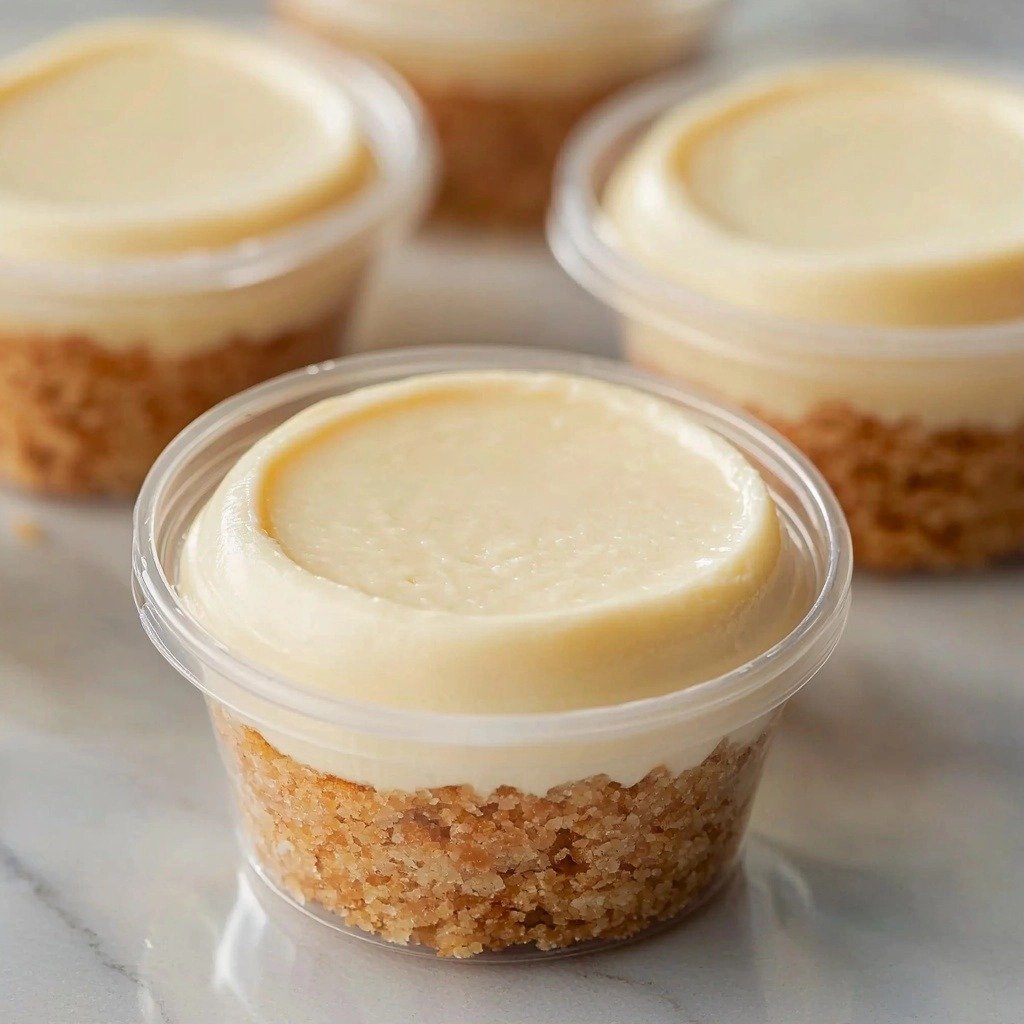
Next, we build our crust! In a mixing bowl, combine your vanilla wafer crumbs with melted butter. Stir them together until every crumb is coated and moist. Now for the fun part: take your 2-ounce plastic cups (I find about 28 of them work well) and portion the crumb mixture into the bottom of each. A small cookie scoop or a tablespoon helps here. Then, use the back of another plastic cup to gently press those crumbs down to create a firm, even crust. Don’t worry if it’s not perfectly flat; it’s going to be delicious either way!
Now, for the creamy caramel mousse! In a large mixing bowl, whisk together your instant vanilla pudding mix and milk. Keep whisking until it’s lump-free, then let it chill for about 5 minutes to set up a bit. This is where the magic happens! Stir in your salted caramel sauce. Then, pour in the heavy cream and use an electric hand mixer to whip everything together on medium speed for about 3-5 minutes. You’ll see it transform into a thick, creamy, and dreamy caramel mousse – it’s so satisfying! Transfer this gorgeous mousse to a large piping bag, then pipe it into each cup right on top of your crust. Finish by spooning a generous helping of those cooled cinnamon apples over the mousse. A little extra drizzle of caramel on top is always a good idea, trust me! Seal them up with lids and chill them until you’re ready to serve. They’re good to go immediately, but a little chill time helps everything meld together.
My Top Tips for Success
- Cool the apples completely: I always make sure the cinnamon apples are totally cool before adding them to the cups. Warm apples can melt the mousse!
- Use instant pudding: Trust me on this one, make sure your pudding mix is “instant” and not the “cook and serve” kind for the right mousse texture.
- Don’t overmix the mousse: Once the heavy cream is added, whip until thick and creamy, but stop there. Overmixing can make it grainy.
- Chill time is your friend: While you can serve them right away, a few hours in the fridge really lets the flavors deepen and the mousse set perfectly.
- Press the crust firmly: A well-pressed crust holds together better and gives a nice contrast to the creamy filling.
Common Mistakes to Avoid
- Using warm apples: This will cause your beautiful caramel mousse to melt and become watery. Make sure they are completely cooled.
- Not chilling the pudding mixture: If you don’t let the pudding set for a few minutes before adding caramel and cream, your mousse might be too runny.
- Overfilling the cups: Leave a little space at the top for the lid and for easy eating without a mess.
- Substituting heavy cream: Lighter creams won’t whip up correctly and you won’t get the desired thick, airy mousse.
How to Store Caramel Apple Dessert Cups
- Refrigerator: Store sealed cups in the refrigerator for 2 to 3 days.
Can I make these ahead of time?
Absolutely! These Caramel Apple Dessert Cups are perfect for making ahead. You can assemble them up to 2-3 days in advance and keep them chilled in the refrigerator.
What kind of apples are best for the filling?
I recommend using a firm apple that holds its shape when cooked, like Honeycrisp, Gala, Fuji, or Granny Smith. A mix of sweet and tart is always a winner!
Can I use a different type of crust?
While vanilla wafers are classic, you could experiment with graham cracker crumbs or even crushed shortbread cookies for a different flavor profile. Just make sure to adjust the butter amount if needed.
Do I have to use individual cups?
You don’t! You could layer this dessert in a larger trifle dish or even small mason jars for a similar effect. Just be mindful of portioning.
What if my caramel mousse isn’t thickening?
Ensure you used instant pudding mix and heavy cream. If it’s still a bit loose after whipping for 3-5 minutes, chill the mixture for 15-20 minutes, then try whipping again.
I hope these Caramel Apple Dessert Cups bring a little bit of autumn joy to your kitchen! They’re truly a delightful treat that’s easy enough for any occasion. If you give them a try, I’d absolutely love to hear how they turned out for you!
PrintCaramel Apple Dessert Cups

These individual dessert cups feature a crunchy vanilla wafer crust, creamy caramel mousse, and tender cinnamon apples, perfect for any fall gathering.
- Prep Time: 30
- Cook Time: 15
- Total Time: 45
- Yield: 28 servings
- Category: Dessert
- Method: No-Bake
- Cuisine: American
Ingredients
- 4 cups (500 g) apples peeled and chopped
- ½ cup (110 g) light brown sugar
- 1 tsp (2 g) cinnamon
- 2 cups (220 g) vanilla wafer crumbs
- ¼ cup (57 g) salted or unsalted butter melted
- 1 pkg (96 g) instant vanilla pudding mix 3.4 ounces
- 1 cup (244 g) milk
- ⅓ cup (75 g) salted caramel sauce homemade or store bought
- 1 ½ cups (357 g) heavy cream
- additional caramel sauce for garnish
Instructions
- Combine peeled and chopped apples, brown sugar, and cinnamon in a medium saucepan.
- Stir the apple mixture.
- Cook the apple mixture over medium heat until the apples are soft and the liquid thickens.
- Set the cinnamon apples aside to cool completely.
- Combine vanilla wafer crumbs and melted butter in a mixing bowl.
- Stir the crumb mixture until fully incorporated.
- Portion the vanilla wafer crumbs into 28 – 2 ounce plastic cups.
- Use the back of one of the plastic cups to press the crumbs down to create the crust.
- Combine instant vanilla pudding mix and milk in a large mixing bowl.
- Whisk the pudding mixture to combine.
- Chill the pudding mixture for 5 minutes.
- Add salted caramel sauce to the vanilla pudding mixture.
- Use an electric hand mixer on medium speed to mix the caramel into the pudding until smooth.
- Pour the heavy cream into the pudding mixture.
- Whip the mixture with an electric hand mixer for 3-5 minutes until it becomes thick and creamy.
- Transfer the caramel mousse mixture to a large piping bag.
- Pipe the mousse into the plastic cups on top of the vanilla wafer crust.
- Using a spoon, portion the cooled cinnamon apples over the caramel mousse.
- Drizzle with additional caramel sauce if desired.
- Seal the cups with a lid.
- Chill the cups before serving.
- Serve immediately or store in the refrigerator for 2 to 3 days.
Notes
Ensure apples are completely cool before adding to the mousse to prevent melting.
Use instant pudding mix, not cook-and-serve, for the best mousse texture.
Do not overmix the mousse once the heavy cream is added.
Press the vanilla wafer crust firmly into the cups for a stable base.