Every year, as the leaves start to turn and there’s a crispness in the air, I get a little nostalgic for simpler times. There’s just something about fall that makes me want to bake and create. This year, I rediscovered these adorable Chocolate Acorns, and they instantly transported me back to childhood. They’re such a charming little treat, and honestly, they’re just pure joy to make and share!
Why You’ll Love This Chocolate Acorns
- They’re unbelievably cute and perfect for fall gatherings or holiday platters.
- Super easy to make – seriously, no baking required!
- The combination of chocolate and vanilla wafer is a total crowd-pleaser.
- They come together so quickly, making them ideal for last-minute treats.
Ingredients You’ll Need
- Chocolate candy melts: These are great because they melt smoothly and set up nicely without needing tempering. You can find them in various colors, but brown works best here!
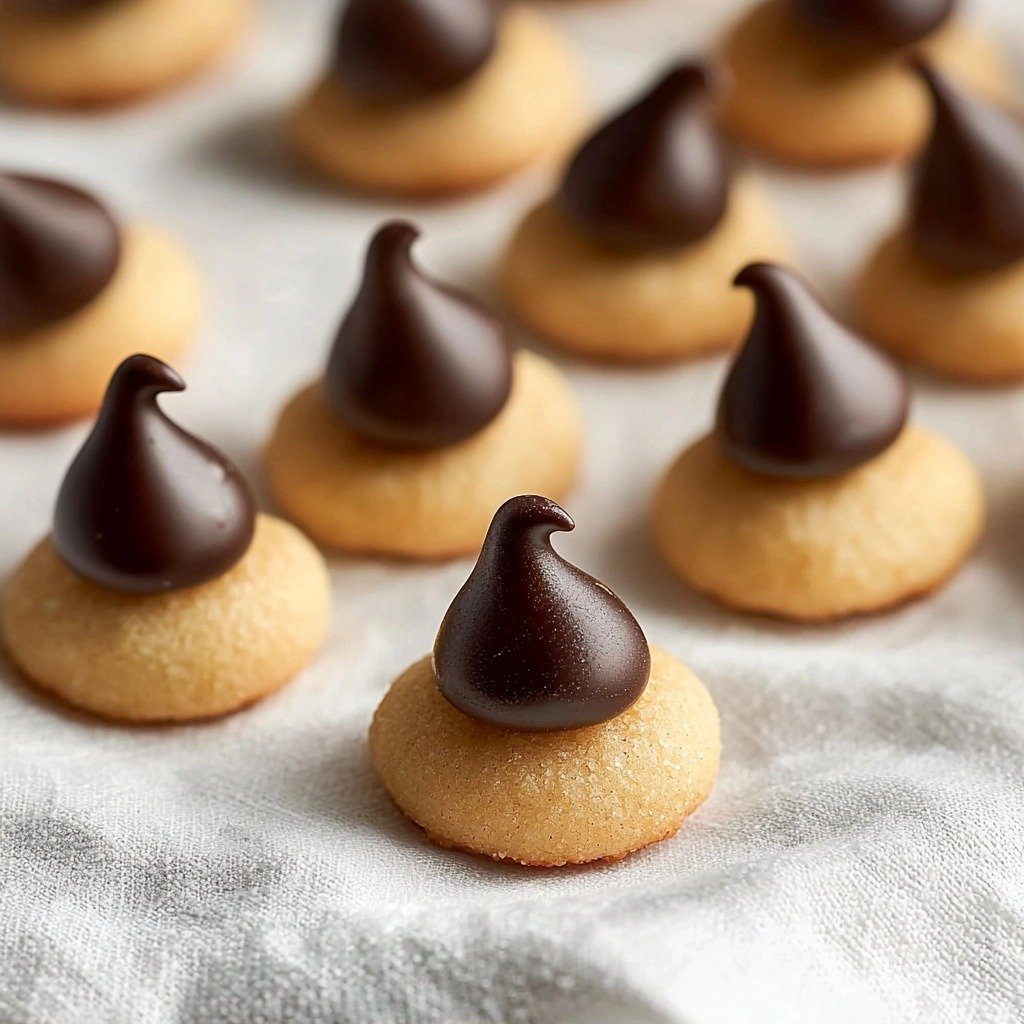
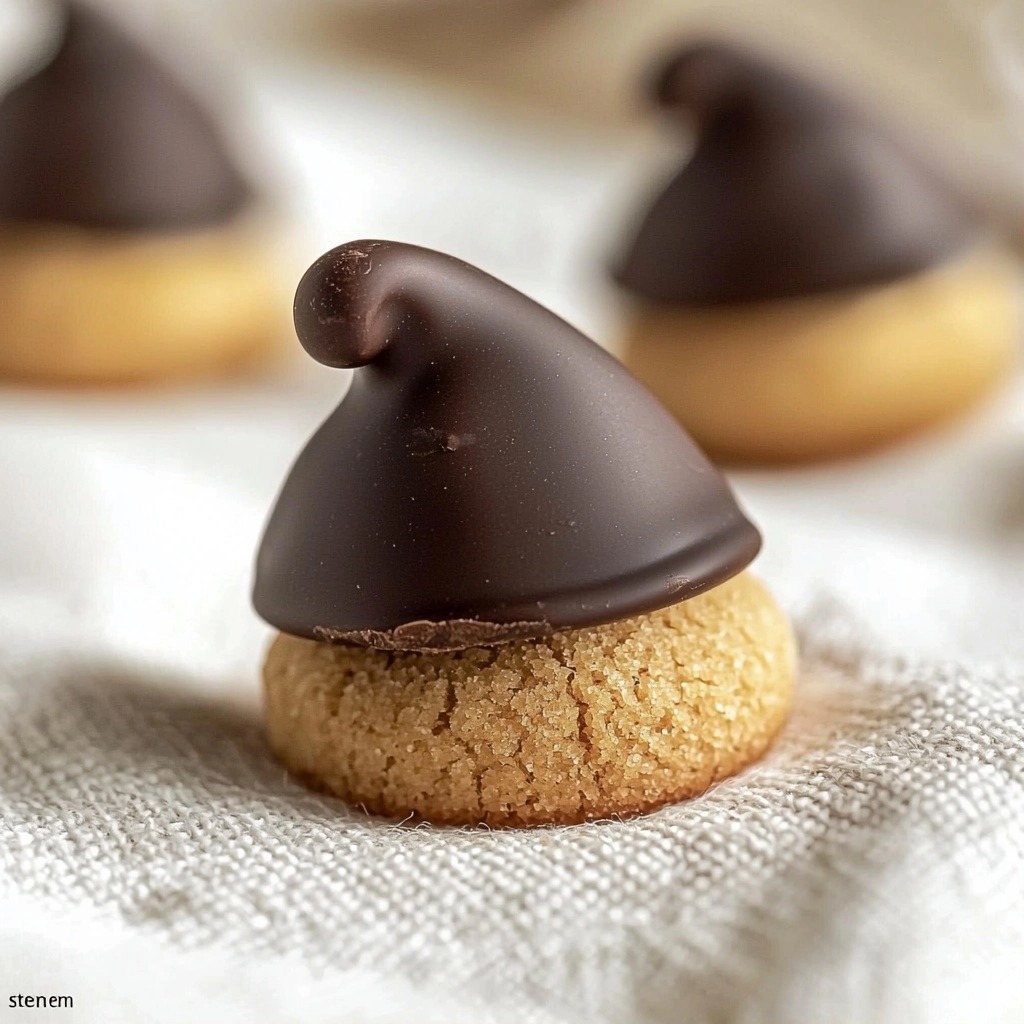
- Milk chocolate Hershey’s Kisses: Their iconic shape is what gives our acorns their body. Make sure they’re unwrapped and ready to go.
- Mini Nilla wafer cookies: These form the base of our acorn cap. Their subtle vanilla flavor pairs perfectly with the chocolate.
- Mini chocolate chips: These are the perfect little “stems” for our acorns. They add that extra touch of cuteness.
How to Make Chocolate Acorns Step by Step
First things first, let’s get organized! Grab a baking sheet and line it with parchment paper. This will make cleanup a breeze and ensure your Chocolate Acorns don’t stick. Set that aside for now.
Next, it’s time to melt your chocolate candy melts. Follow the package directions carefully – usually, this means microwaving in short bursts and stirring until it’s lovely and smooth. This is where the magic happens! Once your chocolate is melted, very gently dip the flat end of an unwrapped Hershey’s Kiss into it. You just want a thin layer of chocolate, like a little glue.
Immediately press that chocolatey Kiss onto the flat side of a mini Nilla wafer cookie. Give it a gentle squeeze to make sure it’s attached. Place your newly formed acorn base onto your prepared baking sheet, with the cookie side down. Repeat this process with all your remaining Kisses and wafers. Don’t worry if they’re not perfectly uniform – handmade treats have character!
My Top Tips for Success
- I always make sure my Hershey’s Kisses are completely unwrapped before I start melting the chocolate. It saves so much time!
- In my experience, using a shallow, wide bowl for melting the candy melts makes dipping much easier.
- Trust me on this one: don’t over-melt your candy melts. Follow the package directions closely to avoid seizing.
- If your melted chocolate starts to thicken, you can gently reheat it for a few seconds to get it smooth again.
- When attaching the mini chocolate chip stem, use just a tiny dab of chocolate. Less is more here!
Common Mistakes to Avoid
- Over-melting the candy melts: This can make the chocolate seize up and become unusable. To fix it, melt in short intervals and stir frequently.
- Dipping the Hershey’s Kiss too deep: You only want a thin layer of chocolate for adhesion. Too much chocolate can make it messy and hard to attach evenly. Just a quick dip is all you need.
- Not unwrapping Kisses beforehand: This slows down the assembly line once your chocolate is melted. Prep all your ingredients before you start.
- Using too much chocolate for the stem: A large blob of chocolate under the mini chip will look messy. A tiny “smidge” is perfect.
How to Store Chocolate Acorns
- Room temperature: Store in an airtight container for up to 1 week. Keep them away from direct sunlight or heat sources.
- Refrigerator: Store in an airtight container for up to 2 weeks. Let them come to room temperature for a few minutes before serving for best flavor and texture.
Frequently Asked Questions
Can I use regular chocolate chips instead of candy melts?
You can, but candy melts are designed to melt smoothly and set firmly without needing to temper the chocolate. If you use regular chocolate chips, you might need to add a bit of shortening or coconut oil to help them melt and set properly.
What if I can’t find mini Nilla wafers?
You can use other small, flat cookies like mini shortbread cookies or even cut larger Nilla wafers into smaller circles. The key is a flat surface for the Kiss to attach to.
Can I make these ahead of time for a party?
Absolutely! These Chocolate Acorns are perfect for making a day or two in advance. Store them in an airtight container at room temperature until you’re ready to serve.
My chocolate is too thick to pipe. What should I do?
If your chocolate has cooled and thickened, you can gently reheat the Ziploc bag in a bowl of warm water or microwave it for a few seconds. This should loosen it up enough to pipe.
How do I make sure the chocolate chips stay on as stems?
Make sure you use a very small amount of melted chocolate as “glue” and press the mini chocolate chip firmly onto the wafer. Letting them set completely (especially in the fridge) will help secure them.
I hope these Chocolate Acorns bring a little bit of autumn magic and a whole lot of deliciousness to your day. They’re such a simple, sweet way to celebrate the season. If you give them a try, I’d absolutely love to hear how they turned out for you!
PrintChocolate Acorns

Adorable no-bake Chocolate Acorns made with Hershey’s Kisses, Nilla wafers, and candy melts – a perfect charming treat for fall!
- Prep Time: 20
- Cook Time: 5
- Total Time: 25
- Yield: 50 acorns
- Category: Dessert
- Method: No-Bake
- Cuisine: American
- Diet: Vegetarian
Ingredients
- 12 ounce bag chocolate candy melts
- 50 milk chocolate Hershey's Kisses unwrapped
- 50 mini Nilla wafer cookies
- 50 mini chocolate chips
Instructions
- Line a baking sheet with parchment paper.
- Melt the candy melts according to package directions until smooth.
- Vewry gently dip the flat end of one Hershey's Kiss into the melted chocolate.
- Immediately place the chocolate-dipped Kiss on top of the flat side of a mini Nilla wafer cookie.
- Press gently to attach the Kiss to the wafer.
- Place the assembled acorn onto the prepared baking sheet, with the cookie side down.
- Repeat with the remaining cookies and Kisses.
- Transfer any remaining melted chocolate to a small Ziploc bag.
- Snip off a very tiny corner from the Ziploc bag.
- Pipe a small amount of melted chocolate onto a mini chocolate chip.
- Attach the chocolate-dipped mini chocolate chip to the top of the wafer cookie to create the stem.
- Let the Chocolate Acorns set at room temperature until firm.
- Alternatively, place the baking sheet with all the acorns in the fridge for about 5 minutes to set completely.
Notes
Ensure all Hershey’s Kisses are unwrapped before you begin.
Use a shallow, wide bowl for easier dipping of the Kisses.
Do not overheat the candy melts; follow package directions for best results.
If chocolate thickens, gently reheat to restore consistency.