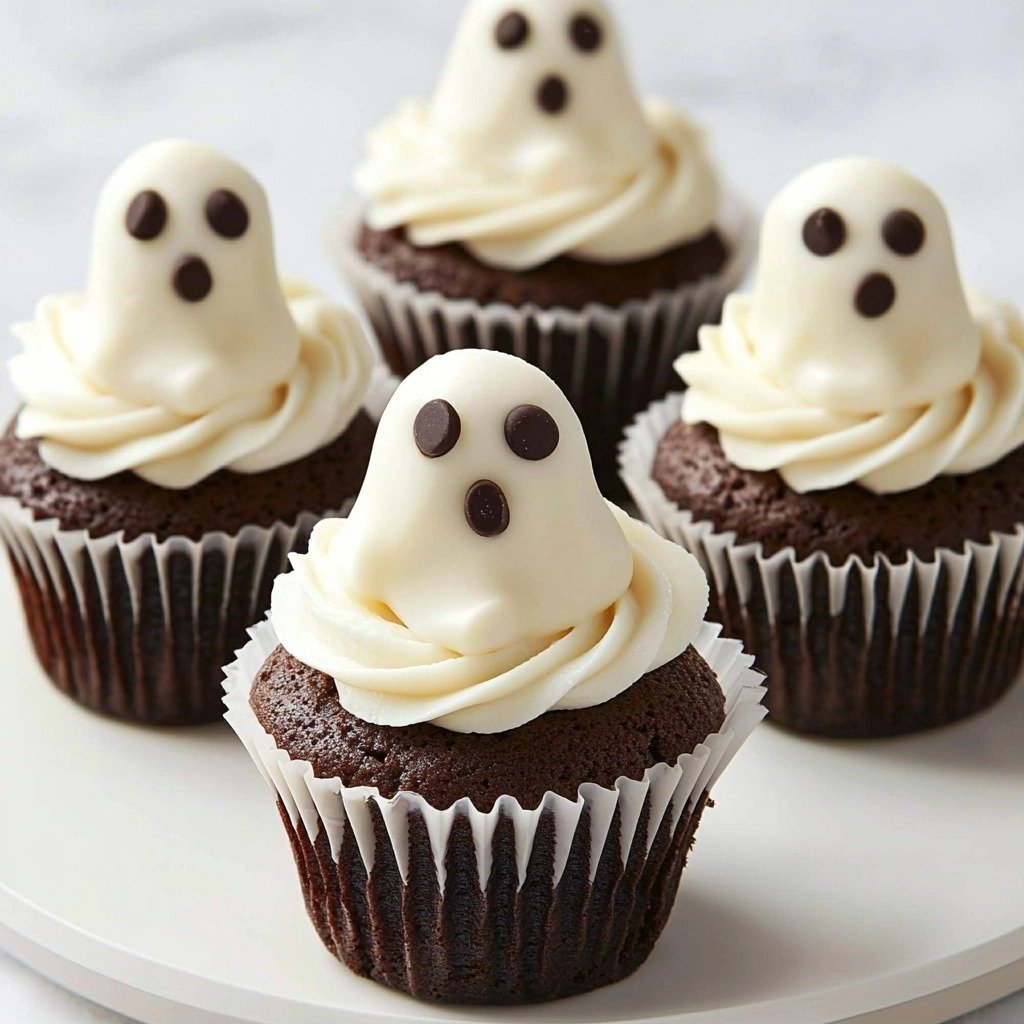
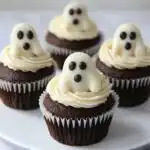
Every Halloween, my kitchen transforms into a little spooky bakery, and honestly, I wouldn’t have it any other way! There’s just something so fun about making treats that are both delicious and a little bit whimsical. This year, I’m so excited to share my absolute favorite recipe for Ghost Cupcakes! They’re fluffy, sweet, and just the cutest little spooks you ever did see.
Why You’ll Love This Ghost Cupcakes!
- They’re super fun to make for Halloween parties or just a festive treat.
- The chocolate cupcakes are incredibly moist, and the meringue is light and sweet.
- You can get really creative with the ghost faces – each one has its own personality!
- It’s a fantastic project for bakers of all skill levels, even beginners.
Ingredients You’ll Need
- Unsalted Butter: Using unsalted butter gives you control over the salt content in your cupcakes. If you only have salted, you can use it, but omit any other added salt in the recipe.
- Light Brown Sugar: This gives the cupcakes a lovely, moist texture and a hint of caramel flavor. Granulated sugar would work in a pinch, but the brown sugar really adds something special.
- Self-Raising Flour: This flour already has leavening agents mixed in, making your cupcakes rise beautifully. If you don’t have it, you can make your own by adding 1.5 teaspoons of baking powder and 1/4 teaspoon of salt to 125g of all-purpose flour.
- Cocoa Powder: Unsweetened cocoa powder is key for that rich chocolate flavor. Use a good quality one for the best results.
- Granulated Sugar (for meringue): This is crucial for the structure and sweetness of your Italian meringue. Don’t try to substitute with brown sugar here.
- Egg Whites: These are the base of your meringue. Make sure there’s absolutely no yolk in them, as even a tiny bit of fat can prevent them from whipping up properly.
- Melted Dark Chocolate: This is for drawing the ghost faces. You can use chocolate chips or a dark chocolate bar. Fondant is also a great alternative if you prefer.
How to Make Ghost Cupcakes! Step by Step
First things first, let’s get those delicious chocolate cupcakes going! Preheat your oven to 180°C (or 160°C fan) and line your cupcake tin with 12 cases. Grab your butter and light brown sugar and beat them together until they’re super light and fluffy – this creates a wonderful base for your cupcakes. Then, add in your eggs, self-raising flour, and cocoa powder. Mix everything until it’s just combined; you don’t want to overmix!
Spoon this yummy batter evenly into your prepared cupcake cases. Pop them into the oven for about 15-20 minutes. You’ll know they’re ready when a skewer inserted into the center comes out clean and they feel springy to the touch. Once baked, let them cool completely on a wire rack. This is super important before you add the meringue!
Now for the fun part: the Italian meringue! In a heavy-based saucepan, combine your granulated sugar and water and bring it to a boil, stirring occasionally. Keep an eye on that sugar thermometer – we’re looking for 120°C (that’s the firm ball stage!). While that’s heating up, whisk your egg whites in an electric stand mixer until they form stiff peaks. This is where the magic happens!
Once your sugar syrup hits 120°C and your egg whites are stiff, slowly, and I mean slowly, pour the hot sugar syrup into the egg whites while the mixer is still running. Keep that mixer going on high speed for another 5-7 minutes. You want the meringue to be smooth, glossy, and cooled down. Now, for the decorating! Fit a large piping bag with a round nozzle. Practice a few ghosts on parchment paper first if you like. Pipe the meringue onto your cooled cupcakes to create those adorable ghost shapes. Then, use a tiny amount of melted dark chocolate to draw on little eyes and a mouth. So cute!

My Top Tips for Success
- I always make sure my eggs and butter are at room temperature for the cupcakes; it helps everything combine smoothly.
- Trust me on this one: don’t overmix the cupcake batter! Mix until just combined to keep them light and tender.
- For the meringue, a sugar thermometer is your best friend. It ensures your sugar syrup reaches the perfect temperature for stable meringue.
- In my experience, when pouring the hot sugar syrup into the egg whites, aim for the side of the bowl, not directly onto the whisk, to avoid splatters.
- Let the cupcakes cool completely before adding the meringue. Warm cupcakes will melt your beautiful ghost shapes!
- Practice piping a few ghost shapes on a plate before tackling the cupcakes. You’ll get the hang of it quickly!
Common Mistakes to Avoid
- Overmixing the cupcake batter: This can lead to tough, dense cupcakes. Mix only until the ingredients are just combined.
- Not cooling cupcakes completely: If your cupcakes are warm, the meringue will melt and slide off. Patience is key here!
- Not reaching the correct sugar syrup temperature: If the syrup isn’t hot enough, your meringue won’t set properly and will be too runny. Use a thermometer!
- Getting yolk in egg whites: Even a tiny bit of fat from the yolk can prevent egg whites from whipping up into stiff peaks. Separate eggs carefully.
- Pouring sugar syrup too quickly: This can cook the egg whites or make the meringue lumpy. Pour in a slow, steady stream.
How to Store Ghost Cupcakes!
- Room Temperature: Store in an airtight container for up to 2 days. The meringue will be best fresh.
- Refrigerated: Not recommended for extended periods due to meringue texture, but if necessary, an airtight container for up to 3 days. Meringue may become slightly sticky.
- Freezer: Cupcakes (without meringue) can be frozen for up to 3 months. Thaw, then prepare meringue fresh.
Frequently Asked Questions
Can I make the cupcakes ahead of time?
Yes, you can! Bake the chocolate cupcakes a day in advance and store them in an airtight container at room temperature. Then, make the meringue and decorate them the day you plan to serve them.
What if I don’t have a piping bag for the meringue?
No problem! You can use a sturdy zip-top bag and snip off one corner to create a makeshift piping bag. It might not be as precise, but it will still work for ghost shapes.
Can I use store-bought frosting instead of Italian meringue?
While the Italian meringue gives these Ghost Cupcakes! their signature light texture and holds its shape perfectly, you could use a thick, stiff buttercream frosting if you prefer. Just know the texture will be different.
My meringue isn’t getting stiff, what’s wrong?
This usually happens if there’s any fat (like a tiny bit of egg yolk) in your egg whites, or if your sugar syrup wasn’t hot enough. Make sure your bowl and whisk are super clean and dry, and always use a sugar thermometer.
How can I make different ghost expressions?
Get creative with the melted chocolate! A simple dot for eyes and a curved line for a mouth works, but you can also make squiggly mouths, bigger eyes, or even little “boo”s.
I hope these adorable Ghost Cupcakes! bring a touch of spooky fun to your kitchen this season. They’re such a joy to make and even more fun to eat! If you whip up a batch, I’d absolutely love to see your creations and hear how they turned out!
PrintGhost Cupcakes!
Spooky and sweet, these delightful chocolate cupcakes are topped with a light and airy Italian meringue shaped into adorable ghosts, perfect for Halloween.
- Prep Time: 40
- Cook Time: 20
- Total Time: 120
- Yield: 12 cupcakes
- Category: Dessert
- Method: Baking, Piping
- Cuisine: American
- Diet: Vegetarian
Ingredients
- 150 g unsalted butter
- 150 g light brown sugar
- 125 g self raising flour
- 25 g cocoa powder
- 3 medium eggs
- 185 g granulated sugar
- 85 ml water
- 100 g egg whites
- Melted dark chocolate
Instructions
- Preheat your oven to 180ºC (160ºC fan).
- Line a cupcake or muffin tin with 12 large cupcake/muffin cases.
- Beat the unsalted butter with the light brown sugar in a bowl until the mixture is light and fluffy.
- Add the 3 medium eggs to the butter and sugar mixture.
- Add the self-raising flour and cocoa powder to the bowl.
- Mix all ingredients until they are just well combined.
- Spoon the cupcake batter evenly into the 12 prepared cupcake cases.
- Bake in the preheated oven for 15-20 minutes.
- Check for doneness by inserting a skewer into a cupcake; it should come out clean, and the cakes should be springy to touch.
- Remove the cupcakes from the oven.
- Leave the baked cupcakes to cool fully on a wire rack.
- Pour the granulated sugar and water into a heavy-based saucepan.
- Bring the sugar and water mixture to a boil, stirring occasionally with a wooden spoon.
- Monitor the temperature of the mixture with a sugar thermometer until it reaches 120ºC (firm ball stage).
- While the sugar mixture is heating, if any sugar splashes up the side of the pan, brush the sides with a pastry brush dipped in cold water to prevent crystallization.
- Whilst the sugar mixture is heating and boiling, begin to whisk the egg whites in your electric stand mixer until they form stiff peaks.
- Once the sugar syrup has reached 120ºC and the egg whites are at stiff peaks, slowly pour the hot sugar syrup into the egg whites at the edge of the bowl while the mixer is still whisking.
- Continue to whisk throughout the pouring process to ensure a constant trickle of sugar syrup and smooth egg whites.
- After all the sugar syrup has been added, continue to whisk the mixture fast and on a high speed for 5-7 minutes.
- Whisk until the Italian meringue mixture is smooth and has cooled down.
- Fit a large disposable piping bag with a large round nozzle.
- Pipe the cooled meringue onto the fully cooled cupcakes in little ghost shapes.
- To pipe a ghost, point the nozzle downwards to create a bottom, then lift slightly.
- Repeat with a slightly smaller blob and lift to create a thin top for the ghost shape.
- Pipe the tiniest amount of melted dark chocolate onto each meringue ghost to create eyes and a mouth.
- Serve and enjoy your Ghost Cupcakes!
Notes
Ensure all cupcake ingredients are at room temperature for a smooth batter.
Do not overmix the cupcake batter; stop as soon as it’s combined.
Use a sugar thermometer for precise meringue results; 120°C is crucial.
Let cupcakes cool completely before piping meringue to prevent melting.