Every October, my house turns into a whirlwind of spooky fun and delicious treats. There’s just something magical about this time of year, isn’t there? We love cuddling up with a good Halloween movie, and for me, that almost always means Hocus Pocus! And what better to munch on during a movie night than a themed snack? This Hocus Pocus Popcorn is so easy to make and absolutely perfect for getting into the spirit of the season.
Why You’ll Love This Hocus Pocus Popcorn
- It’s super quick to whip up, perfect for last-minute treats.
- The vibrant colors are so festive and fun for Halloween parties!
- It’s a fantastic no-bake recipe, so no oven required.
- The combination of salty popcorn and sweet candy melts is simply irresistible.
Ingredients You’ll Need
- Popped Popcorn: You can use any kind you like – microwave, air-popped, or stovetop. Just make sure it’s plain so the candy melt flavors shine!
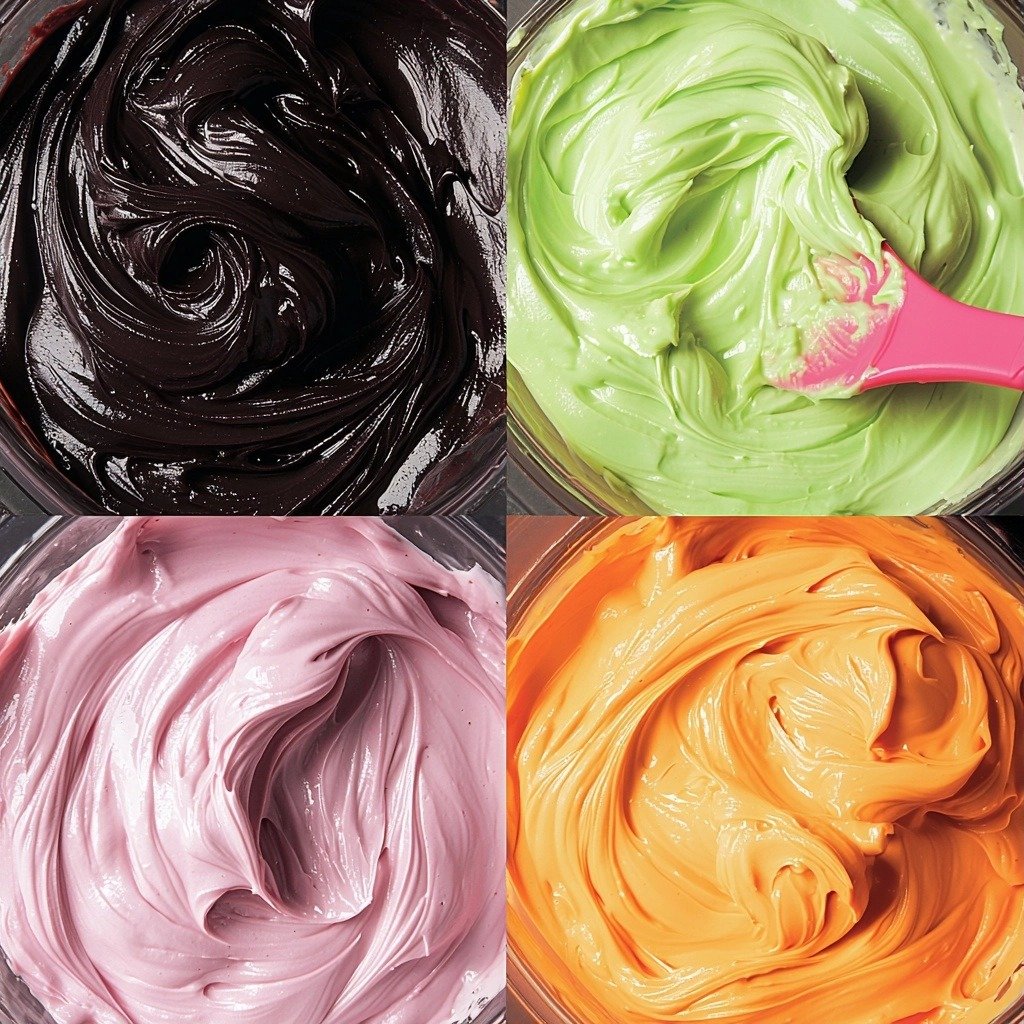
- Candy Melts: We’re using light green, lavender, orange, and black. These are specifically designed for melting and coating, giving you that smooth, vibrant finish. “Sweet Tooth Fairy” is a great brand, but any candy melt brand will work.
- Black Sprinkles: These add a fun, spooky touch and some extra texture.
- Candy Eyeball Sprinkles: These are my favorite! They really bring the “Hocus Pocus” vibe to life and make each piece of popcorn look like it’s watching you!
How to Make Hocus Pocus Popcorn Step by Step
First things first, get your popcorn ready! Pop your bag of popcorn according to the package directions. Once it’s all popped, spread it out evenly on a baking sheet that you’ve lined with parchment paper. This parchment paper is key for easy cleanup and making sure nothing sticks.
Next, it’s time for the candy melts. You’ll want to melt each color separately. Follow the specific instructions on your candy melt package – usually, it involves microwaving in short bursts and stirring until smooth. Don’t worry if it seems a little thick; just keep stirring gently until it’s pourable.
Now, for the fun part where the magic happens! Once your candy melts are smooth and ready, drizzle each color over the popcorn. You can go back and forth with the different colors to create a really cool, marbled effect. Immediately after drizzling, sprinkle generously with your candy eyeballs and black sprinkles. Do this quickly before the candy melts set!
Finally, let your festive popcorn sit and dry. You’ll want to wait until the candy melts have completely hardened. This usually takes about 15-30 minutes, depending on your room temperature. Once firm, gently break the popcorn apart into individual pieces and place it in a big bowl for serving. Enjoy your spooky creation!
My Top Tips for Success
- I always use parchment paper on my baking sheet. Trust me, it makes cleanup a breeze!
- In my experience, melting candy melts in short bursts (30 seconds at a time) and stirring well prevents them from seizing or burning.
- Make sure your popcorn is completely cooled before adding the candy melts. Warm popcorn can make the melts too runny.
- Don’t be shy with the sprinkles! Add them right after drizzling each color so they stick perfectly.
- If your candy melts get a little too thick while working, you can microwave them again for a few seconds to loosen them up.
Common Mistakes to Avoid
- Overheating Candy Melts: This can cause them to seize and become clumpy. How to fix: Melt in short intervals, stirring thoroughly after each. If they seize, you can try adding a tiny bit of vegetable shortening (1/4 teaspoon at a time) and stirring vigorously.
- Not Spreading Popcorn Evenly: If the popcorn is piled up, some pieces won’t get coated. How to fix: Ensure a single layer of popcorn on the parchment-lined baking sheet for even coverage.
- Waiting Too Long to Add Sprinkles: The candy melts will harden quickly, and sprinkles won’t stick. How to fix: Sprinkle immediately after drizzling each color of candy melt.
- Using Wet Popcorn: Any moisture can cause the candy melts to seize. How to fix: Ensure your popcorn is completely dry and cooled before starting.
How to Store Hocus Pocus Popcorn
- Airtight Container at Room Temperature: Up to 3-5 days. Ensure it’s completely cooled and hardened before storing.
- Ziploc Bag at Room Temperature: Up to 3-5 days. Press out as much air as possible to keep it fresh.
Frequently Asked Questions
Can I use chocolate chips instead of candy melts?
You can, but chocolate chips don’t melt as smoothly for coating and may not give you the vibrant colors. Candy melts are formulated to melt and set quickly with a glossy finish.
Can I make this Hocus Pocus Popcorn ahead of time?
Absolutely! You can make it 2-3 days in advance. Just store it in an airtight container at room temperature to keep it fresh.
My candy melts are too thick, what should I do?
If your candy melts are too thick, you can add a small amount of vegetable shortening (about 1/4 teaspoon per 1/2 cup of melts) and stir until smooth. This will thin them out without affecting the taste.
Do I need to refrigerate the popcorn to make the candy melts harden faster?
While you can, it’s generally not recommended. Refrigerating can sometimes cause condensation, making the popcorn soggy. It’s best to let it harden at room temperature.
I hope this Hocus Pocus Popcorn brings a little extra magic and fun to your Halloween celebrations! It’s such a simple way to make movie night or a party feel extra special. If you give this recipe a try, please let me know how it turns out – I’d absolutely love to hear about it!
PrintHocus Pocus Popcorn

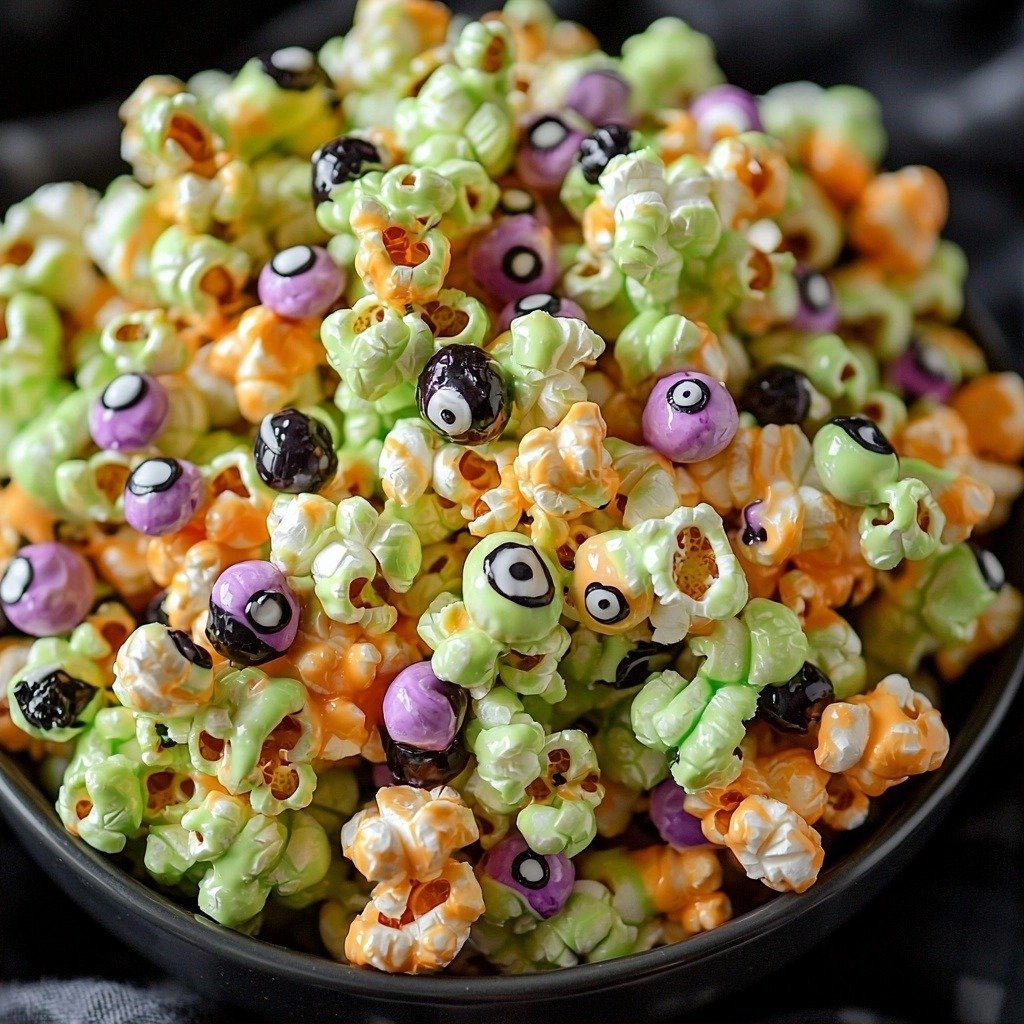
A fun and festive Halloween treat featuring colorful candy-coated popcorn, candy eyeballs, and sprinkles.
- Prep Time: 15
- Cook Time: 5
- Total Time: 20
- Yield: 8 servings
- Category: Snack
- Method: No-Bake
- Cuisine: American
- Diet: Vegetarian
Ingredients
- 1 bag of popcorn; popped
- 1/2 cup light green candy melts sweet tooth fairy
- 1/2 cup lavender candy melts sweet tooth fairy
- 1/2 orange candy melts sweet tooth fairy
- 1/2 black candy melts sweet tooth fairy
- black sprinkles
- candy eyeball sprinkles
Instructions
- Pop the popcorn as directed on the package.
- Place the popped popcorn on a baking sheet lined with parchment paper, spreading it into a single layer.
- Melt the orange candy melts as directed on the package, typically in a microwave-safe bowl in 30-second intervals, stirring until smooth.
- Melt the lavender candy melts as directed on the package.
- Melt the light green candy melts as directed on the package.
- Melt the black candy melts as directed on the package.
- Drizzle each color of melted candy over the popcorn, alternating colors as desired.
- Immediately sprinkle the popcorn generously with candy eyeball sprinkles.
- Immediately sprinkle the popcorn generously with black sprinkles.
- Let the popcorn sit undisturbed until all the candy melts have completely hardened.
- Once hardened, gently break apart the popcorn into individual pieces.
- Place the Hocus Pocus Popcorn in a bowl to serve.
Notes
Ensure popcorn is fully cooled before coating.
Melt candy melts in short bursts to prevent burning.
Add sprinkles immediately after drizzling each color.
Store in an airtight container for best freshness.